Guide to Install Microsoft Dynamics 365 Developer Toolkit Extension into Visual Studio 2017
Introduction
When setting up my development environment, I wanted to use the Microsoft Dynamics 365 Developer Toolkit in the latest version of Visual Studio 2017. This extension allows the ability to deploy plugins and workflow code directly from Visual Studio – a huge time saver for Dynamics 365 development.
Requirements
- Visual Studio 2017
- CRM SDK
- 7Zip
- Notepad (or similar application)
Problem
The only problem is that it officially supports Visual Studio 2015 only. I thought I was out of luck with Visual Studio 2017, and I would have to use an older version of visual studio if I wanted to use this extension.
Solution
After digging, I found a resource that showed that it is possible to run this extension on Visual Studio 2017 with some tweaking.
I ran into issues with the source tutorial since it was vague. I wasted some time going in the wrong direction when installing this, so hopefully, my guide will help eliminate that wasted time!
Learn more about our Dynamics 365 offerings
Guide:
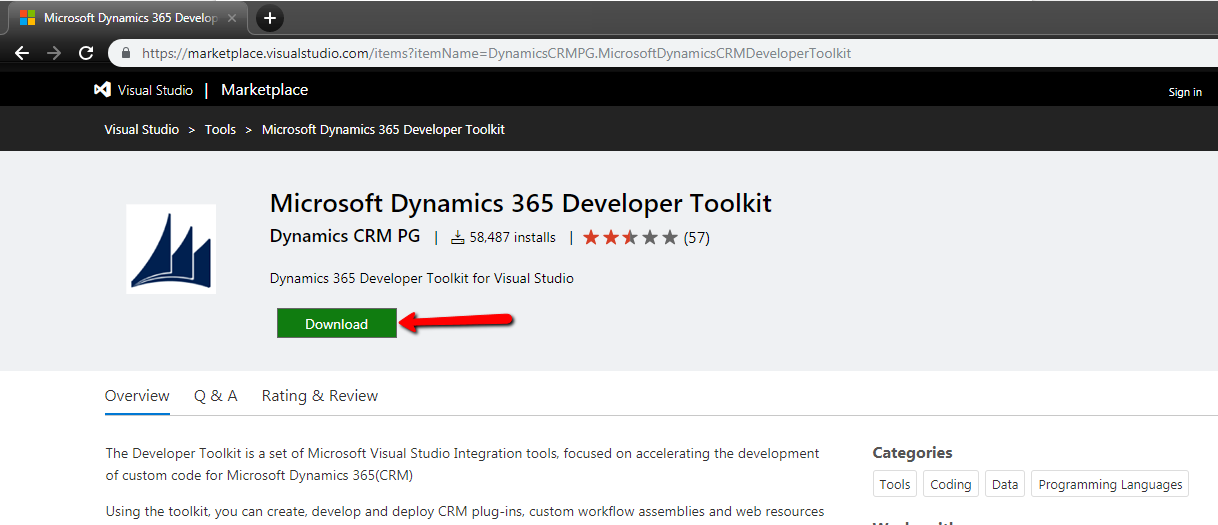
- Go to this page:
https://marketplace.visualstudio.com/items?itemName=DynamicsCRMPG.MicrosoftDynamicsCRMDeveloperToolkit - Download the extension ‘Microsoft Dynamics 365 Developer Toolkit’
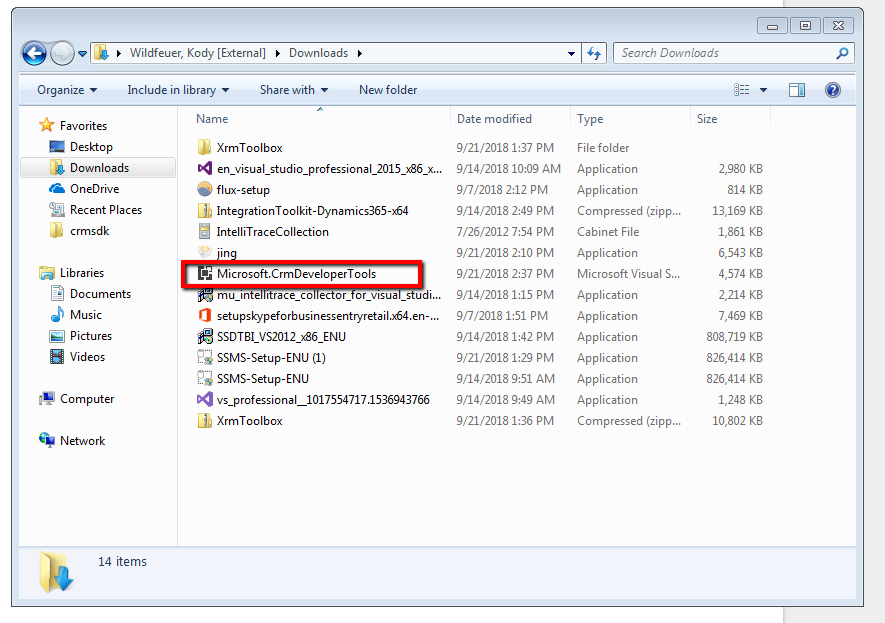
- Go to your downloads folder
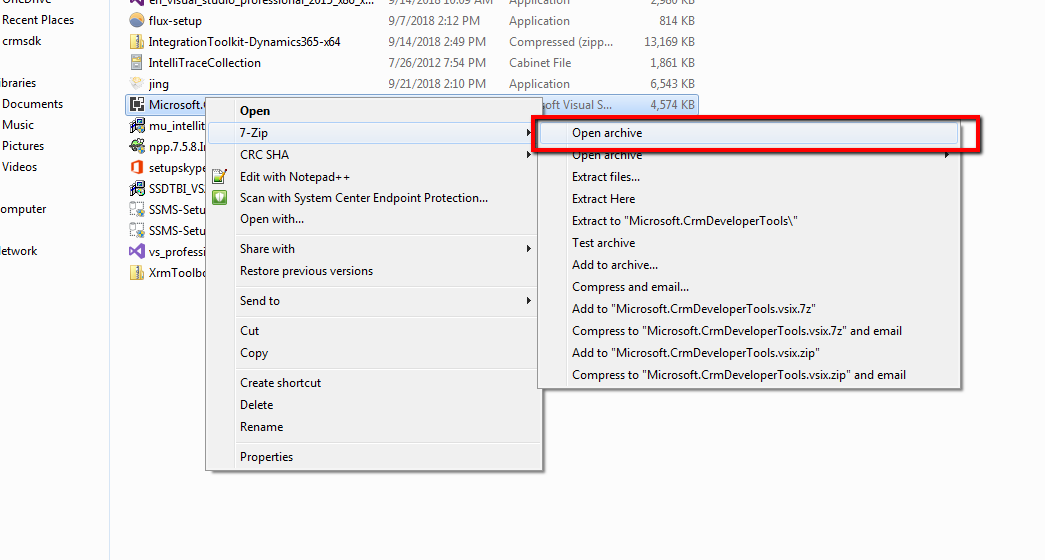
- Right-Click and go to 7-Zip and then click ‘Open Archive’
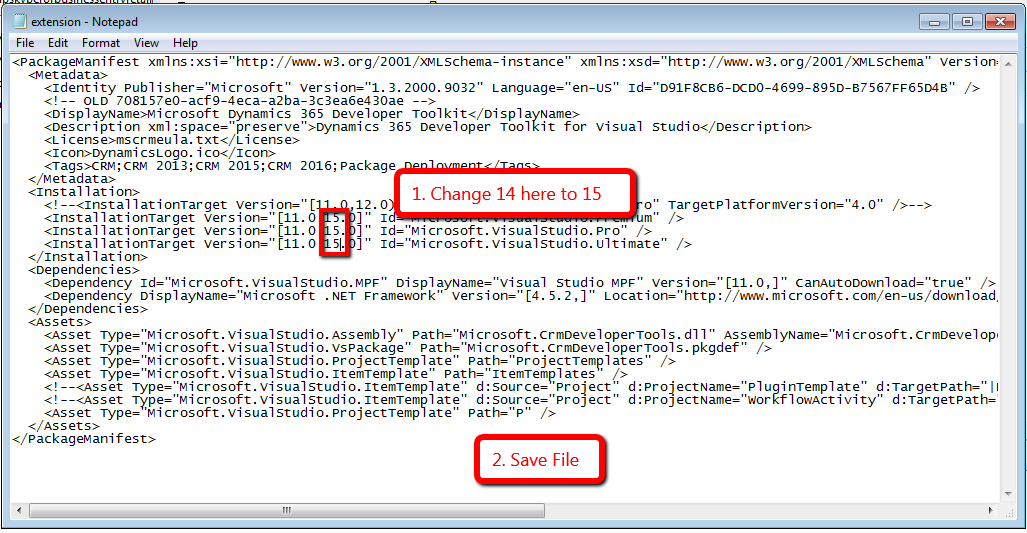
- Go to the file extension.vsix.manifest and right-click. Then, click Edit
Read more: Why Work With a Partner on Dynamics 365 Implementation?
Optimize your Dynamics CRM with AlphaBOLD Experties!
Installing Dynamics 365 Toolkit into Visual Studio has opened new doors for you; imagine what expertise in Dynamics CRM can do for your business. AlphaBOLD guides you through optimizing your CRM strategy for peak performance.
Request a Demo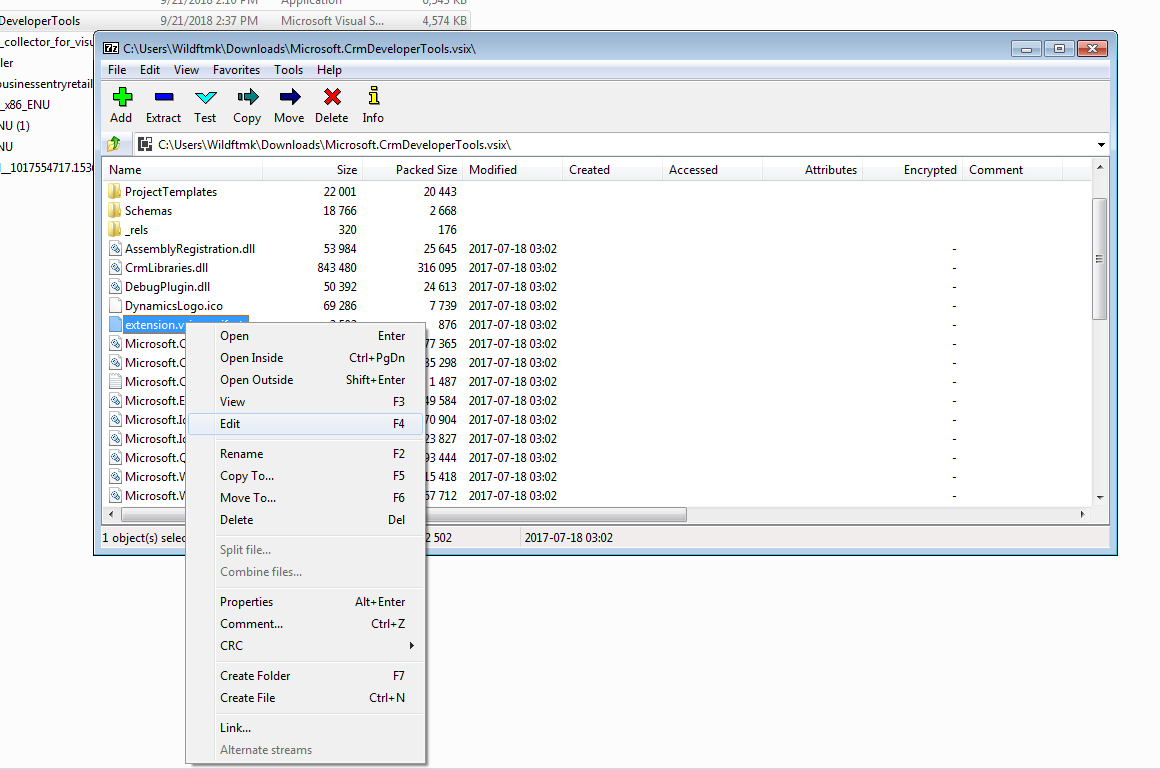
- Change 14 to 15 for the version and save the file
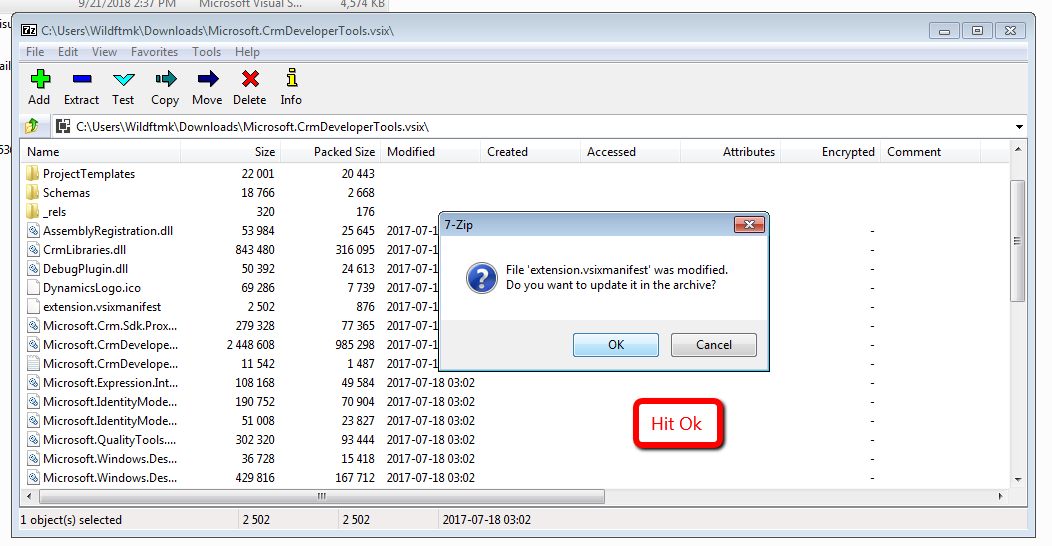
- You will see a pop-up in 7zip saying that a file was modified. Hit ‘Ok’
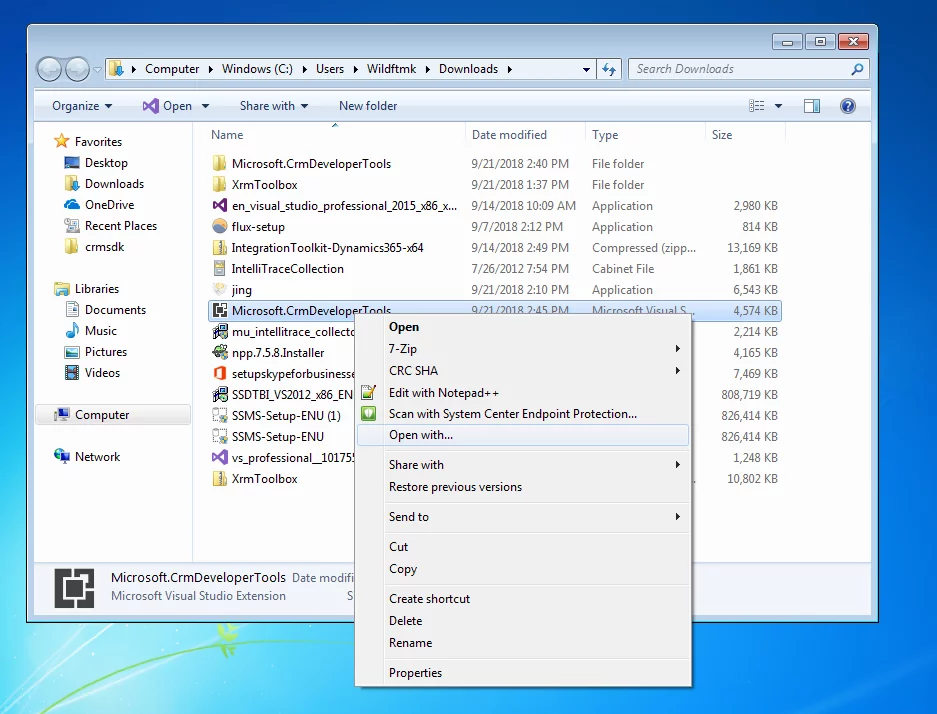
- Go back to the download folder, hit right click on the file and select Open With.
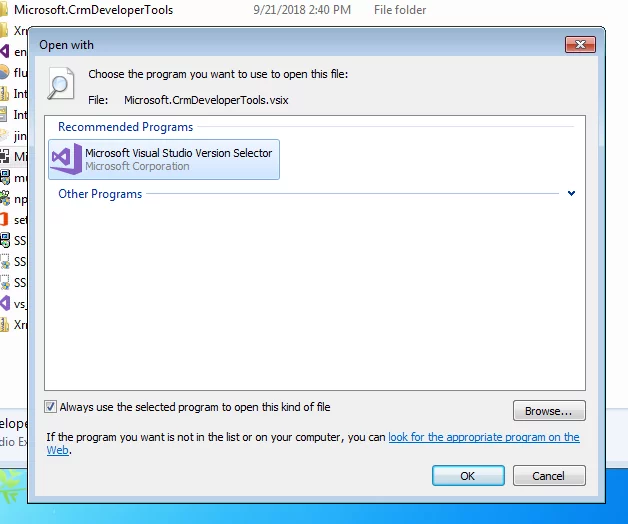
- Select Microsoft Visual Studio Version Selector
- Wait for the VSIX Installer window to appear. This might take a few seconds to pop up.
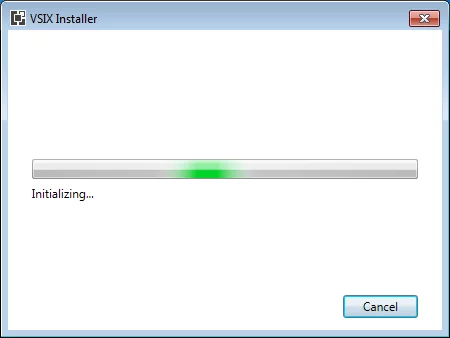
- Select Visual Studio Professional 2017 on this screen. Click Install.
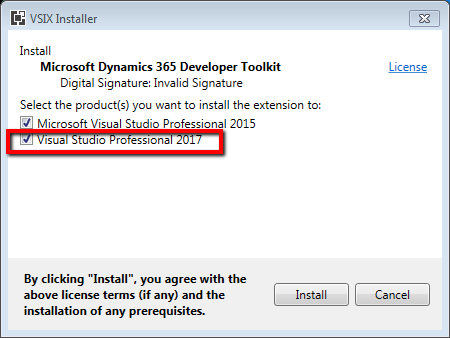
- It should now install this extension on Visual Studio 2017
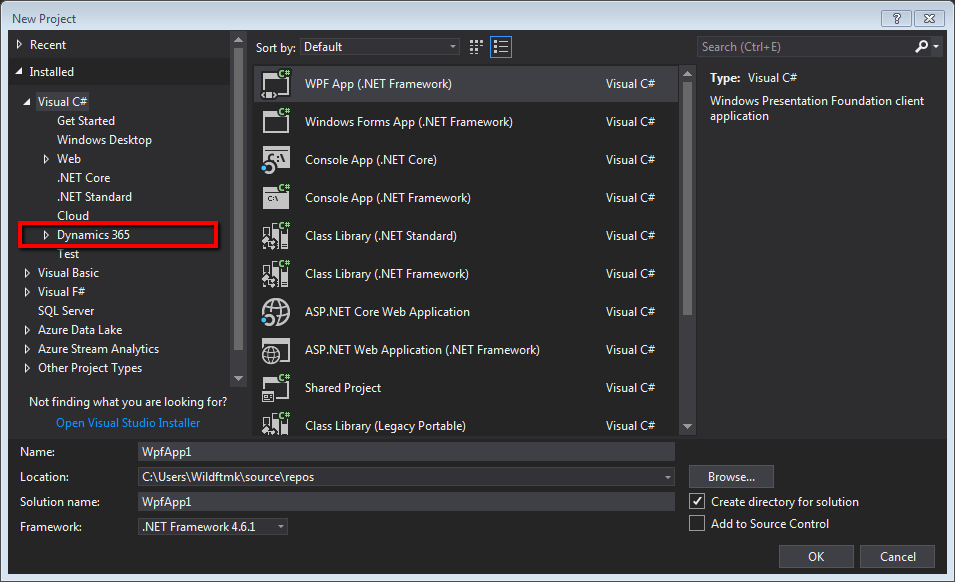
- To confirm that it has been installed, open up Visual Studio 2017, and in the top right bar, select File > New > Project
- Dynamics 365 should be showing under Visual C# in the popup window, confirming that it has been downloaded successfully.
Read more: AI in CRM: Exploring Microsoft Dynamics 365 Benefits
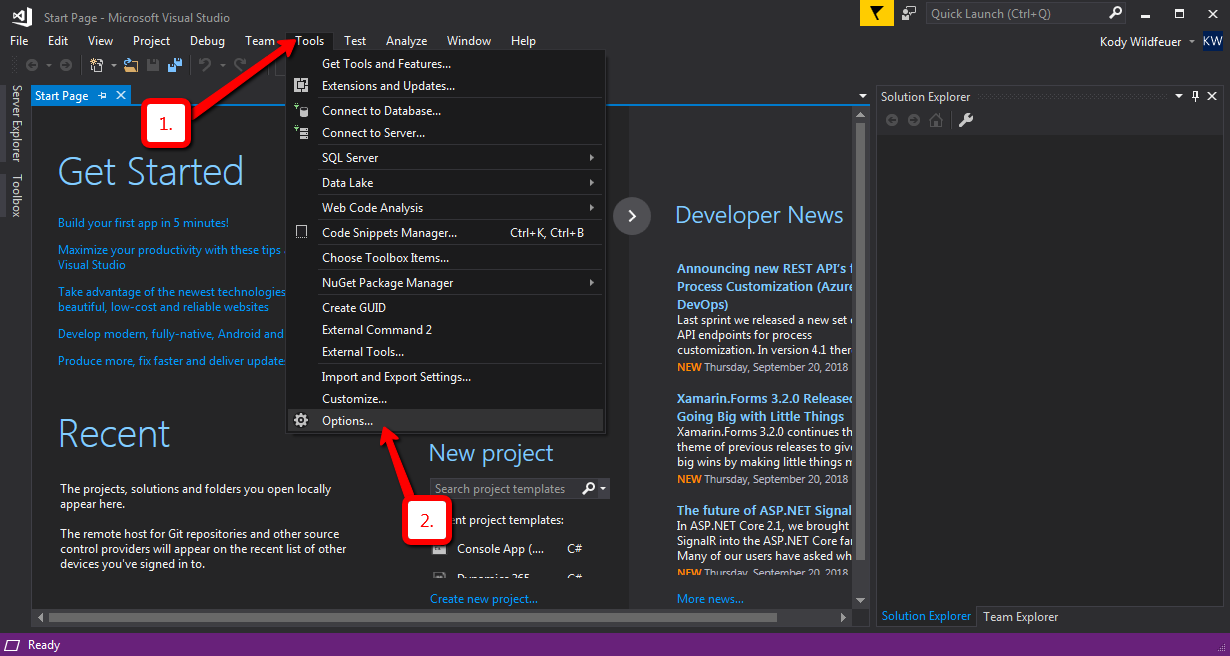
- On the toolbar, select Tools > Options…
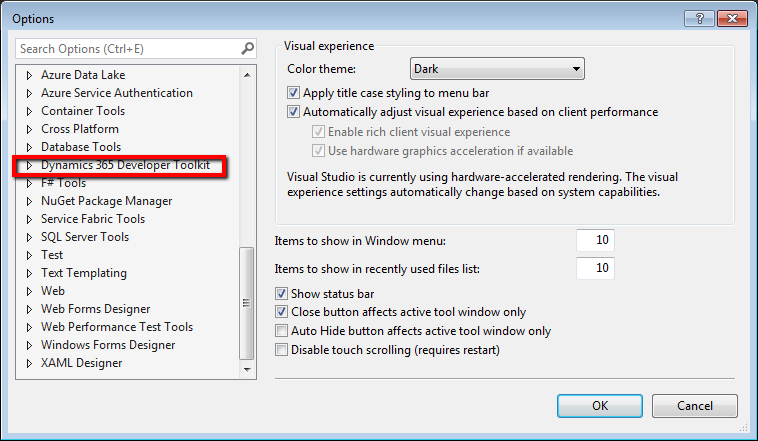
- Scroll down on the left hand side of the screen until you see ‘Dynamics 365 Developer Toolkit’. Expand this section.
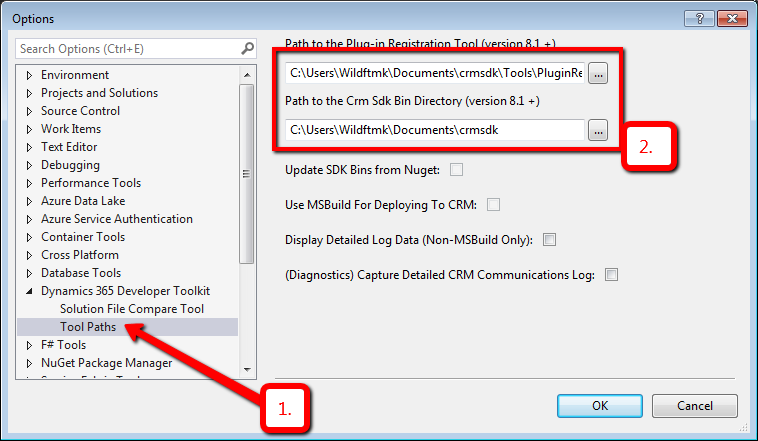
- Select Tool Paths and then provide the location to the Plug-In Registration Tool and CRM Sdk Bin Directory
Advance your CRM Strategy with AlphaBOLD!
Finished setting up your Dynamics 365 Toolkit. With AlphaBOLD, dive deeper into Dynamics CRM and discover strategies that drive success.
Request a DemoRead more: Microsoft Dynamics 365 vs. Competing Solutions
You can directly deploy and work on CRM Plugin and Workflows in Visual Studio 2017!
If you have any questions or queries, leave a comment below. You can also connect with our BOLDEnthusiasts by clicking here.


Last part is unclear. Where exactly is this Plguin-in registration tool path? How do you get it, where is it shown earlier in the process?
@Daniel,
When the SDK is installed a path is specified. You will have to point the Developer ToolKit to this file path.
If you have not installed the SDK yet please look here:
https://docs.microsoft.com/en-us/dynamics365/customerengagement/on-premises/developer/download-tools-nuget
can we install with Visual Studio 2019 ?
Chhainith,
Thanks for the reply. I am not sure if it works for Visual Studio 2019. Feel free to give it a shot using this guide!
BOLDEnthusiasts
Hi Chhainith,
WIll this work in Visual STudio 2017 Community version?
Yes same applies to Visual Studio 2019, just change 14 to 17.
HI All, I did that and I am still getting error.
This extension is not installable on any currently installed products.
I followed the instructions and get an error when running – “This VSIX Package is invalid as it does not contain the file extension.vsixmanifest at the root.
I havent moved it, just adjusted the version