What is AutoIT:
Selenium is an open-source tool intended to automate web-based applications but not to deal with window GUI. AutoIT utilizes a blend of mouse movement, keystrokes, and windows control manipulation to automate a task that cannot be handled by Selenium web-driver. It can prepare content for our usual activities, such as document input/output operations, application handling, resource monitoring, administrative tasks, etc.
Why we use AutoIT:
While using Selenium or any other tool for automation, we all face a common obstacle; the windows pop-ups. Selenium is limited to automating browsers, and as such, the desktop window is out of scope. Web applications may need to interact with the desktops to perform tasks such as downloading and uploading files. There are a few more reasons for its utilization:
Simple to Learn:
It is just another scripting language making it very easy to use. Under AutoIt’s assistance menu, users are given all the functions and methods they can use with point-by-point clarifications and models.
Reproduces Keystrokes:
It is required to utilize keystrokes anywhere in your test. You can hit the enter key on any dialog box and compose the username and password on the pop-up that cannot be simulated with Selenium.
Reproduce Mouse Movements:
Like keystrokes, there can be scenarios when you need to affect the mouse movements, and it is the most efficient tool that can be used for those circumstances.
Windows Management:
You can desire to move, hide, show, resize, activate, close, and pretty much do what you want with Windows. Windows can be referenced by title, text on the window, size, position, class, and even internal Win32 API handles.
Windows Controls:
Get information on and communicate with edit boxes, checkboxes, list boxes, combos, buttons, status bars without the risk of keystrokes getting lost. Even work with controls in Windows that are not active.
Where to Get AutoIT:
Go to the URL and click the referenced icon in the screenshot.
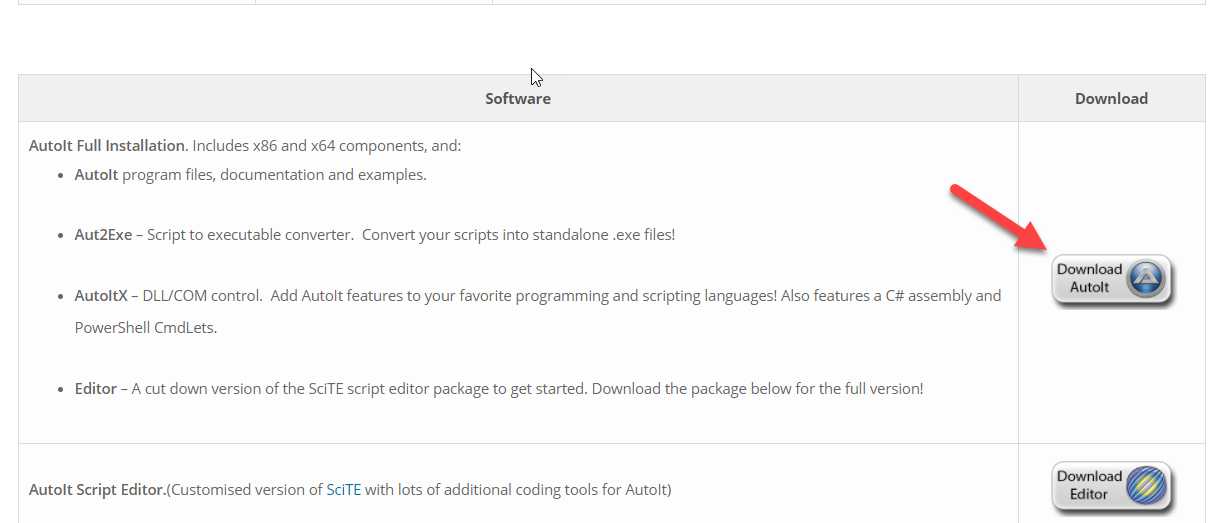
It will allow you to download the .exe file and install the application. It would be a simple installation, so no need to be worried.
How to use AutoIT with Selenium:
Once the installation is complete, you will need to go to Visual Studio and follow these steps:
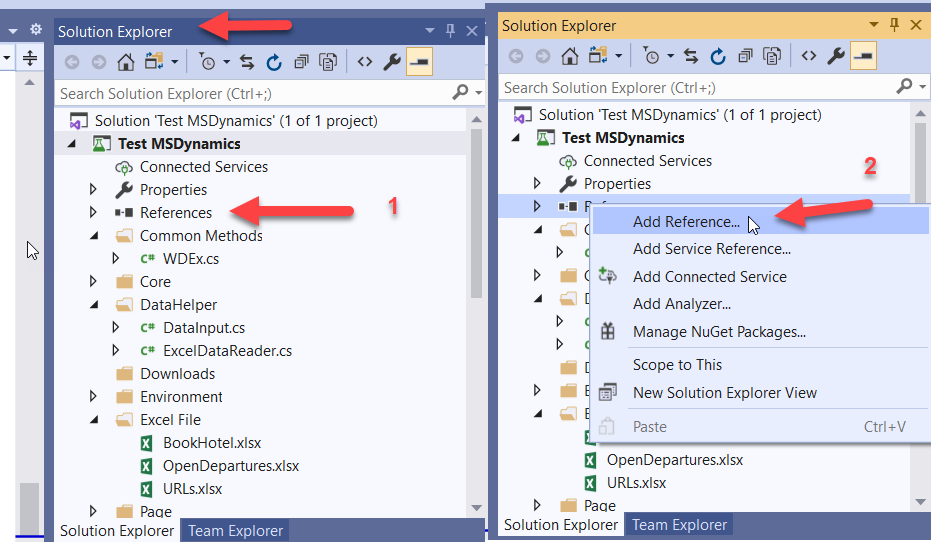
Step 1: Navigate to the Solution Explorer and right-click on the references, select add reference from the number of displayed options.
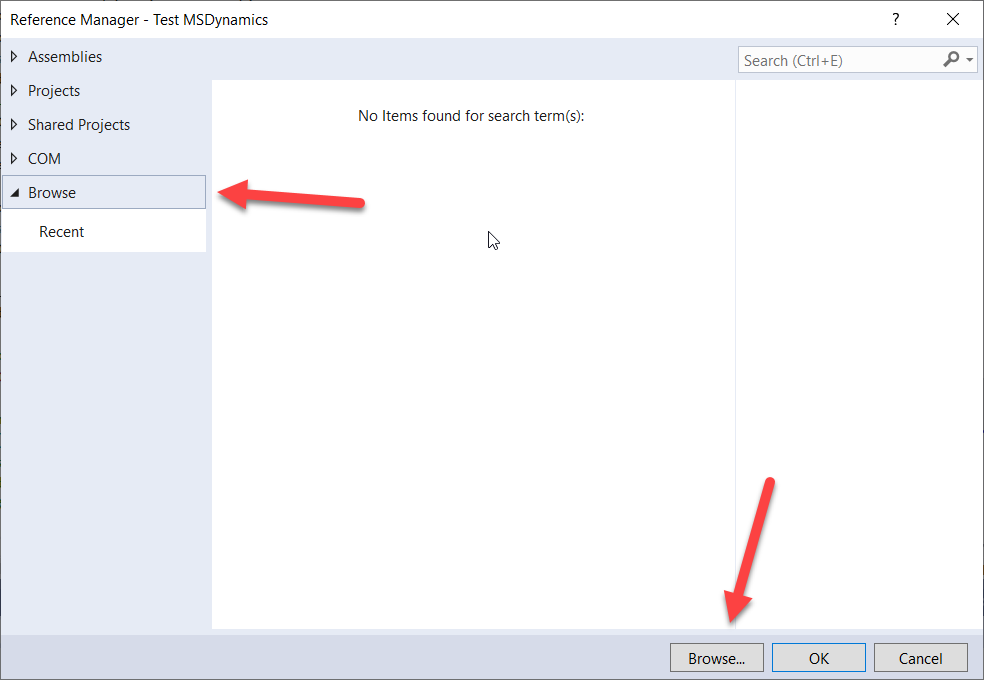
Step 2: Once you click on the add reference, it will pop-up the Reference Manager window where you can see multiple tiles on the left panel. You then click on the Browser tile; it will enable a “Browse” button in the lower right corner of the screen; click on that button.
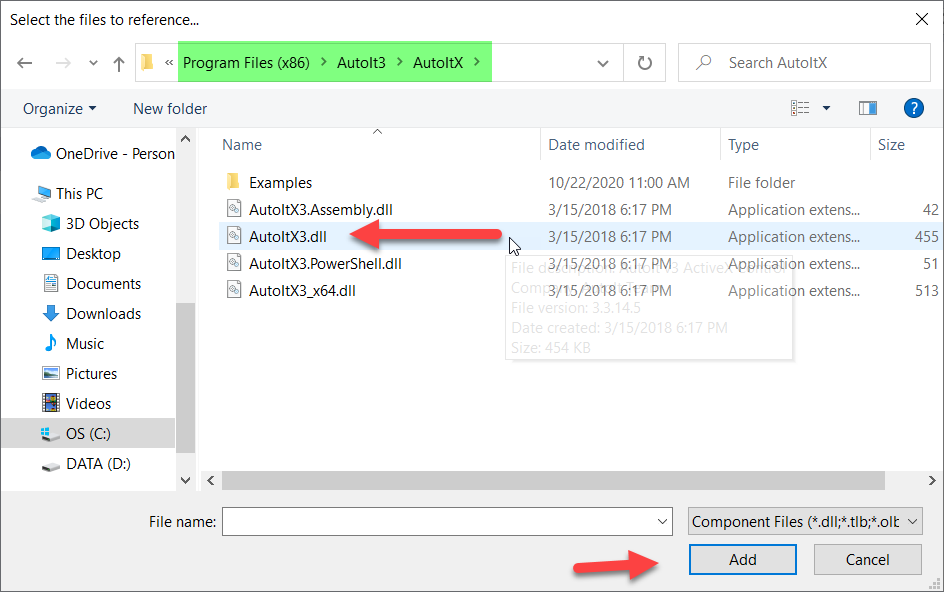
Step 3: Once you click on the browse button, the system will pop-up another window for a .dll file to be selected. Go to the following file location: “C:Program Files (x86)AutoIt3AutoItX” and select “AutoItX3.dll” file and press ok. Now the AutoIt reference is added to your selenium project, and you can utilize it to handle any windows operation. Note: the file location could change depending on your installation location.
Step 4: Now, open the class where you desire to use AutoIT and put “using AutoItX3Lib;” as a reference to that class.
Step 5: You need to put the following method that will assist you to handle windows-based pop-up windows which cannot be controlled by Selenium:
public static void AddDocument()
{
AutoItX3 autoit = new AutoItX3();
driver.FindElement(By.CssSelector(“button#myButton”)).Click(); // Put the button element that you want to click
autoit.WinActivate(“Open”); // activated window popup name
autoit.Send(FileURL); // Put the File URL here that you want to upload
autoit.Send(“{ENTER}”);
Thread.Sleep(1000);
}
Code Explanation:
- autoit.WinActivate(“open”); It sets the cursor’s focus to the pop-up title, e.g., sometimes it could be downloads or Open.
- autoit.Send(ImageURL); It represents the complete address of the attachment. “Send” action might be performed on pressing the Enter Key, Shift Key and so on. OR typing a string, number, etc. I want to type in the Filename in this example, so I use the command to enter the Filename in the window.
- autoit.Send(“{ENTER}”); It represents the same action as when the “Enter” button is pressed, which in turn completes the action of upload.
Conclusion:
Conclusively, we figured out how to upload/download file pop-up. However, there are other issues such as browser authentication pop-up, file search in a particular directory, copy file from one location to other, installation of software, and so on. We can deal with every one of these issues by utilizing the AutoIt tool.
I hope this blog helps you utilize AutoIT to solve browser issues. If you have any questions or insights that you would like to share with us, please leave a comment below!
Happy testing!