

In our previous blog, we showed you how you can get your first application running locally within minutes without any hassle at all. If you missed part one, check it out here.
In this tutorial, I will show you how to use Netlify to get your React application exposed to the public web! The best part is this whole process is FREE for minimal apps! Perfect for a technical portfolio.
This will help you share with your friends and family your newly found superpowers. ?
You can use any react app that you are building. For this tutorial, I will be using a Bare Bones application created with the nifty Create-React-App command.
To give you some background Netlify is a resource that allows for easy deployment for any website. As you will see in this tutorial, Netlify offers amazing automation for the build process. It deploys any changes you make to your react app. This works like magic.
If you want to follow along with the same app, please refer to my post on how to get started with your first React application.
Prerequisites:
- A GitHub account
- A Netlify account
- Git installed (Tutorial Here)
- Same prerequisites as the first post.
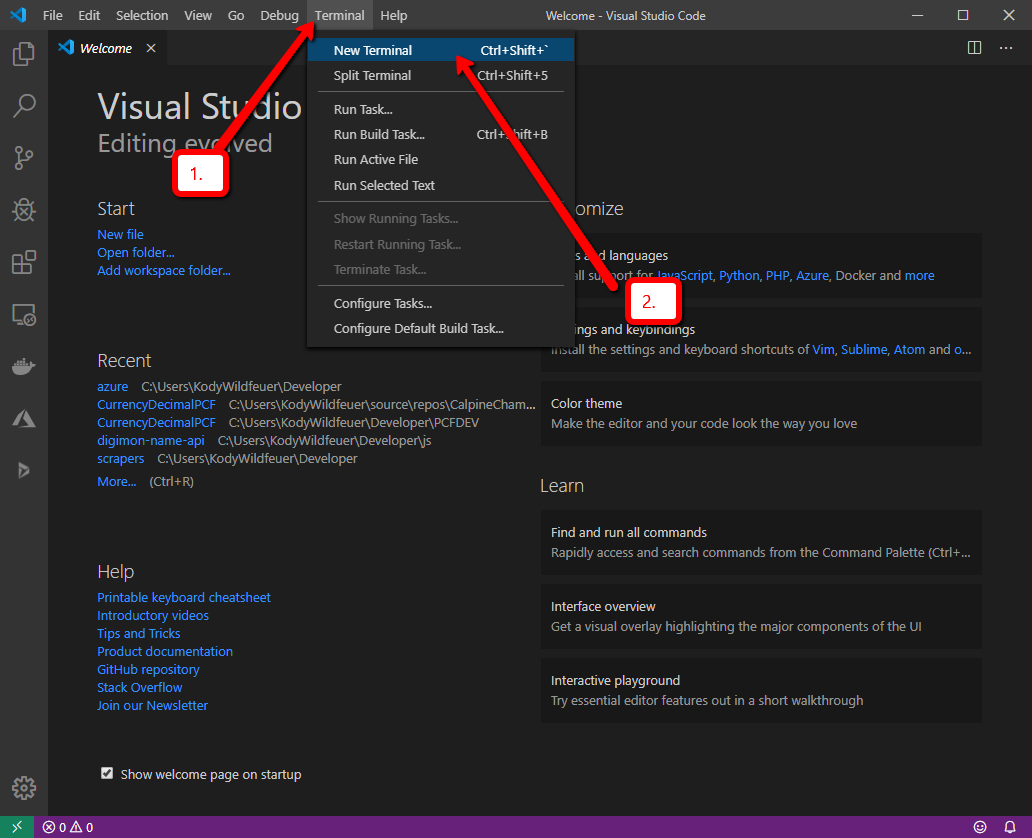
- Open Visual Studio Code. Then click on the terminal dropdown on the top of the menu bar. Then click ‘New Terminal’.

2. Now type ‘cd mytestapp’ in the terminal window that opened at the bottom of the Visual Studio Code. Hit Enter.
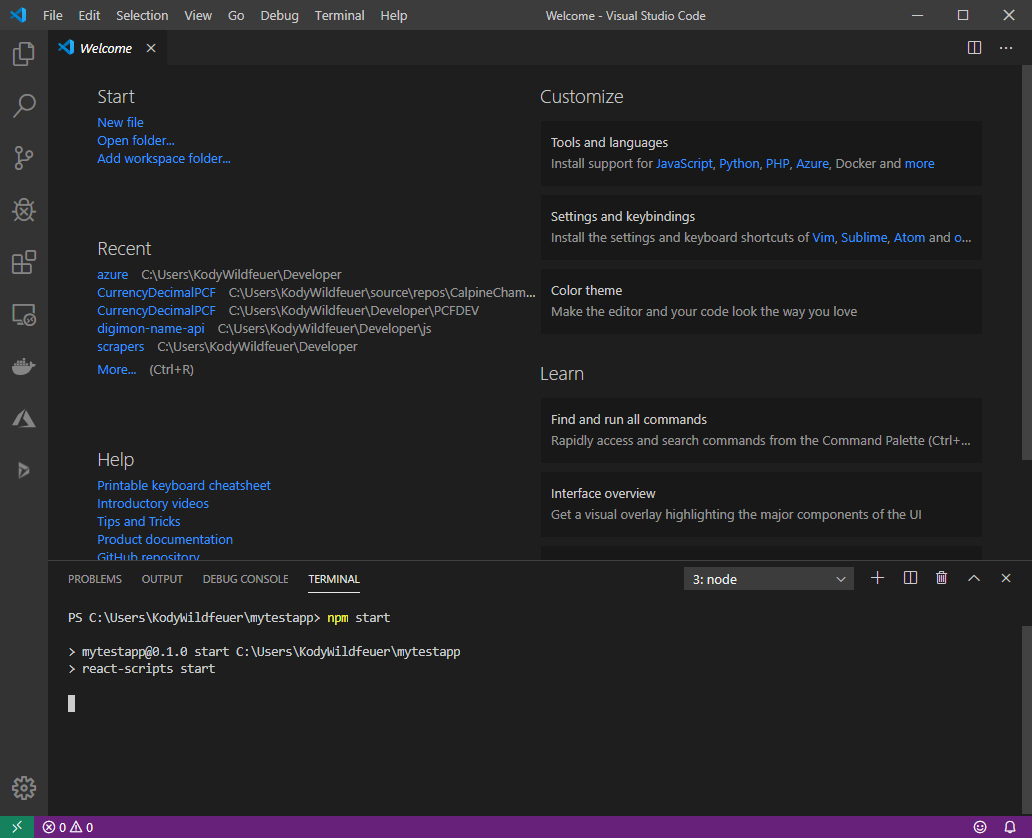
3. Now type ‘npm start’. This will start the React Application locally.
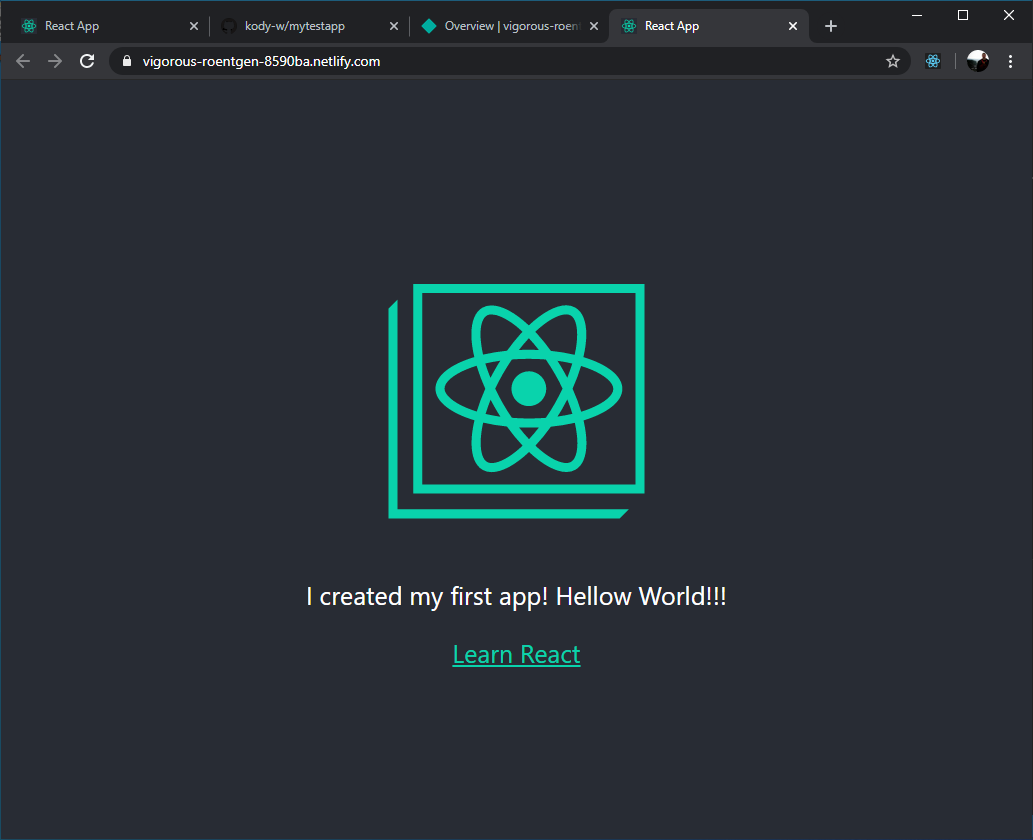
4. You should see a browser window open up with your React application.
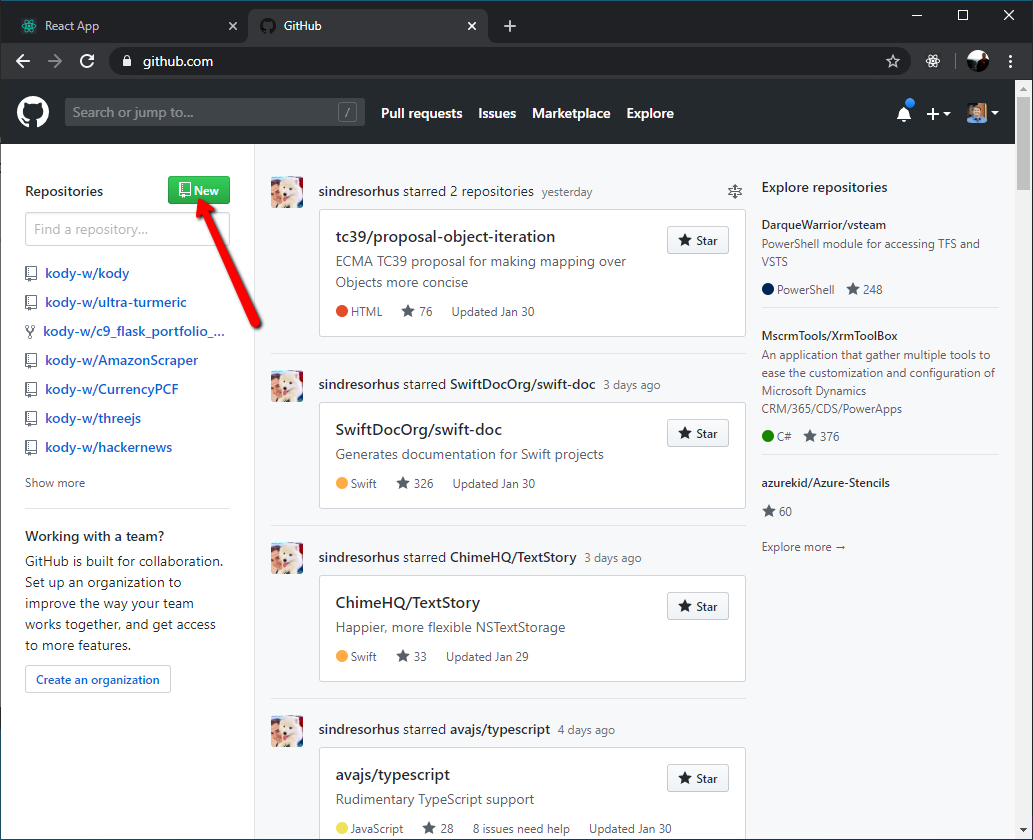
5. Now go to your browser and navigate to github.com. Click on the ‘New’ button on the left-hand side of the site.
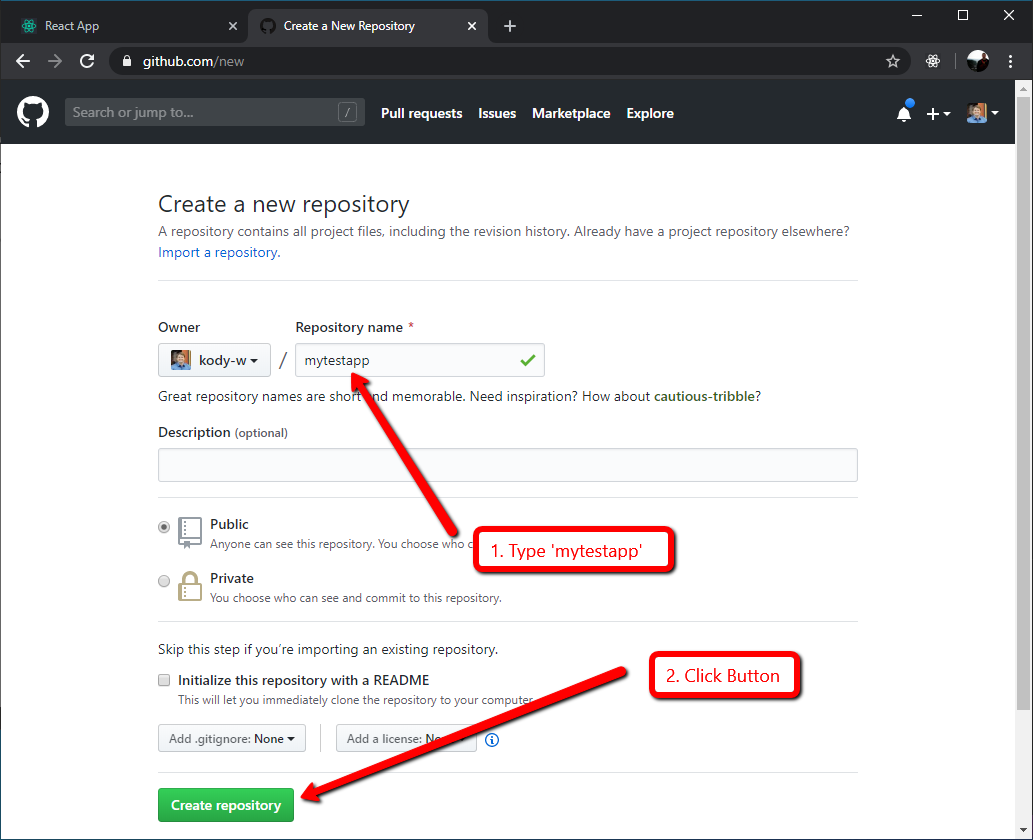
6. Type in ‘mytestapp’ for the repository name. Then click the ‘Create repository’ button.
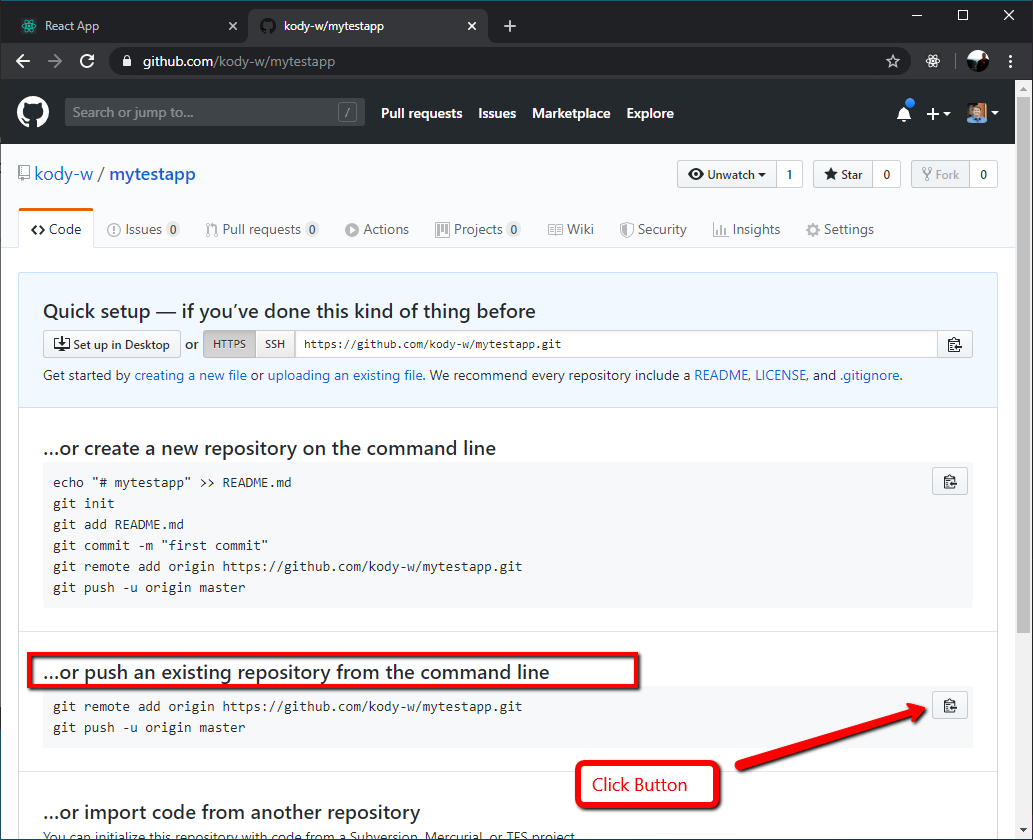
7. Now click on the button on the right side of the displayed section of text. This will allow us to link our local code to this repository that we just created on GitHub.
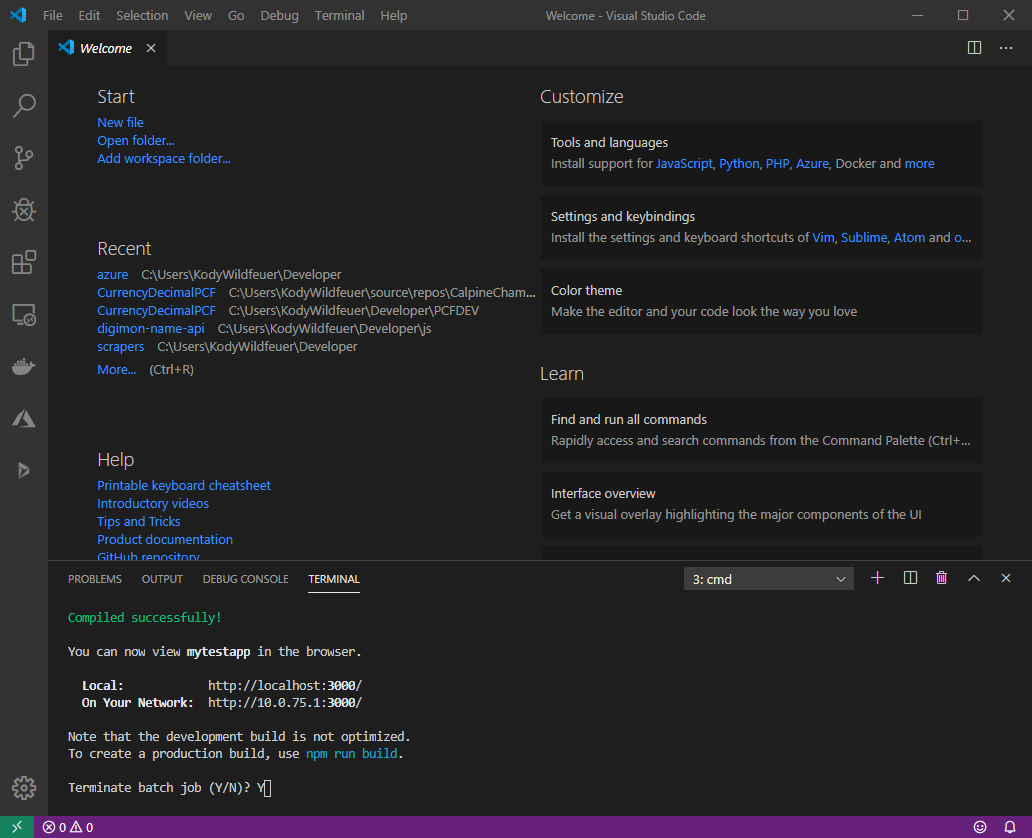
8. Now go back to Visual Studio Code. On the terminal, we need to stop your local React App. To do this, hold the CTRL+C keys while you are on the terminal section of the VS Code.
Now type ‘Y’ and hit enter when you get prompted to terminate the batch job.
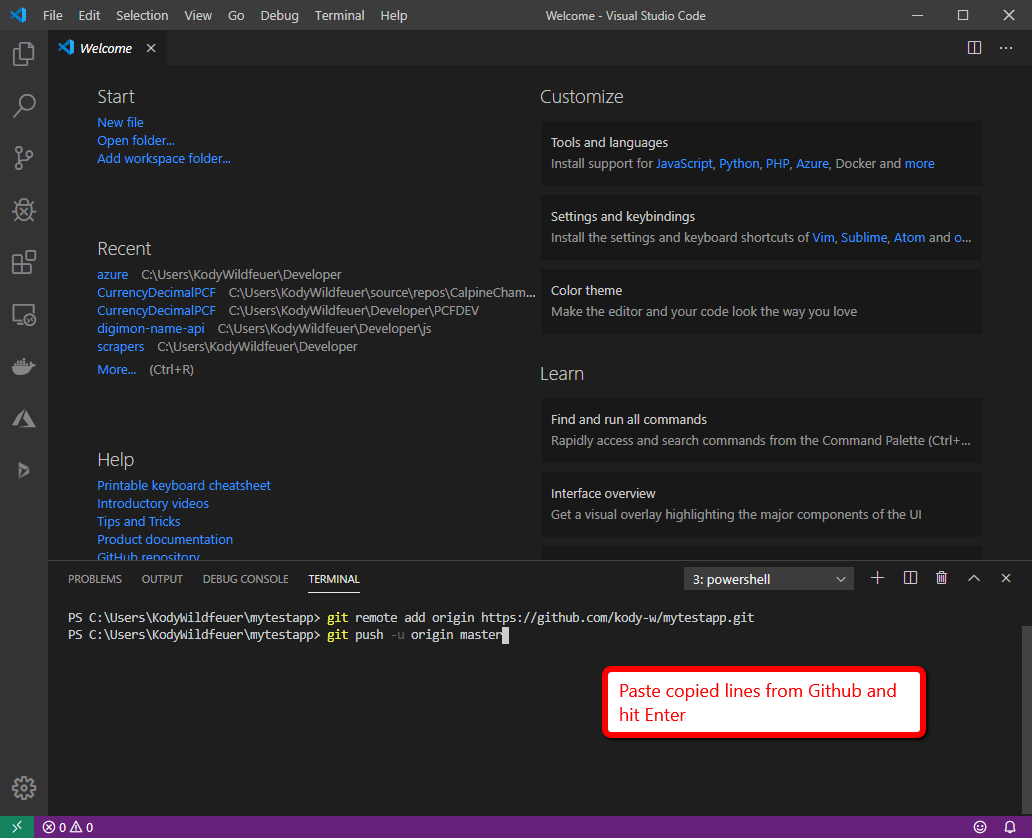
9. Now, paste the statements that were copied from GitHub into your terminal window and hit enter.

10. You should see the following text show up after. This confirms that you have connected your local code to the newly set up repo.
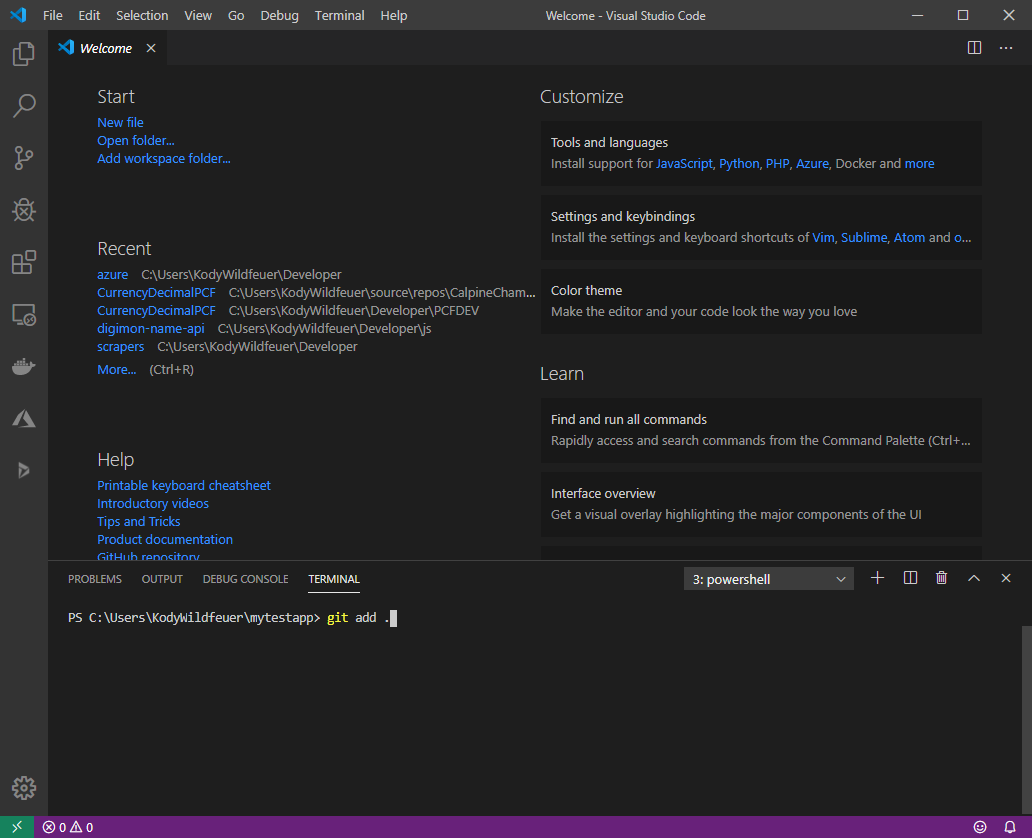
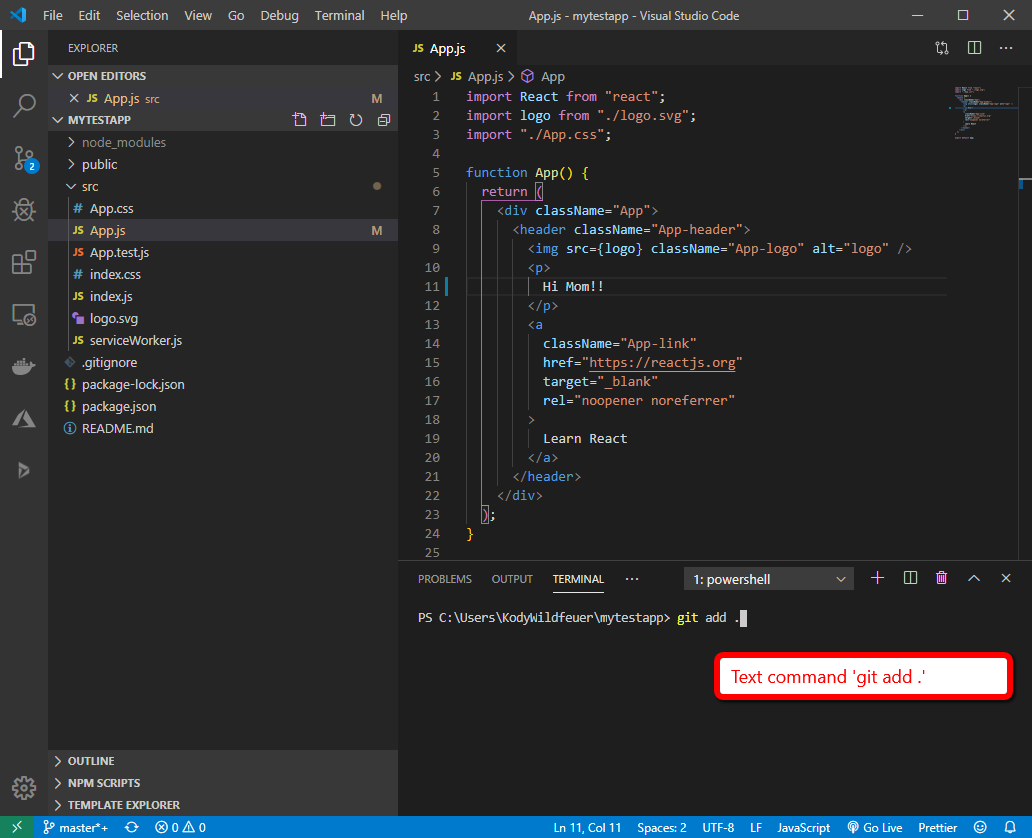
11. In the next step, you will type ‘git add.’ in the terminal and hit Enter.
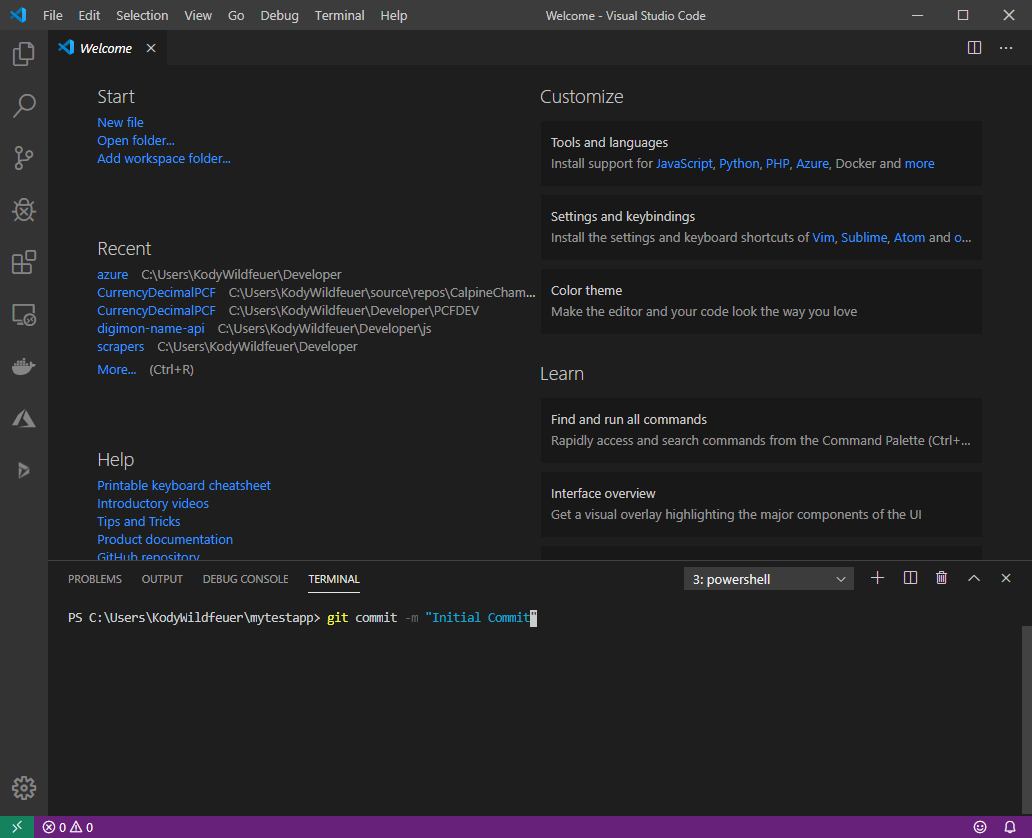
12. Now type ‘git commit -m “Initial Commit” ’ and hit Enter.

13. Next type ‘git push’ and hit Enter. Congrats, you have published your local code to GitHub.
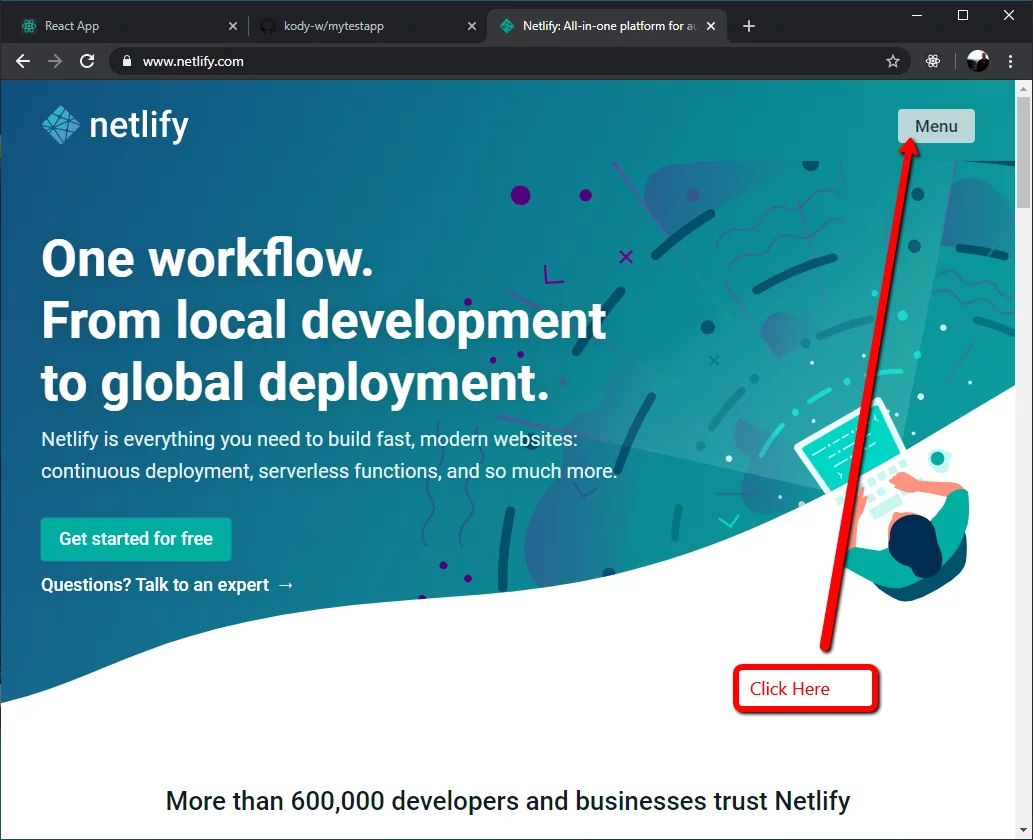
14. Now go to your browser and navigate to netlify.com.
Click on the top-right menu button.
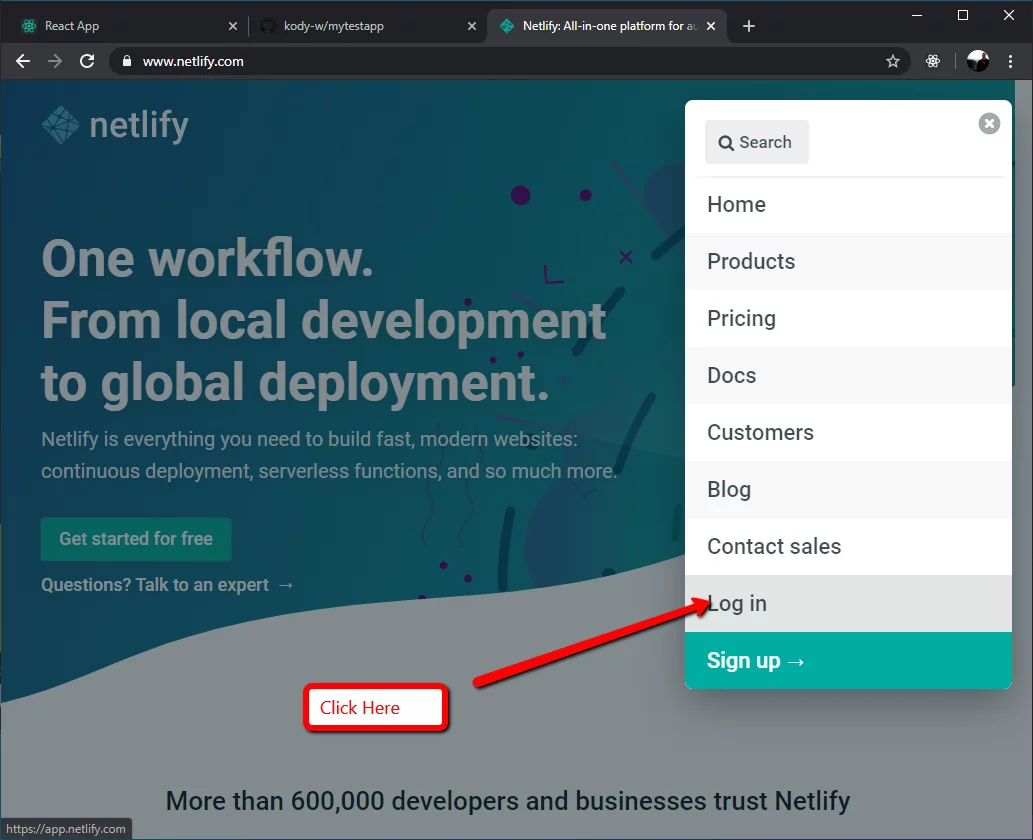
15. Click ‘Log in’ on the dropdown, as shown in the above screenshot.
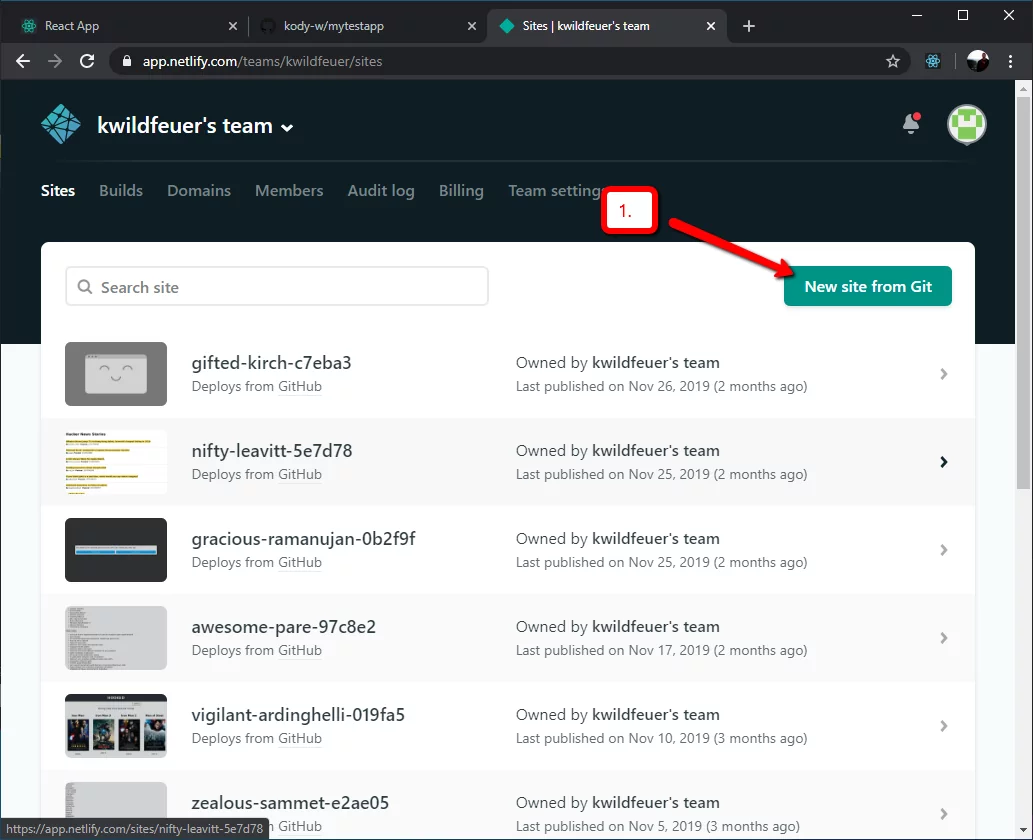
16. Next, click ‘New site from Git’.
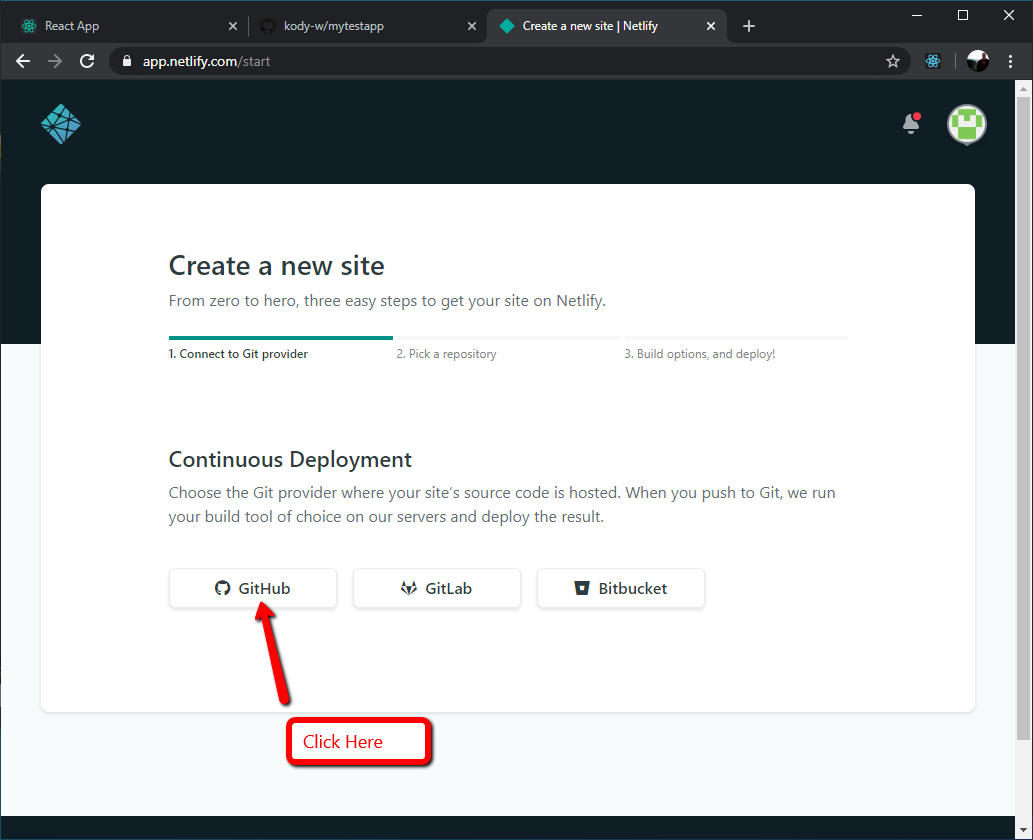
17. Then click GitHub, as shown above.
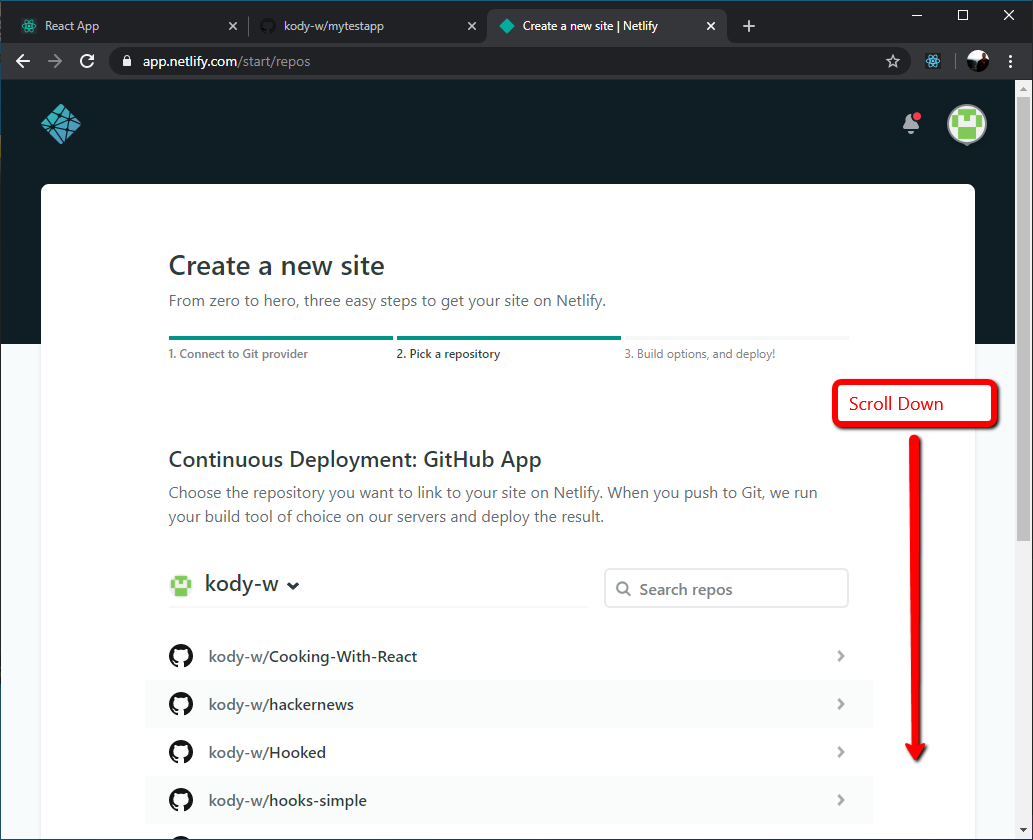
18. Scroll down on this screen.
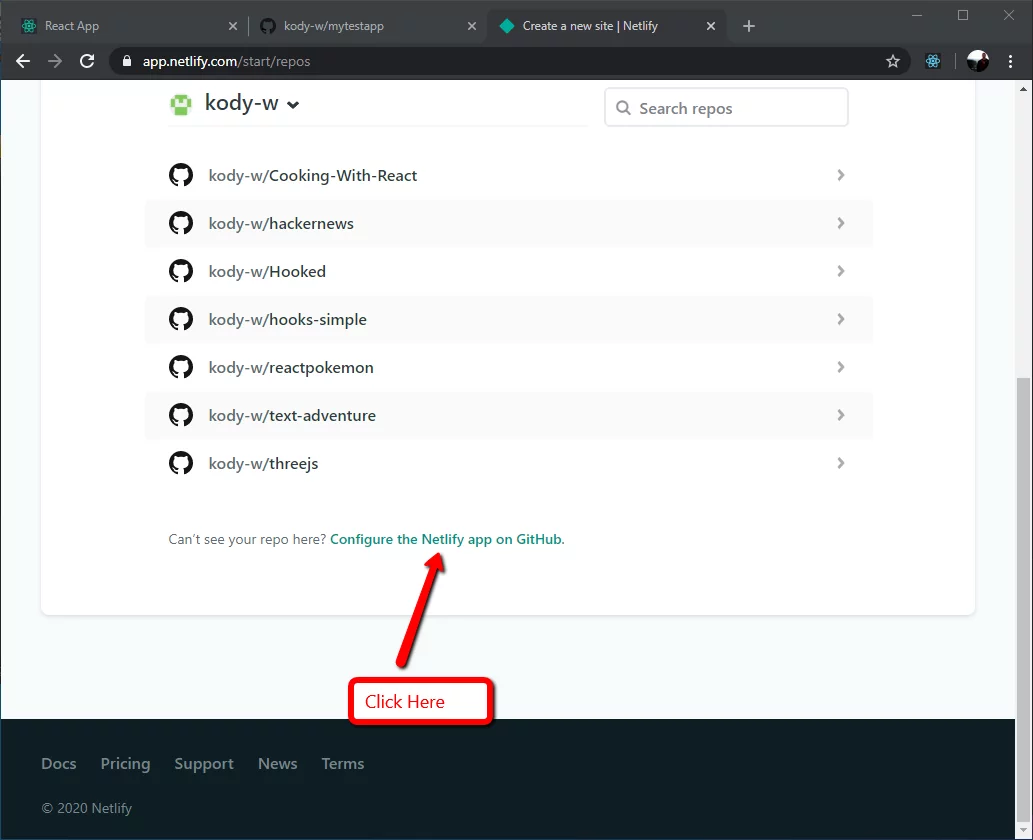
19. Then click ‘Configure the Netlify app on GitHub’.
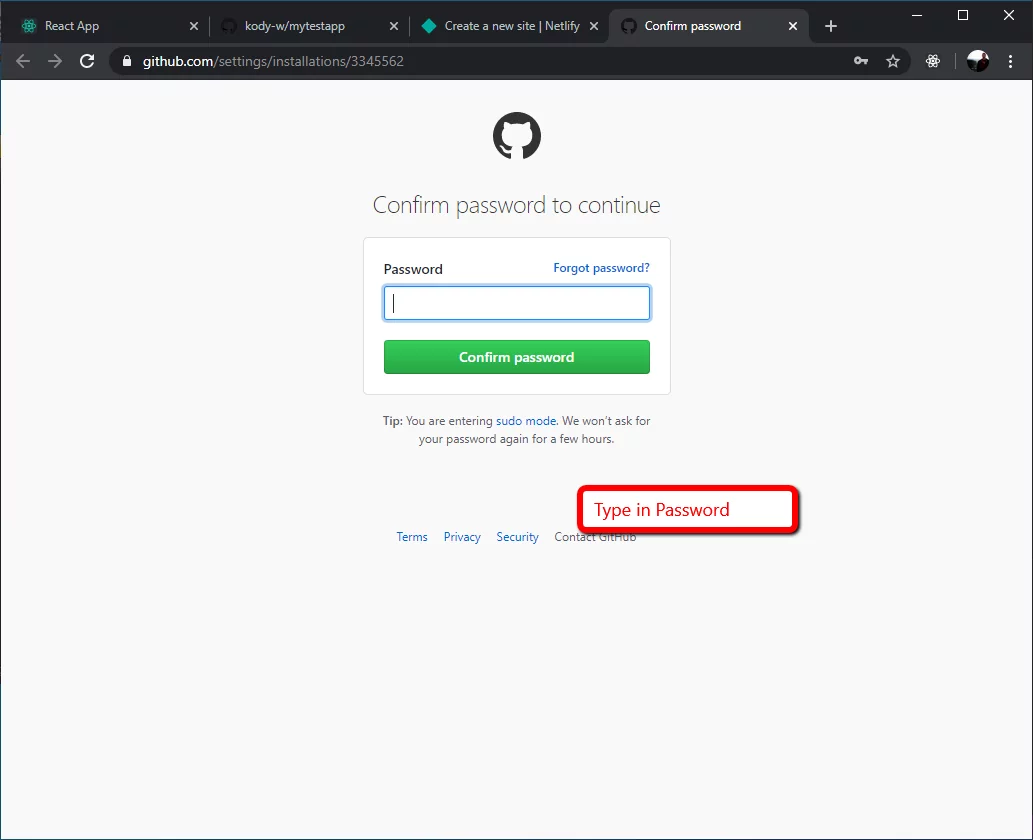
20. Log onto your GitHub account.
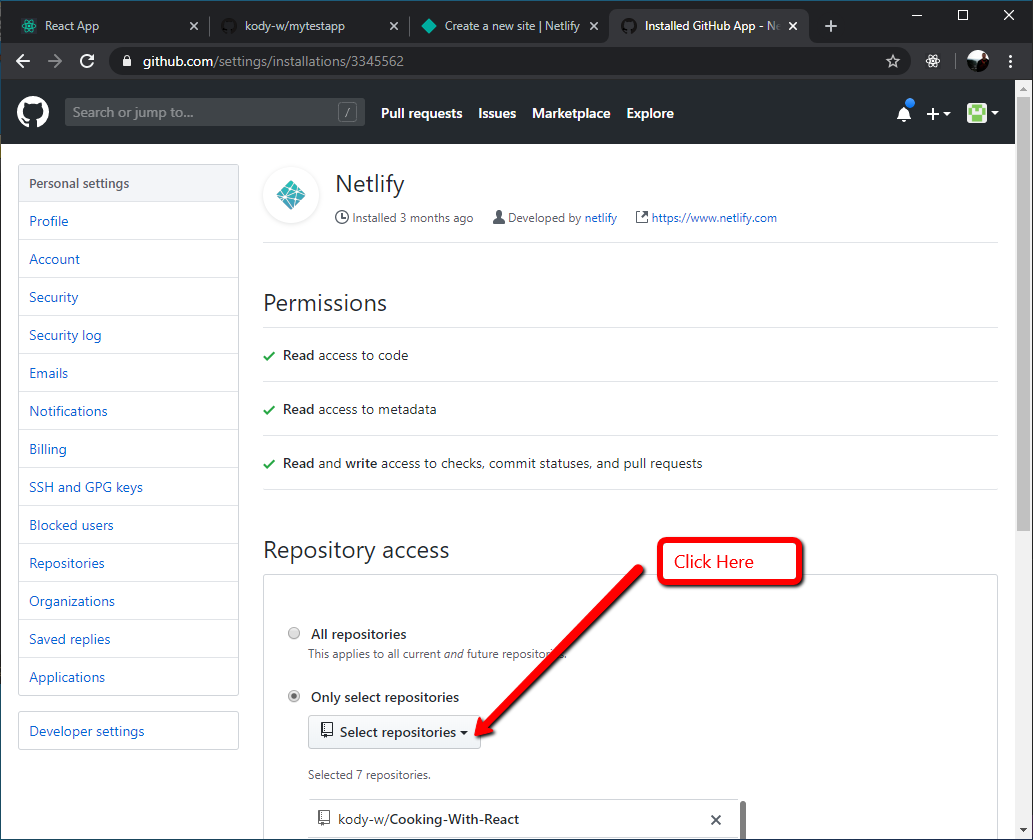
21. Click ‘Select repositories’.
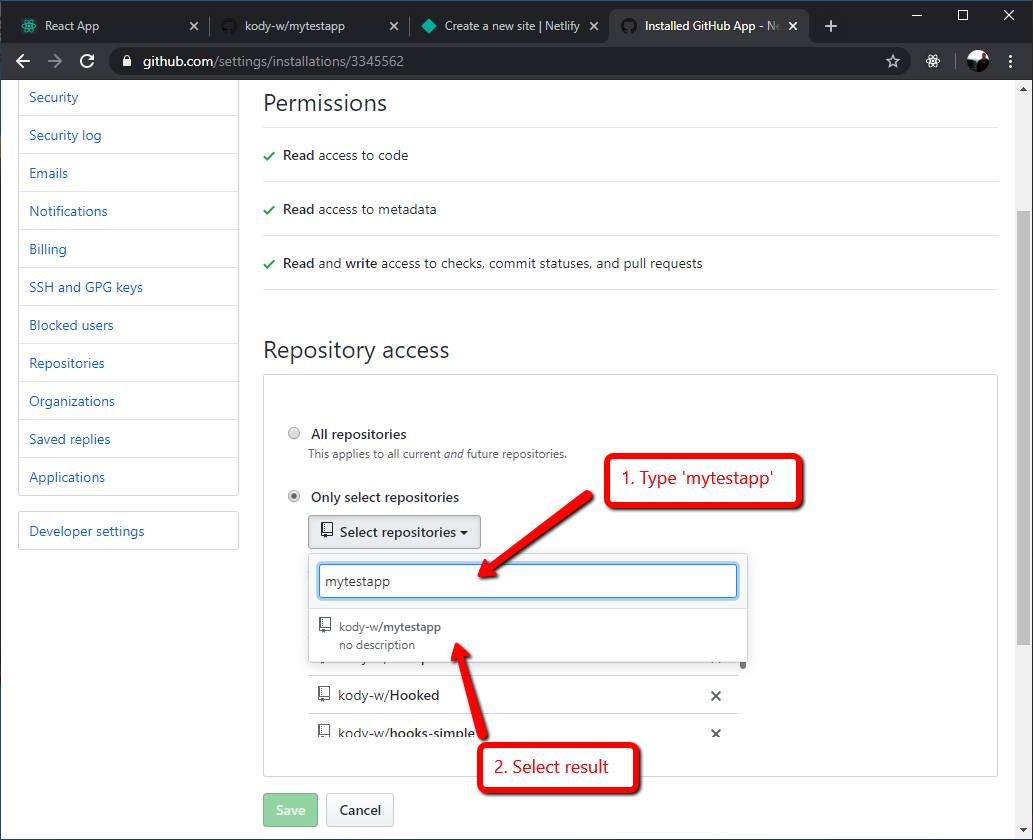
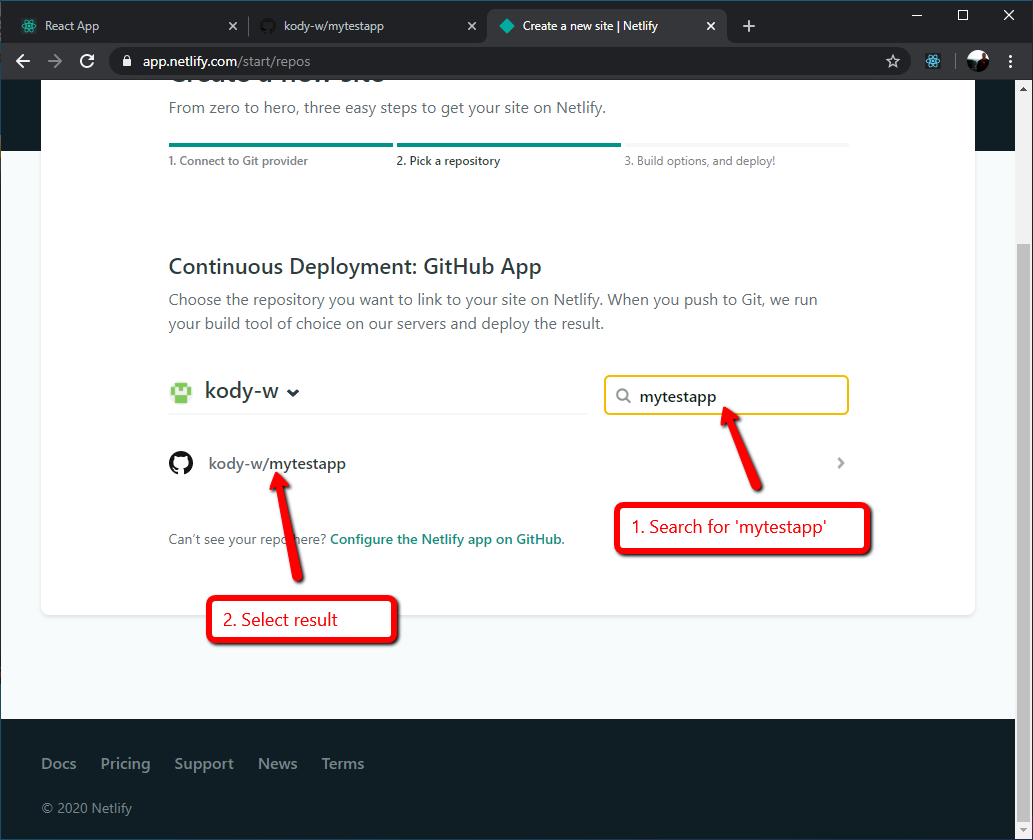
22. Next, type in the search box ‘mytestapp’ as shown in the screenshot above.
Then select the result that shows up.
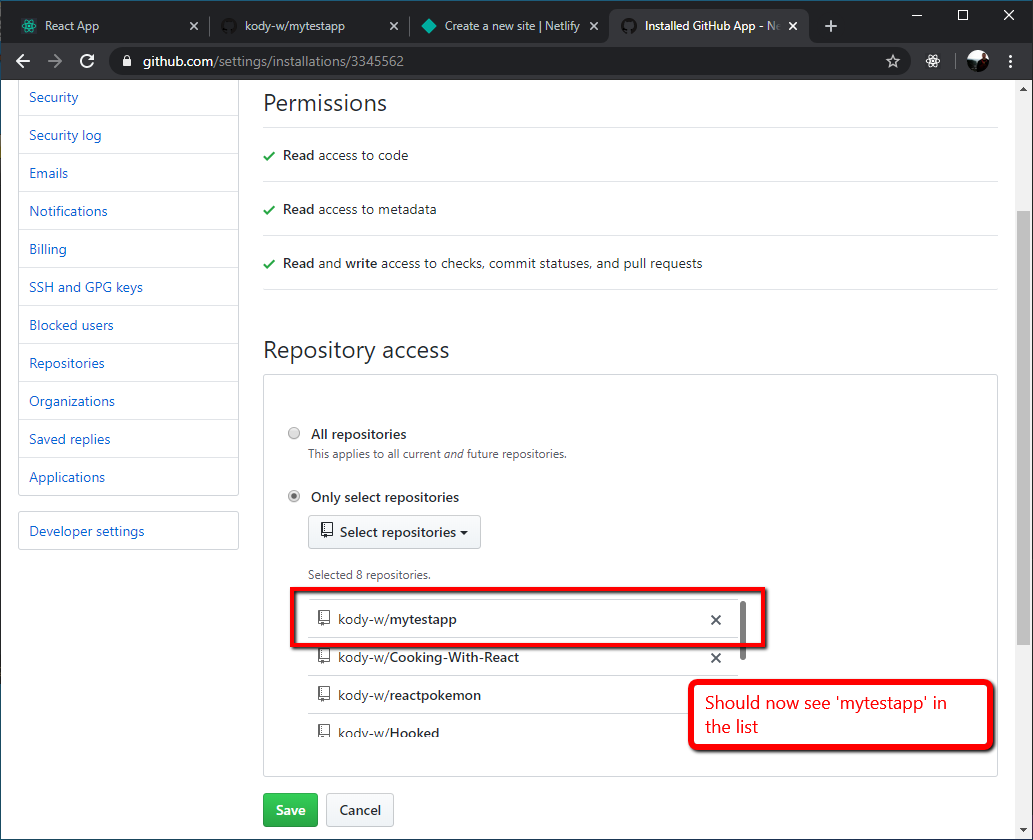
23. Now you should see ‘mytestapp’ in the list of repos. On to the next step!
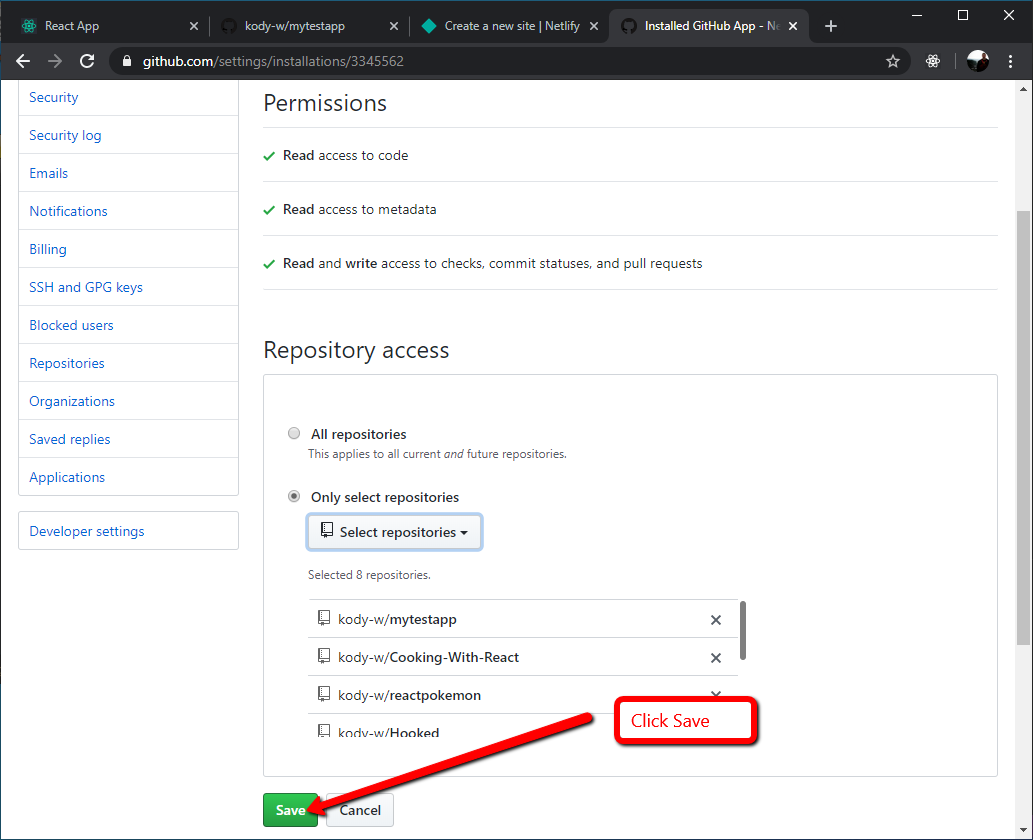
24. Click the ‘Save’ button.
25. Now go back to Netlify.
26. In the search box type ‘mytestapp’.
Select the result, as shown in the screenshot above.
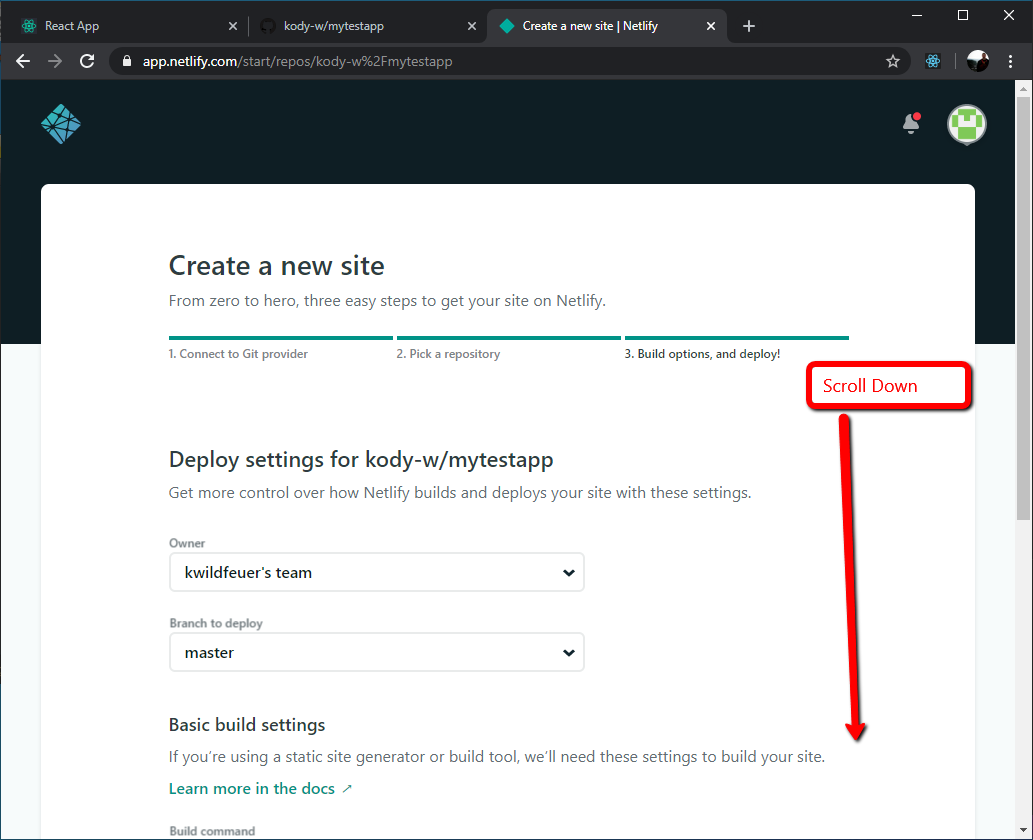
27. Scroll down on this screen.
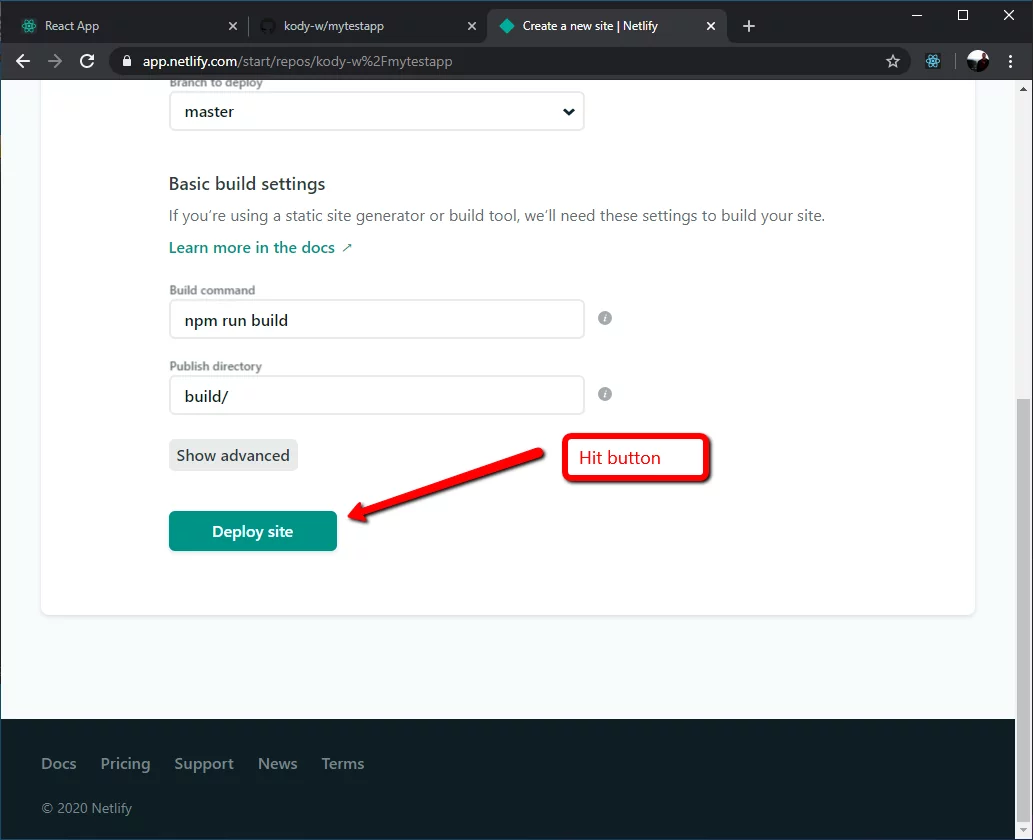
28. Click on the ‘Deploy site’ button.
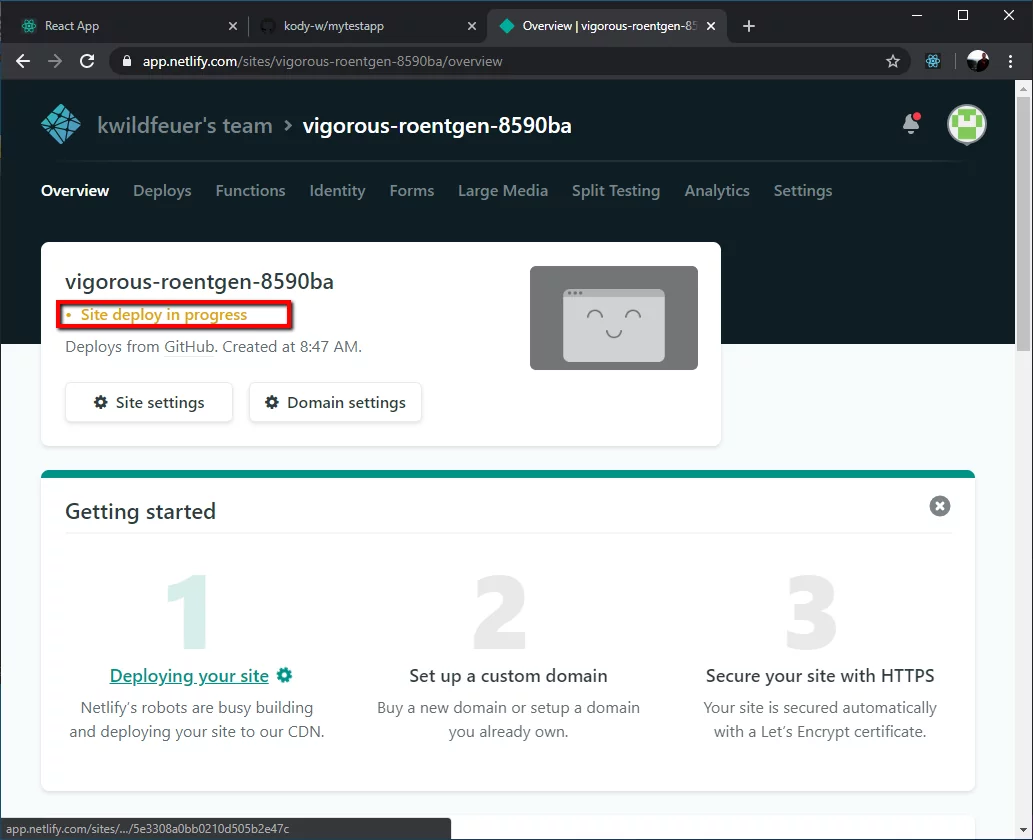
29. You should see a screen like the one above. Your website’s name will be random, so don’t worry if it is different from mine.
You should see the status highlighted in yellow, letting you know that your site deploy is in process. Please wait for this to finish. You can refresh while you wait – it should only take a few minutes.
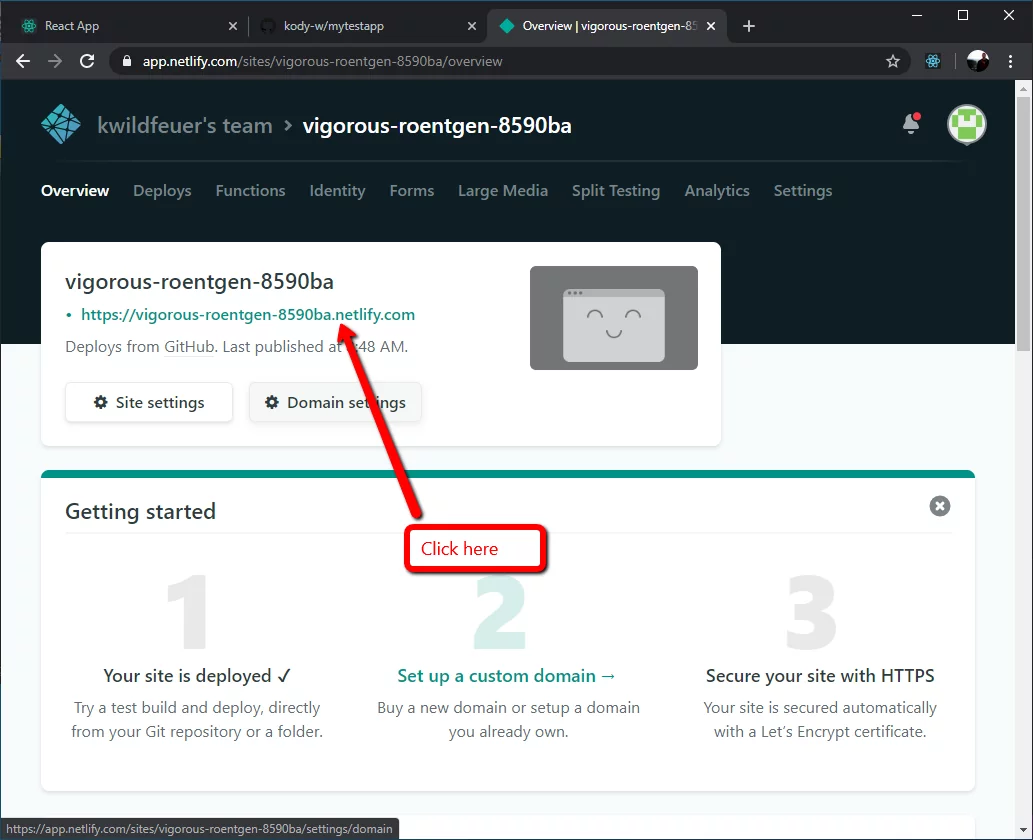
30. In a few minutes, you should see the status turn green.
Now click on the link.
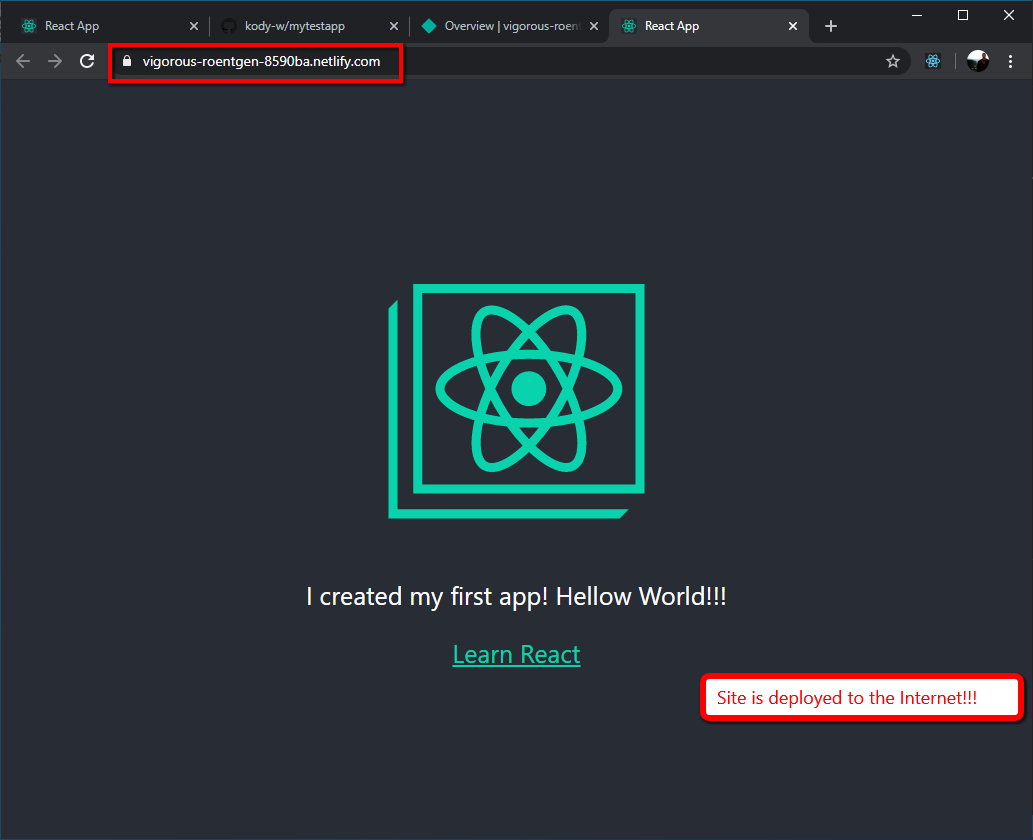
31. Your site is deployed to the internet! Now for the cool part. If you make any code changes and check it into your repository on GitHub, Netlify will automatically detect those changes and push them to your newly created and deployed site. Amazing!
Follow along below.
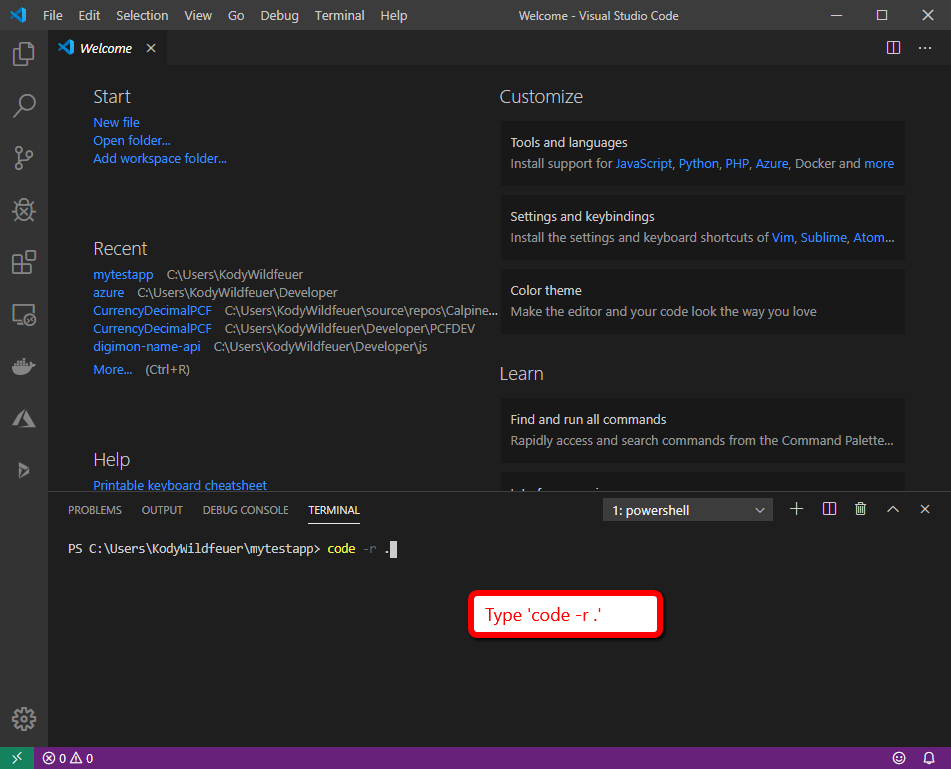
32. Now go back to VS Code and type the following in the terminal window and hit Enter: ‘code -r .’
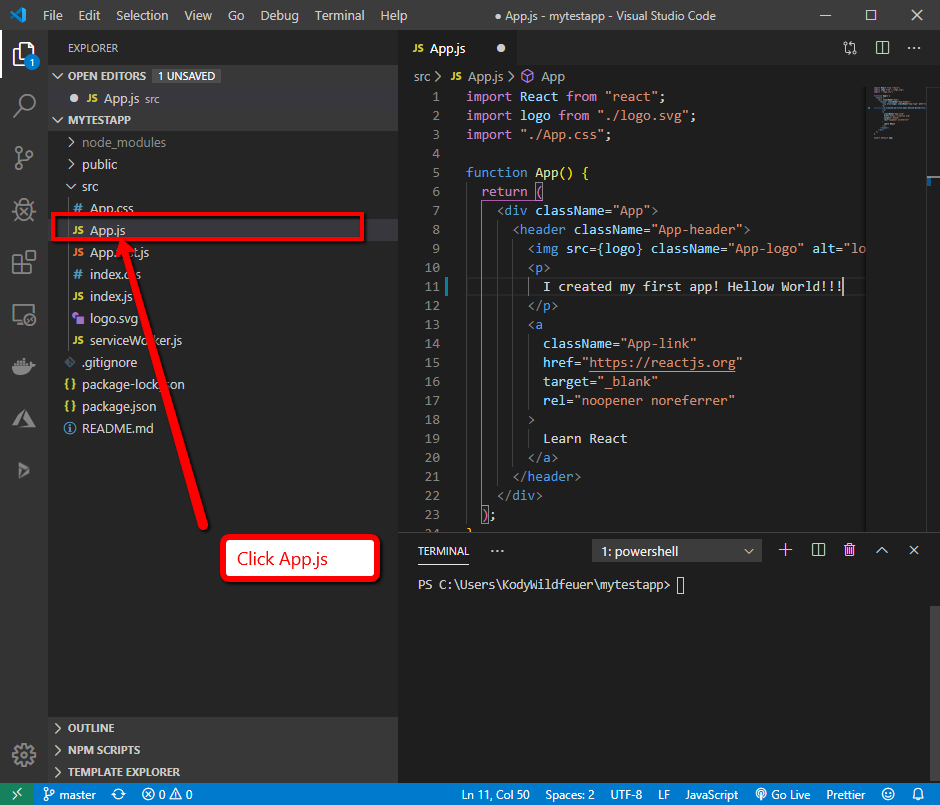
33. You will see a panel for the app open on the left side of the screen.
Click App.js
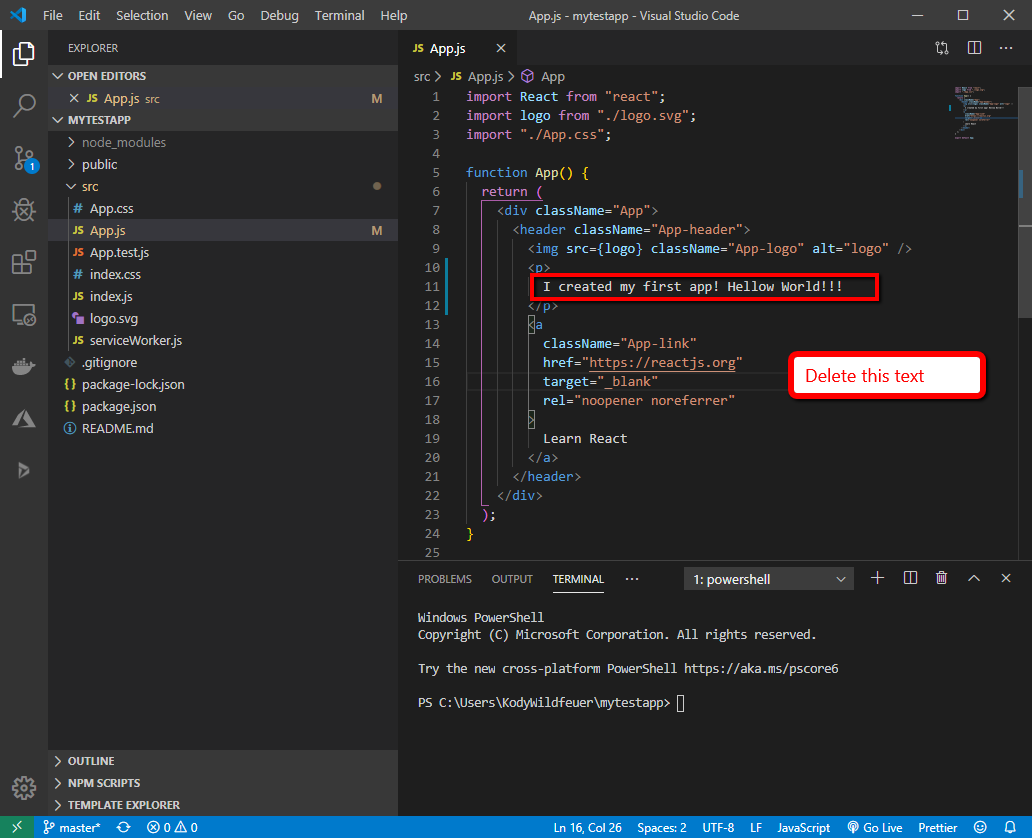
34. Delete the following line from the code.
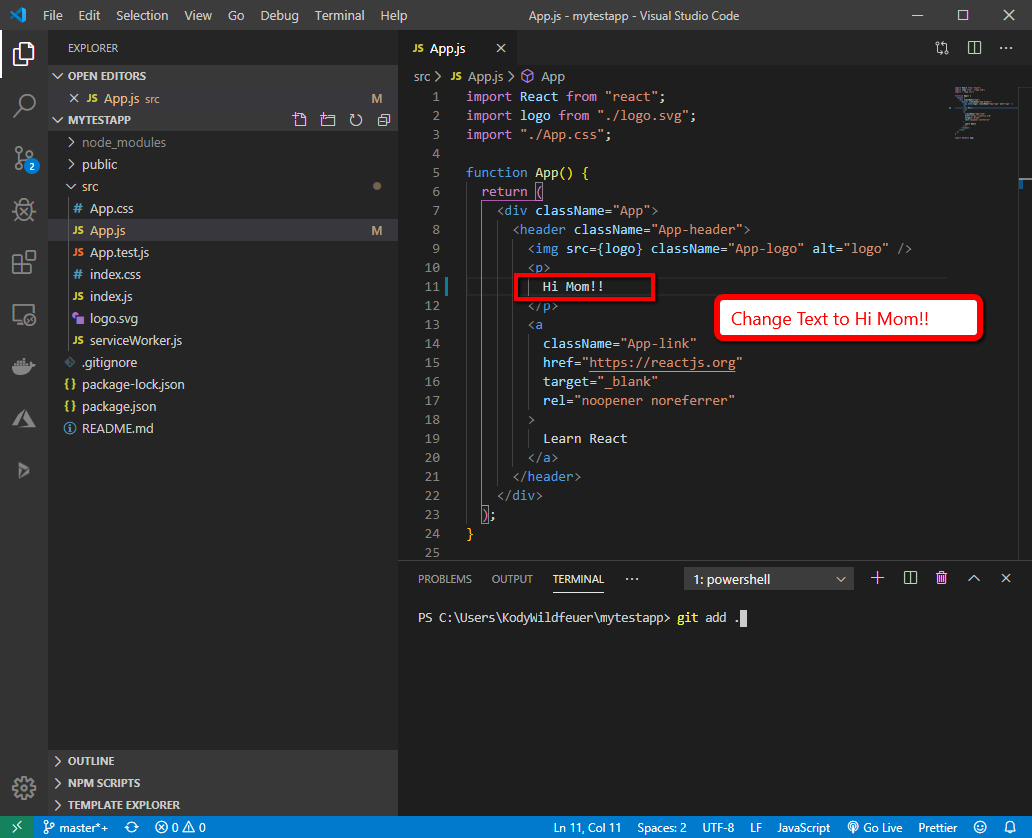
35. Change text to ‘Hi Mom!!’
36. In the terminal, type the command ‘git add’ and then press Enter.

37. Next type ‘git commit -m “Changed Message” ’
Then hit Enter.
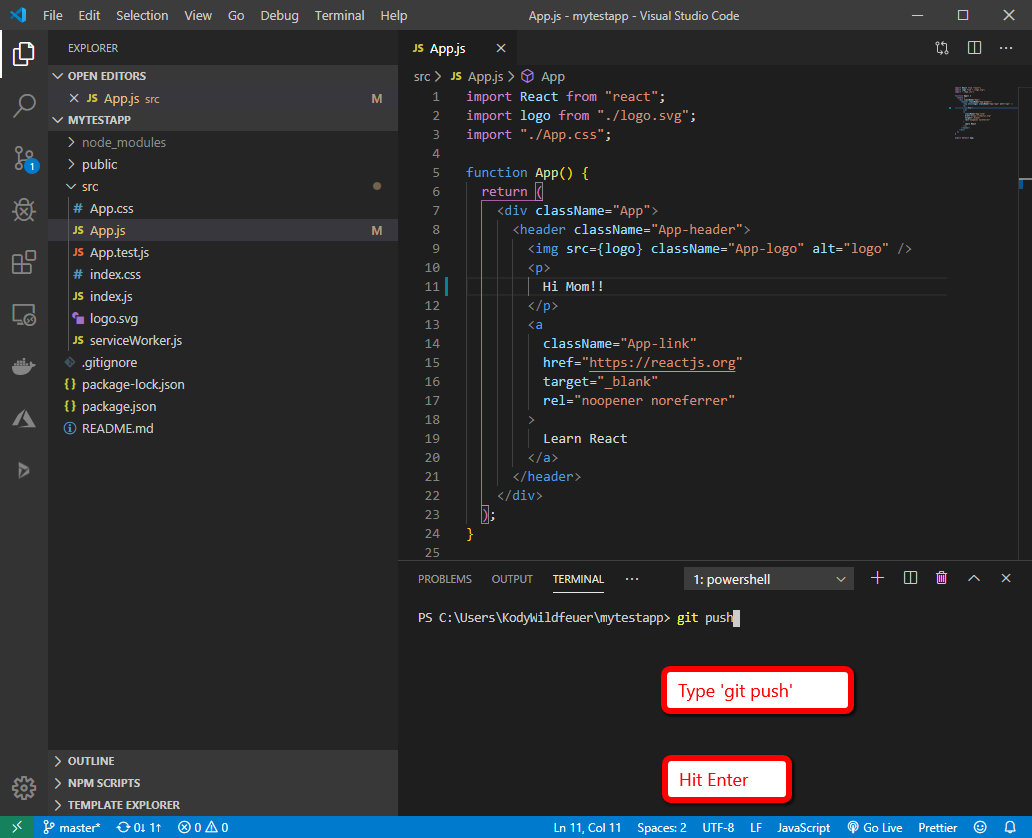
38. Next type ‘git push’
Hit Enter
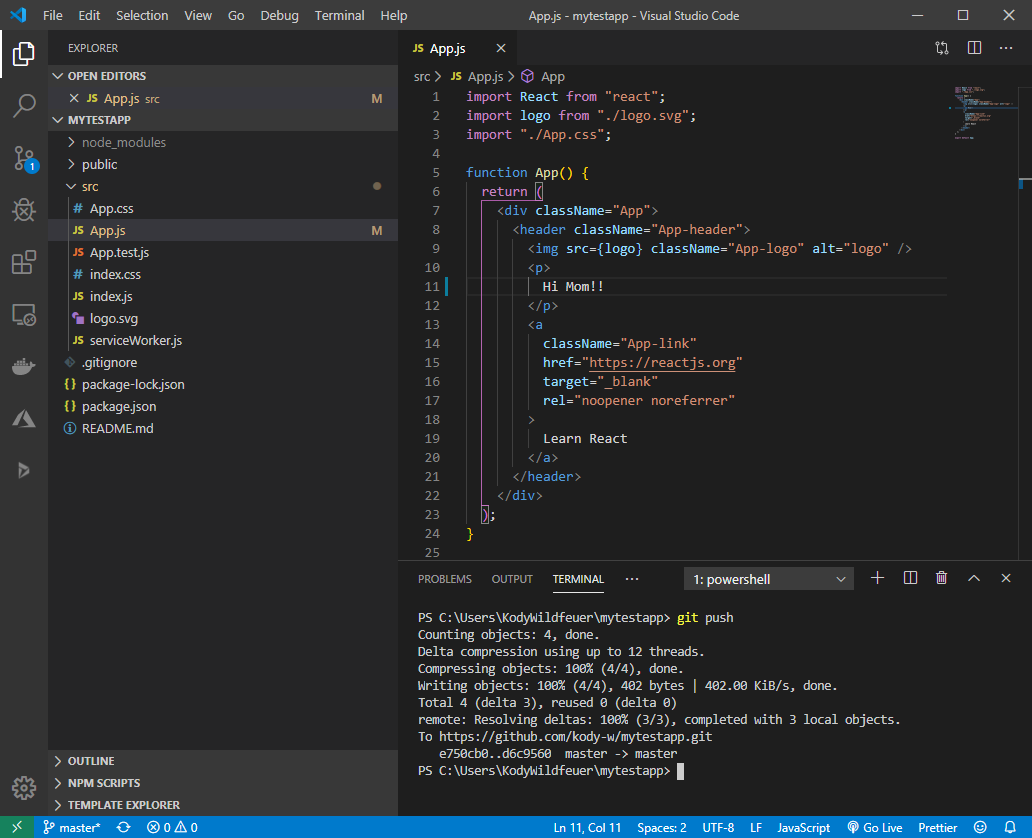
39. You should see a similar amount of text, as shown in the screen above. This pushed the change we made locally to the GitHub repository.
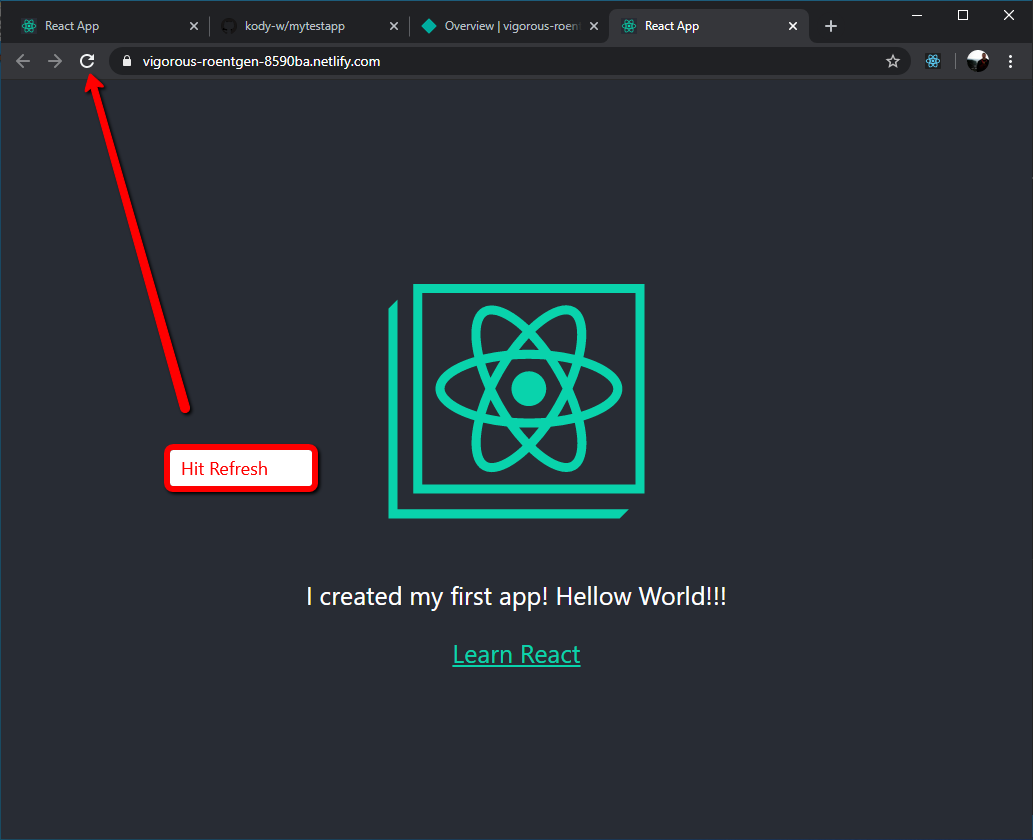
40. Go back to your live site and hit Refresh a few times. It could take a minute or two to change.
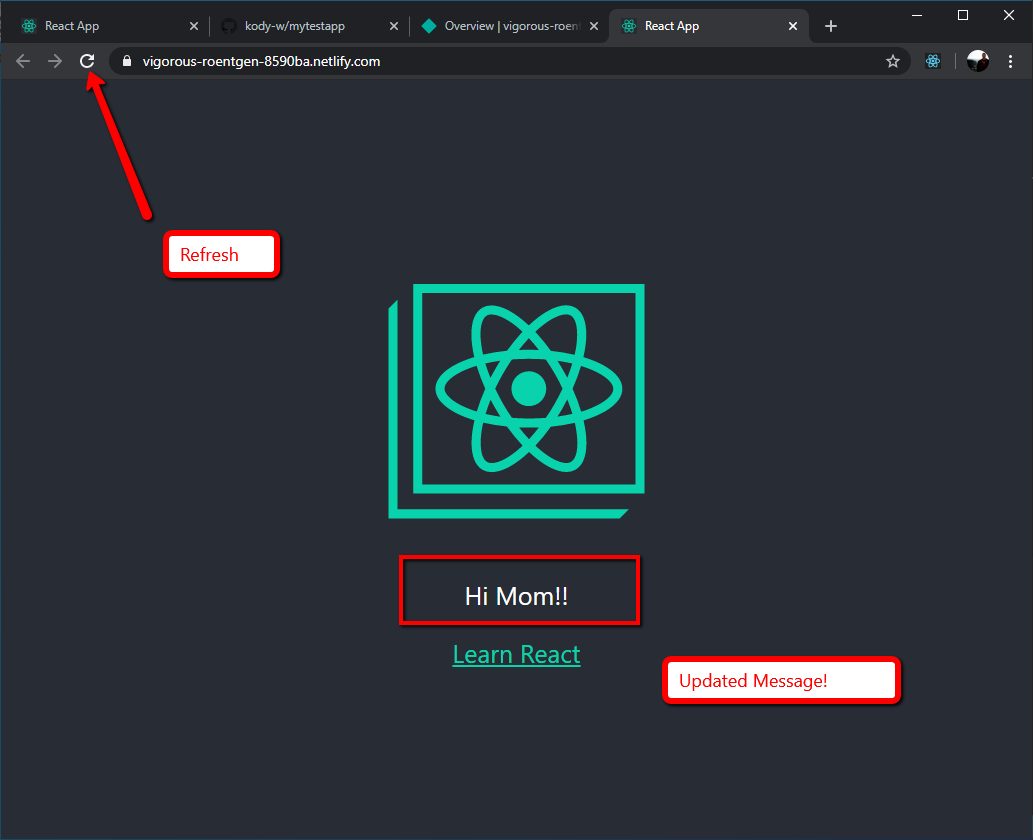
41. Now we can see the updated text on our site deployed to the internet. Woohoo!
There you go, folks; you can now use Netlify to get your React application exposed to the public web! On the contrary, the best part is that this whole process is FREE for minimal apps, which makes it perfect for a technical portfolio! If you have any questions or insights on this blog, please do share them using the comment box below! If you have questions about how AlphaBOLD can help your organization design, build and deploy React applications, please reach out to us at [email protected].
Happy Reacting!