How to screen record your automation test cases with C# and NUnit in Selenium

Osama Tahir
Introduction
Automation testers across the globe are familiar with how frustrating it is when an automation test fails at one specific moment. It is nerve-racking when we try to isolate the issue and cannot while running tests on a remote server. Furthermore, sometimes, the execution test is so long that it becomes impossible to watch every test instance. Similarly, another problematic scenario for automation testers is when they cannot find a suitable screen recorder for the framework. Although some scripting languages (Java) have support for screen recording, there are no support services for C#. Luckily, automation test cases with C# and NUnit in Selenium can end this common misery for automation testers.
This blog explains how easy it is to implement the screen recording feature on your NUnit Framework and customize the recording options later.
Experience Seamless Automation Testing
Discover the power of automated testing with our expert services. Reach out to us for a consultation and unleash the potential of your testing process.
Request a ConsultationSetting Up The Automation Framework
To start, we will first need to create a Basic NUnit framework or use the existing TDD framework. We will then create a TestScreenRecorder.cs file in the same folder as the solution where NUnit has been set up.
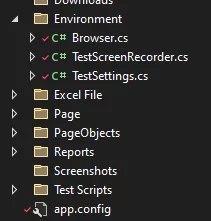
For our screen recording, we will be using an open-source NuGet package called ScreenRecorderLib. If you want more information on this library, it is available on its official documentation on GitHub. We will then move on to set up the TestScreenRecorder.cs file according to the official documentation of the library.
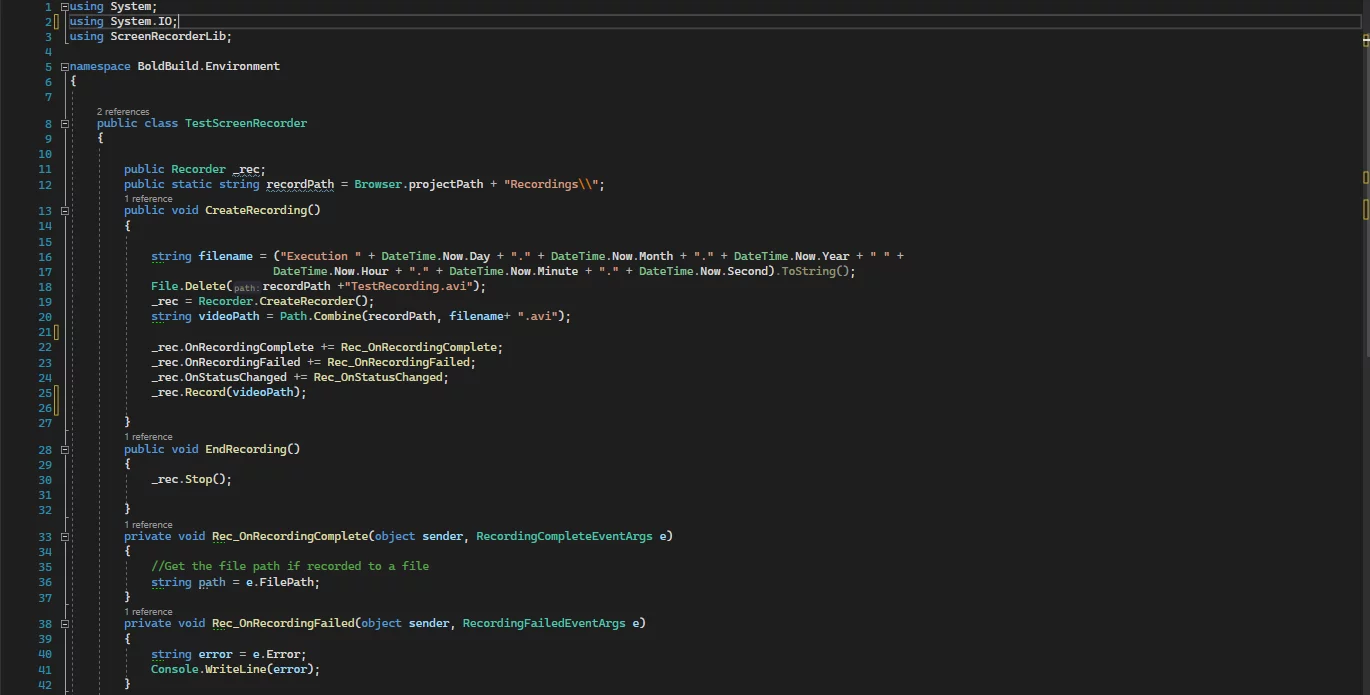
We will need to make a few adjustments to the code according to the requirement of our automation framework. These include:
- Adding our project destination as the path to where the recording will be saved.
- Adding the name of the file as Execution + Current Date and Time to keep track of our recordings
- Adding the library dependency (using ScreenRecorderLib;) at the top of the file.
Working With The Test Recorder Function
In step 2, we will create an object of the type “TestScreenRecorder” to ensure access to the functions of the class. We will create it in the same class where we set up the NUnit framework.
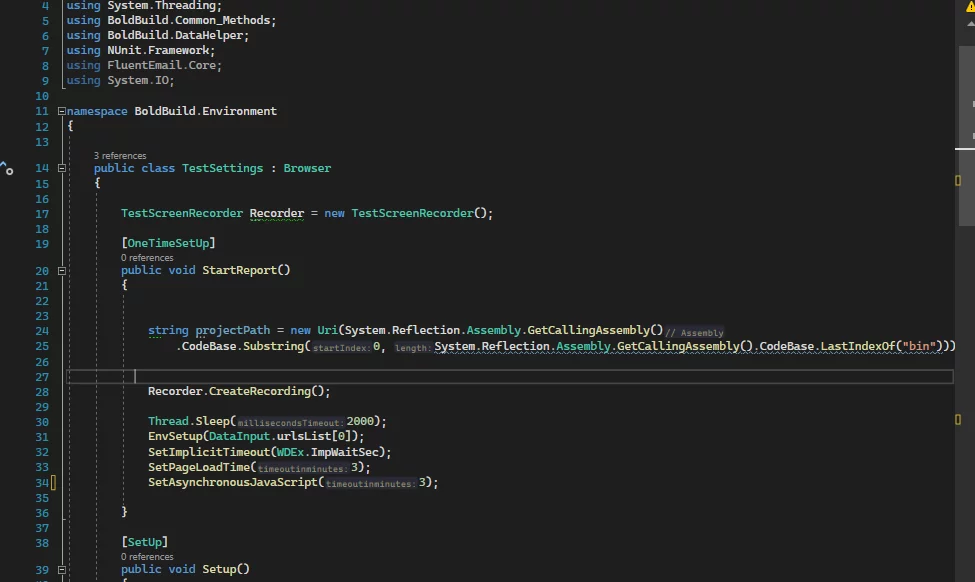
The user may can either record all unit tests in one go or record them separately based on his/her choice. Depending on the requirements of the user, the StartRecording function will be used in OneTimeSetup or Setup.
The OneTimeSetup option allows methods to be executed only once before all our tests are executed. The Setup option allows methods to be executed every time a new test method is called.
For the purpose of this blog, we will use the EndRecording function in TearDown or OneTimeTearDown.
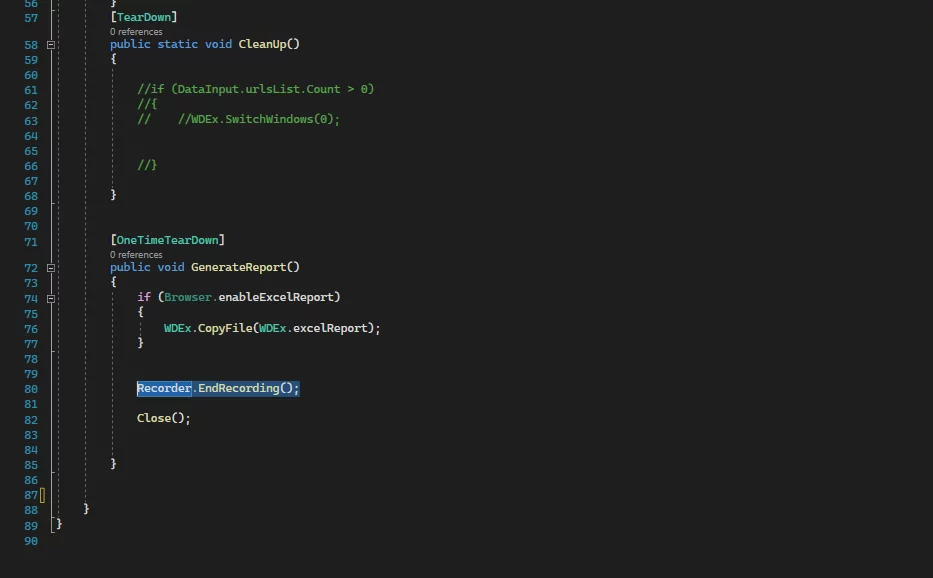
This will allow us to end recordings either at the end of each unit test or at the end of the complete test execution.
Once the above processes are executed, the user will be able to easily navigate to their projects folder and find the recording of the test execution. They can also run any of the videos to see what has been recorded. Furthermore, all interactions made during the process will also be recorded.

Additional Functions
In this blog, we have covered the basic syntax for recording using C# and NUnit. However, let’s suppose a user has specific requirements related to video/audio format. In that case, many other options can also be explored such as changing certain options like video resolution and audio codecs. These options need to be set up in the TestScreenRecorder.cs file before executing the test. Once the recording has started, no changes can be made to it.
Read more about Best Practices For Test Automation
Take your testing to the next level with our Automation Testing services.
Looking to streamline your automation testing process? Our Automation Testing services are designed to help you succeed.
Request a ConsultationConclusion
We hope this tutorial has helped you understand how you can integrate the test recording of your automation tests and that it helps you tackle the many issues of working on automation. If you want to learn more about the library’s functionalities, feel free to visit the official documentation on GitHub. You can also drop your questions in the comment box below.
Explore Recent Blog Posts


