
Using Web Resources to Display Business Intelligence Dashboards & Cards
A common need in every Dynamics 365 implementation is the ability to see charts, reports, and visualizations of data in the system. Many of these features are included by default, but customers with more extensive needs prefer to integrate Dynamics 365 with dedicated business intelligence tools like Power BI, Tableau, and Domo. This is near-seamless with Power BI, as it is intentionally designed from the ground up to be a partner to the Dynamics platform but requires a bit more elbow grease when using tools outside the Microsoft ecosystem.
In this blog, we will explore the process of adding a Card from Domo to the site map of Dynamics 365. There are a few ways to do this, but the most straightforward is to use Domo’s “Domo Everywhere” embedding behavior.
What is Domo Everywhere, and how will we use it?
“Domo Everywhere” allows Domo’s cards to be embedded into an external source. Domo provides pre-formatted HTML text when sharing objects; we can use this in external services where we can modify its HTML. In this example, we will be adding Domo’s HTML to a web resource in Dynamics 365, then adding this web resource to the site map so we can see the card.
Getting the HTML from Domo
When viewing a report or card in Domo, there is a button called Share. When clicked, it brings up a dropdown menu, and at the bottom there is an option: Embed Card:

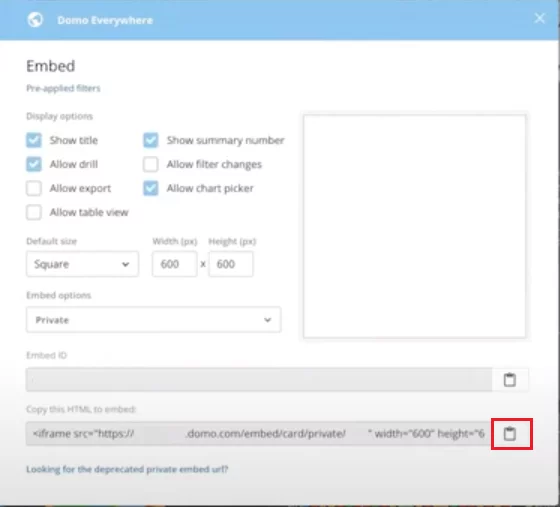
In the Domo Everywhere interface, a few display options can be chosen, depending on how the card should be displayed. Once happy with the display options and size, click on the Copy icon to the right of the Copy this HTML to embed field:
Embedding HTML in a Dynamic 365 web resource
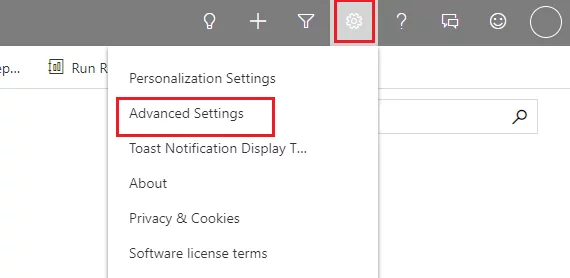
In Dynamics, navigate to the Advanced Settings section:
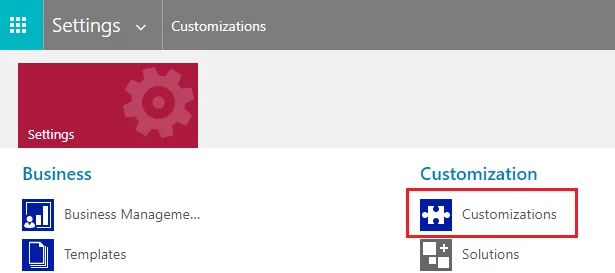
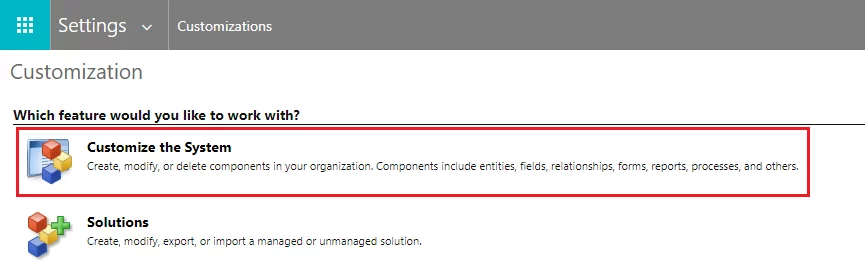
Navigate to Customizations and either create a solution or open the default solution with Customize the System. For simplicity, let’s click on Customize the System.
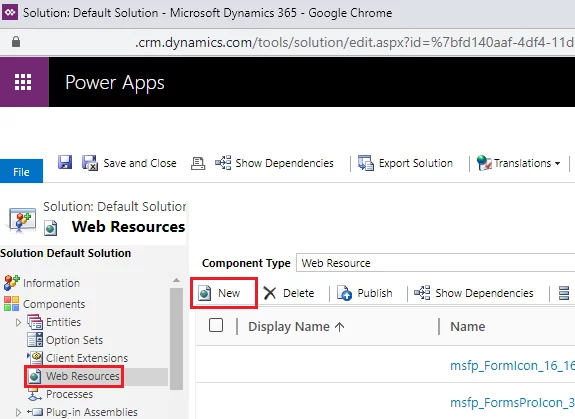
In the resulting window, click on Web Resources, then New:
Add a Name and Display Name, then set the Type to Webpage (HTML).
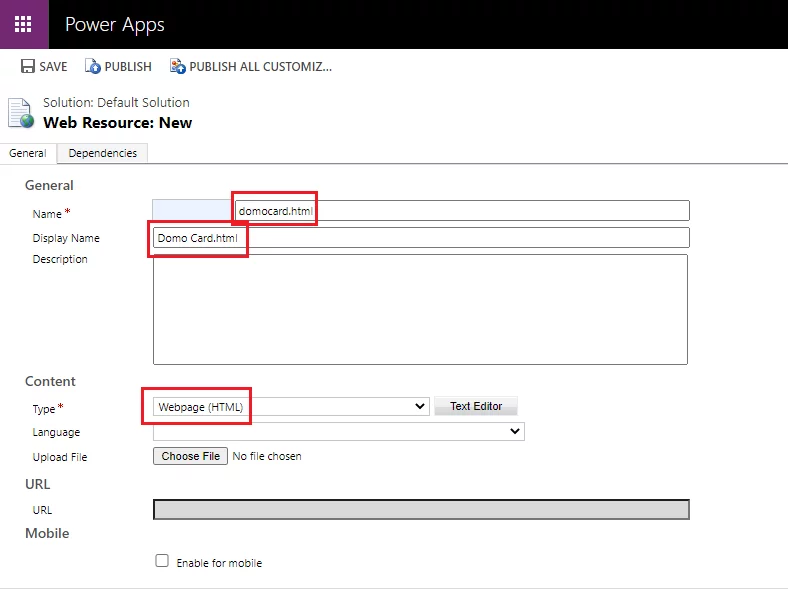
Click on the Text Editor button, and paste the following into the Source tab, replacing “link copied from Domo” with the link copied from Domo earlier.
<html>
<head>
<meta>
</head>
<body style=“word-wrap: break-word;” onfocusout=“parent.setEmailRange();”>
<iframe src=“link copied from Domo”
width=“600” height=“600” marginheight=“0” marginwidth=“0” frameborder=“0” scrolling=“no”>
</iframe>
</body>
</html>
Once finished, Save and Publish the web resource.
Adding the web resource to the site map
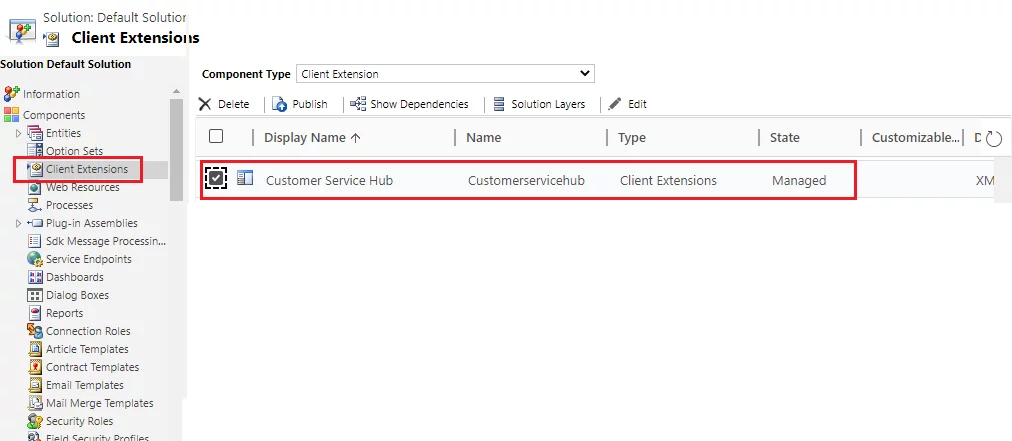
Finally, we need to add the web resource to the site map so it’s viewable by users. To do so, open the relevant app in Client Extensions. In this case, we will use the out-of-the-box Customer Service Hub.
In the Sitemap Designer, add a new Subarea wherever you want the card to be visible. Select a Type of Web Resource, then find the appropriate URL (web resource name) for the web resource we just created. Add a Title, then Save and Publish the site map.
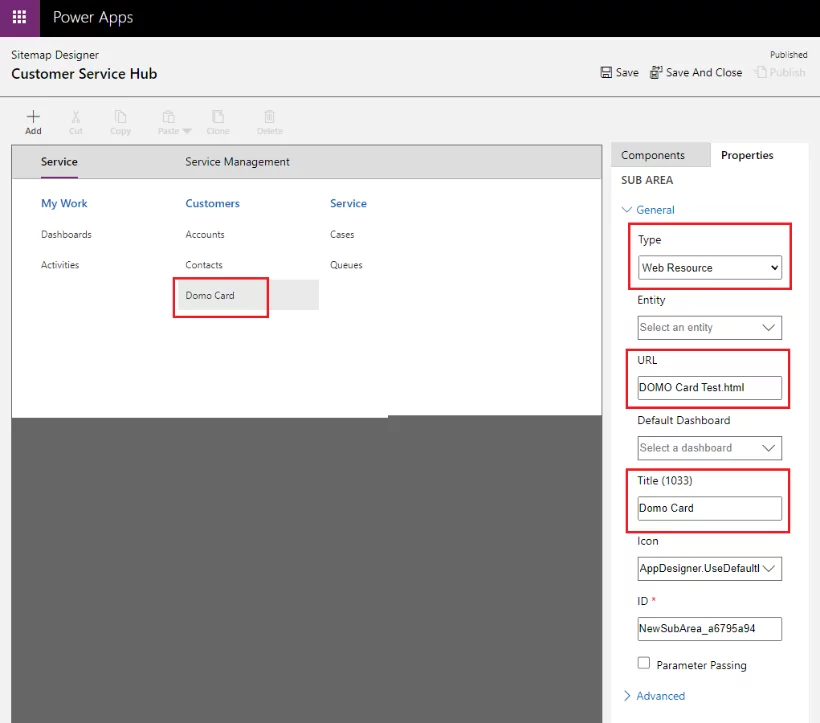
At this point everything is complete, and the card will be visible where you specified!
Conclusion:
Domo is a great tool for business intelligence, and it doesn’t have to stop at its borders. When combined with Dynamics 365’s robust web resource configuration, Domo Everywhere allows for tight integration and exposure of BI visualizations directly in Dynamics.