If you are familiar with Power Apps, you likely know how inconvenient it can be when a Power Apps form has too many fields crowded on a single screen. This overcrowding reduces usability and makes it challenging for fields to render smoothly. In this blog, we’ll show you how adding tabs in Power Apps forms can solve this issue and enhance the user experience. By creating a form in Power Apps with tabs, you can streamline data entry and ensure a smoother rendering process. Let’s dive in!
Create a SharePoint List for Adding Tabs in Power Apps Forms
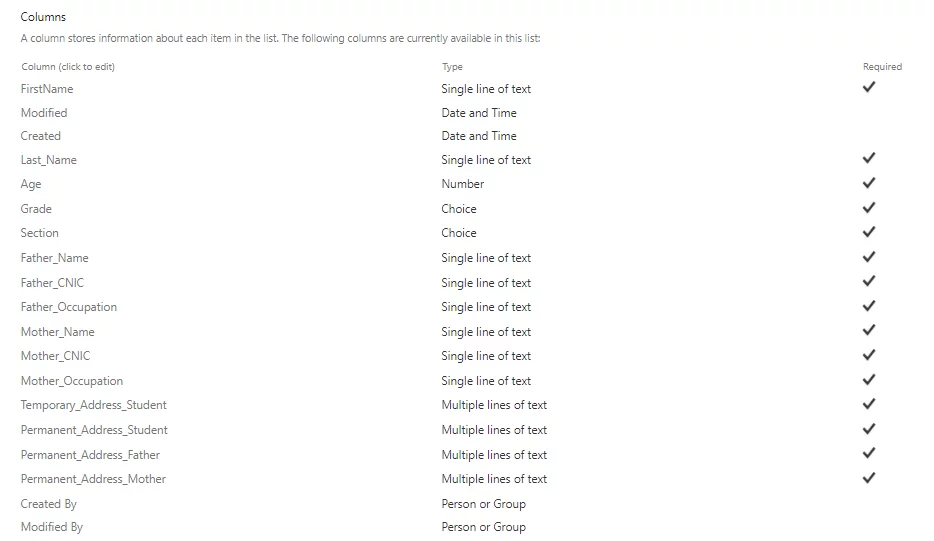
Before you can create a corresponding form in Power Apps, you first need to create a SharePoint list. For the purpose of this blog, we’ve chosen a Student Information Gathering List, named “Student_Info.”
Boost Efficiency with Customized Power Apps Forms
C-level executives rely on AlphaBOLD to simplify complex workflows by adding tabs in Power Apps forms. Improve usability and streamline data processing with our SharePoint integration services.
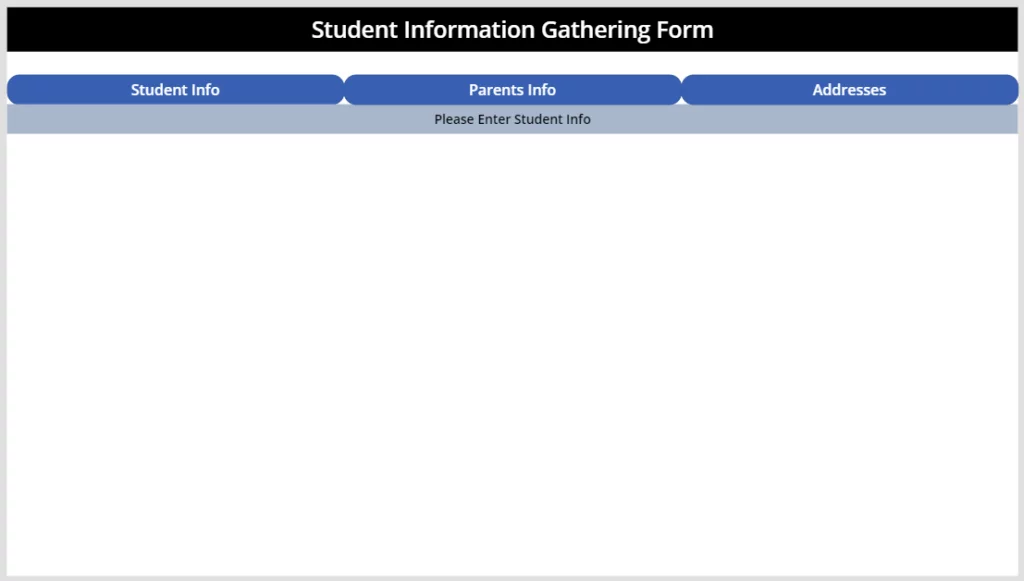
Now, let’s create a new Power Apps form and design it as shown below. In this example, the “Student Info,” “Parent Info,” and “Addresses” buttons have a border radius of about 17 to ensure a clean design. Additionally, the “Student Information Gathering Form” and “Please Enter Address” labels are styled to improve the form’s usability.
Adding Functionality to the Tabs in Power Apps Forms:
Next, we’ll add the functionality that makes this form interactive. Using the “OnSelect” property for each button, we’ll determine which sections of the form will display based on the value of the variables.
In the “OnSelect” functionality for the “Student Info” button, enter the following code:
Set(
StudentInfo,
true
);
Set(ShowText,”Please Enter Student Info”);
Set(
ParentsInfo,
false
);
Set(
AddressInfo,
false
);
In the “OnSelect” functionality of “Parent Info” enter the following code
Set(
StudentInfo,
true
);
Set(ShowText,”Please Enter Student Info”);
Set(
ParentsInfo,
false
);
Set(
AddressInfo,
false
);
In the “OnSelect” functionality of “Parent Info” enter the following code
Set(
StudentInfo,
false
);
Set(
ParentsInfo,
true
); Set(ShowText,”Please Enter Parent Info”);
Set(
AddressInfo,
false
);
In the “OnSelect” functionality of “Addresses” enter the following code:
Set(
StudentInfo,
false
);
Set(
ParentsInfo,
false
);
Set(
AddressInfo,
true
); Set(ShowText,”Please Enter Address Info”);
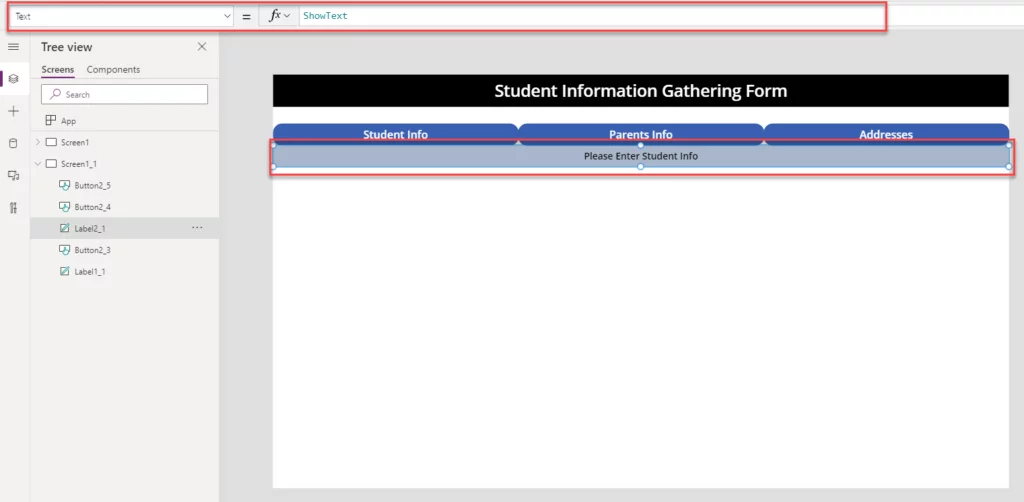
In the “Text” property of the second label, enter the “ShowText” variable. This will dynamically update the label’s text based on the active section of the form.
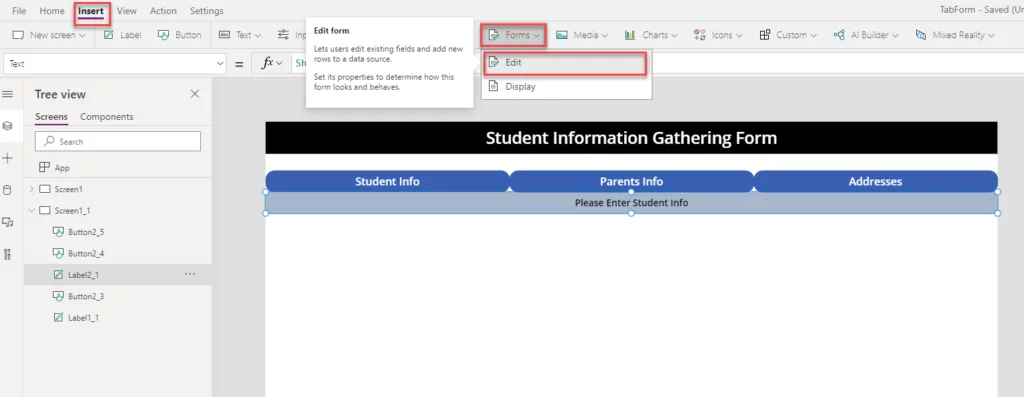
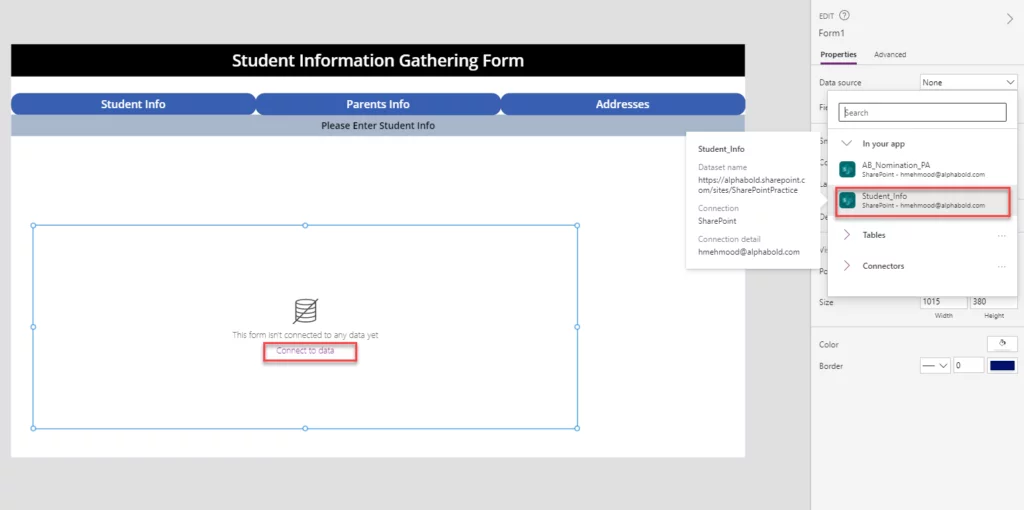
To ensure your form works seamlessly, connect it to the “Student_Info” SharePoint list. This connection enables data submission directly to the list without requiring manual input.
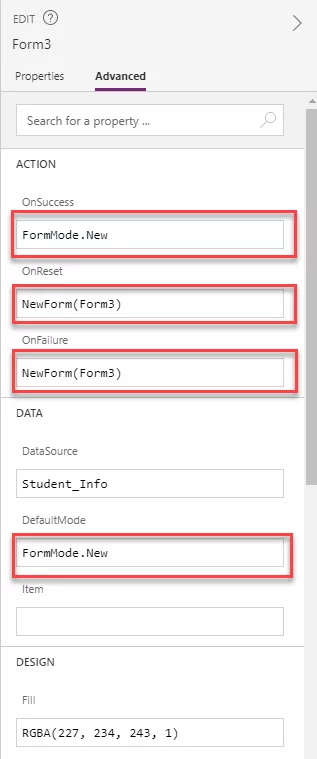
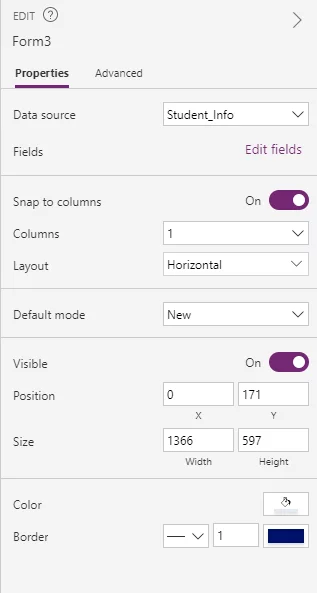
Change Form mode from Edit to New:
The form is in “Edit Mode” by default, we must set its mode value to New, as shown below.
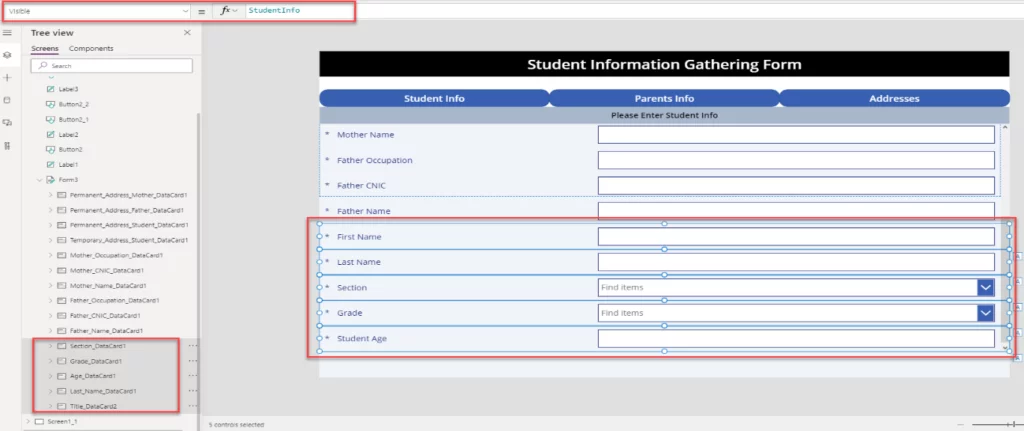
Designing The Form:
Design the form according to this form so that it looks pretty and is easy to manage.
To change the Visible functionality of different columns in the form, perform the following steps Set the “Visible” property of the cards that deal with Addresses to “AddressInfo” as shown below.
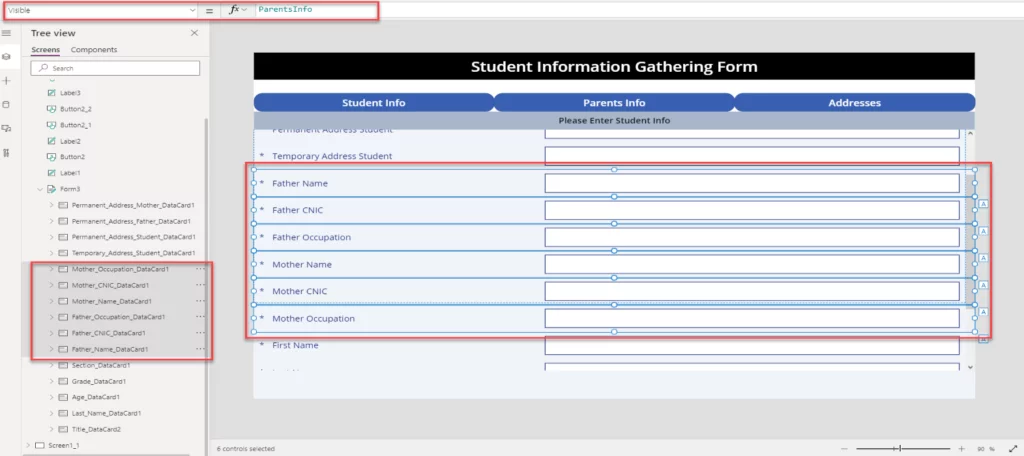
Set the “Visible” property of the cards that deal with Parent Info to “ParentsInfo” as shown below.
Set the “Visible” property of the cards that deal with Student Info to “StudentInfo” as shown below.
Now the form has become tabbed. By clicking on different tabs, the user can navigate between different fields.
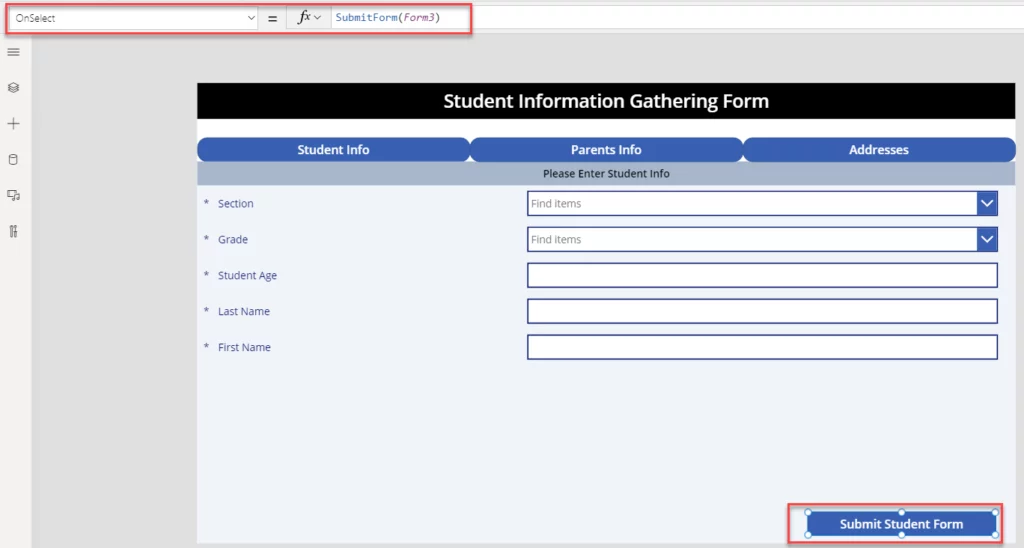
Submitting The Form:
Now that we have made the form tabbed, we must also add the functionality to submit the form. Add a button and set its “Text” value to “Submit Student Form”, set the “OnSelect” functionality of the button to
SubmitForm(Form3);
This will submit the form data to the SharePoint list.
Streamline Your Power Apps with Expert Form Design
C-level executives rely on AlphaBOLD to simplify complex workflows by adding tabs in Power Apps forms. Improve usability and streamline data processing with our SharePoint integration services.
In this blog, we explored how adding tabs in Power Apps forms can significantly improve usability and ensure smoother data rendering. By creating a form in Power Apps with tabs, you can break down complex forms into manageable sections, improving both user experience and functionality.
We walked through the process of creating a SharePoint list, designing a Power Apps form, and adding functionality to make the form interactive. We also covered how to adjust the Visible properties of form fields and connect your forms to a SharePoint list, ensuring a seamless user experience.
Integrating tabs into your Power Apps forms streamlines navigation and enhances performance, making it easier for users to interact with forms containing multiple sections. For more insights on improving Power Apps efficiency, check out this article on optimizing Power Apps performance.
By implementing these techniques, your forms can handle complex data effectively and ensure smooth user interactions.