How to use Conditional Content Blocks in Dynamics 365 Marketing

Rosalinda Valenzuela
Introduction
Dynamics 365 Marketing now has a new and easy way to create contextual, hyper-personalized emails for customers with Conditional Dynamic Content. This new feature allows users to create real-time content tailored to customer preferences and behavior, boosting customer satisfaction and loyalty.
By leveraging machine learning and artificial intelligence capabilities, Microsoft Dynamics 365 Conditional Dynamic Content ensures customers receive valuable content that leads to a better customer experience.
PS: this feature has only been added to the Real-Time Marketing area and cannot be accessed within Outbound Marketing.
Explore the Possibilities of Microsoft Dynamics 365 for Marketing
How to Add and Edit Conditional Dynamic Content?
Before adding Conditional Dynamic Content, please ensure you work in Real-Time Marketing. Begin composing your email by adding text boxes, images, buttons, etc.
- Once you have identified an area you want to personalize, highlight the section by selecting an item from within. If you plan to add conditional content to a single item, advance to step 2. If you would like to select multiple items, navigate to the top left corner of the selected item and click on the dropdown. Choose the Section option to highlight the entire section.
- In the example below, the user can highlight the entire section by selecting the photo and the image.

- After highlighting items, navigate to the top right of your section and select the icon showing two people with a gear. The highlighted box will then turn purple to indicate that it is a Conditional Dynamic Content block.

- On the right side of the designer, the user is provided with a new tab named Variations. In this tab, select +New Condition to define a condition for the user block.
Read more: Improving the Customer Journey with Dynamics 365 Marketing
Optimize your Campaigns with Smart Solutions!
Learn how conditional content blocks in Dynamics 365 Marketing can tailor your campaigns to each unique audience with AlphaBOLD.
Request a Demo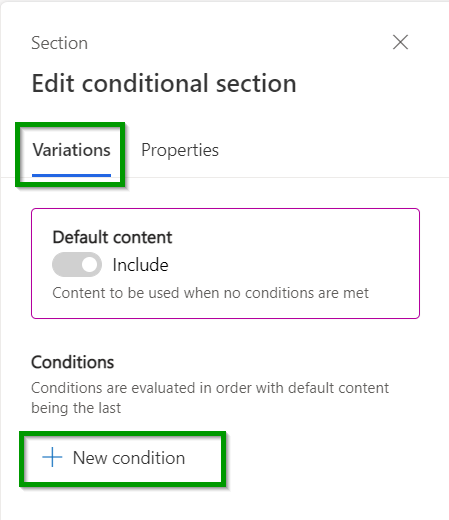
- From here, users are given two options to condition from:
- Condition on an attribute allows the user to select attributes from the Contact, Leads table, related records, and triggers. These triggers include contact updates, event registrations, website visits, etc.
- A condition on segment membership allows the user to select users who are included in or excluded from a specific segment.
In this example, the user selects Condition on an attribute to condition on the address field. When complete, select Save.

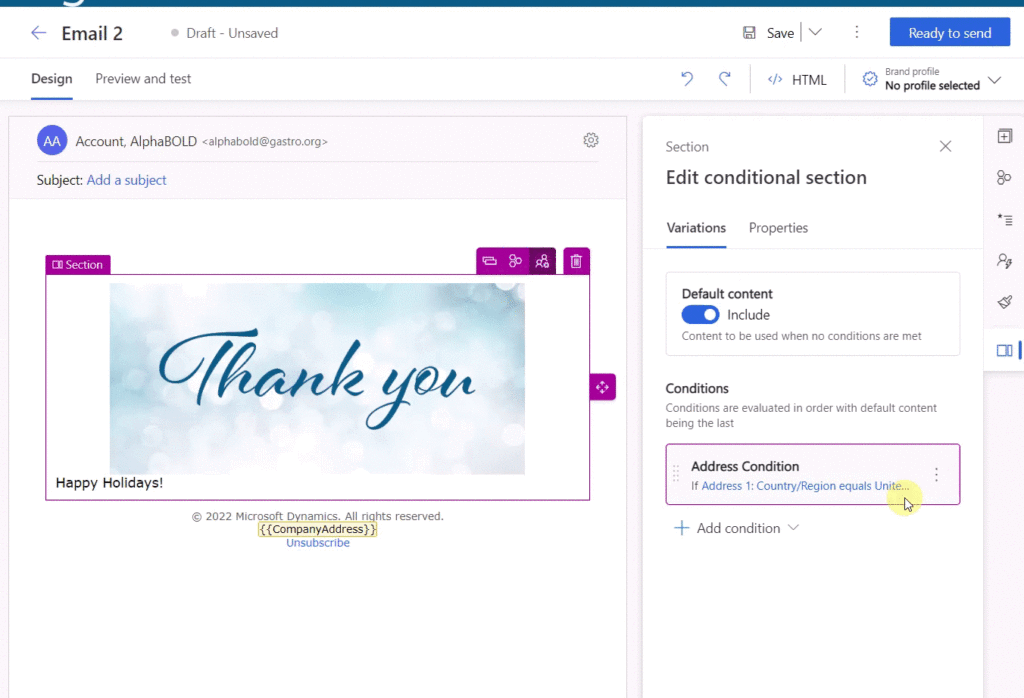
- Select the Properties tab to change the conditioned section by editing the items as normal. Return to the Variations tab and click the default or conditional options to compare your two content blocks.
- If you need to return and edit the default or conditional content blocks, select the corresponding box on the Variation tab and edit your email using the designer shown above!
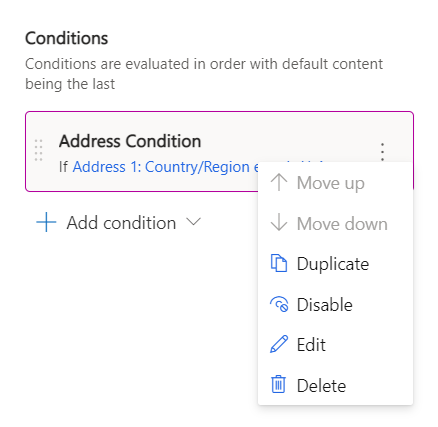
- Select the three dots next to the conditional box for more options if you edit or remove a specific condition.
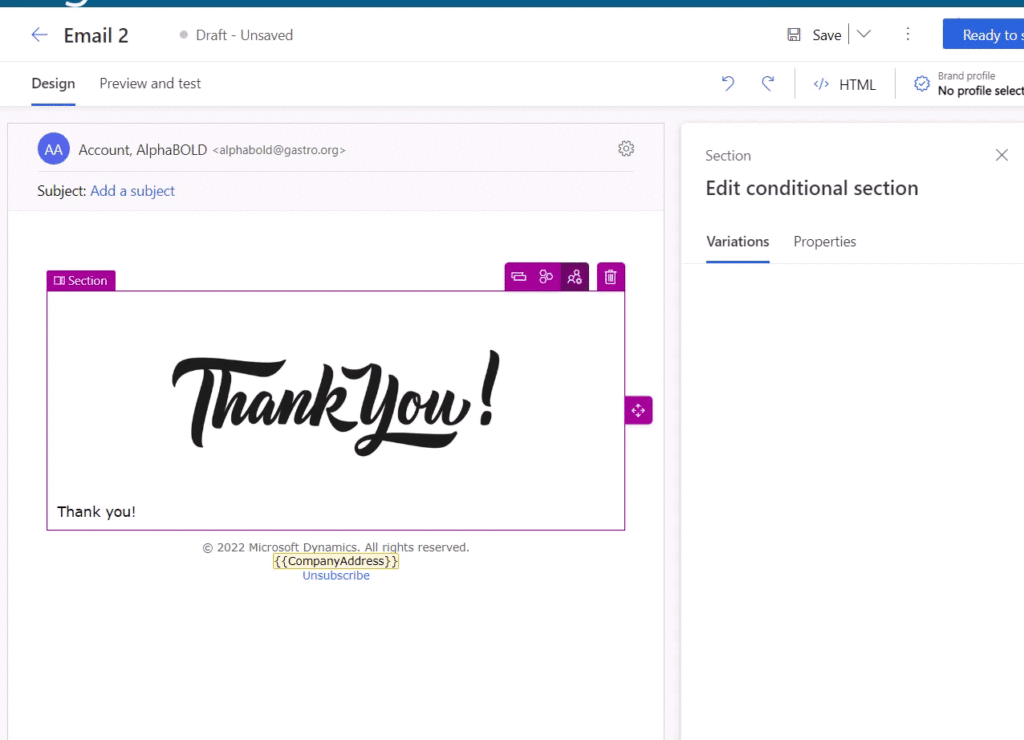
To remove Conditional Content from your email, select the Conditional Dynamic Content icon at the top right on the content block and confirm the deletion.
You can send your hyper-personalized emails using the new Conditional Dynamic Content feature!
Read more: Closing Leads Faster with Dynamics 365 Marketing – Automating Handoffs & Sales
Transform Marketing Strategy with AlphaBOLD!
Experience the benefits of Dynamics 365 Marketing and how AlphaBOLD can help you craft targeted, compelling marketing messages.
Request a DemoConclusion
Conditional content blocks in Dynamics 365 Marketing allow you to show or hide content based on certain conditions or criteria. This can be useful for creating more targeted and personalized marketing campaigns.


