

Multi-factor authentication (MFA) is becoming a necessity for organizations looking to tighten their security. As a result, developers can face difficulty connecting their applications to Dynamics 365.
In this article, we will explore how to connect XrmToolBox to MFA enabled Dynamics 365.
Note: Per the official XrmToolBox website, the only way to connect to MFA secured organizations is to use a connection string. But in order to do that, we will have to create an Azure AD app and set some parameters. Not to worry, we will guide you through every step of the way.
Learn more about our Microsoft Dynamics 365 Services
Registering an Azure AD App
- Go to azure.com
- Log in using your credentials
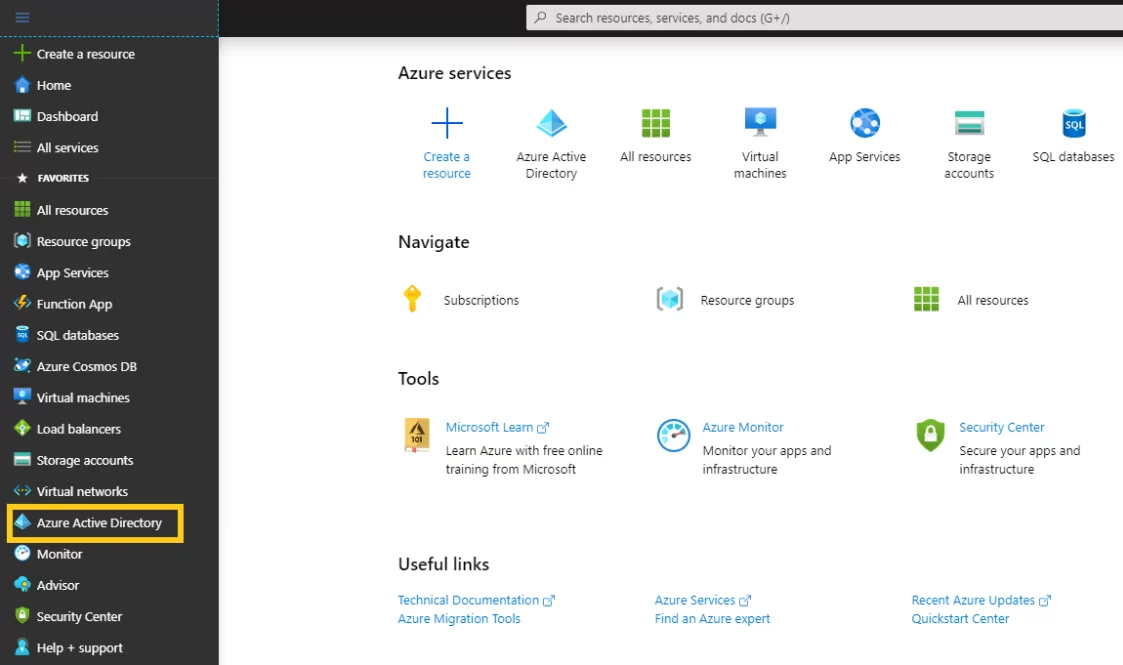
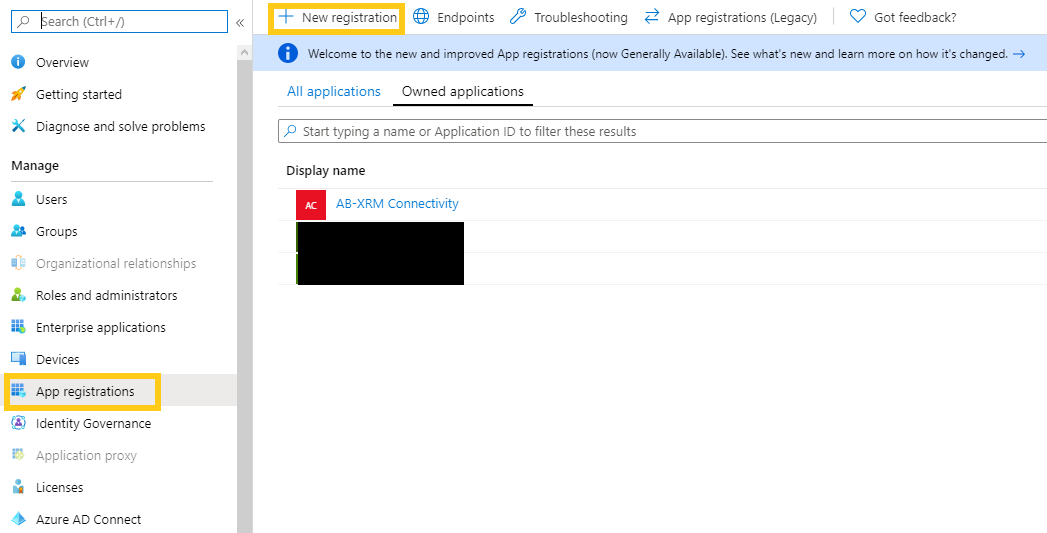
- Expand the Portal Menu and select Azure Active Directory -> App Registrations -> New Registration


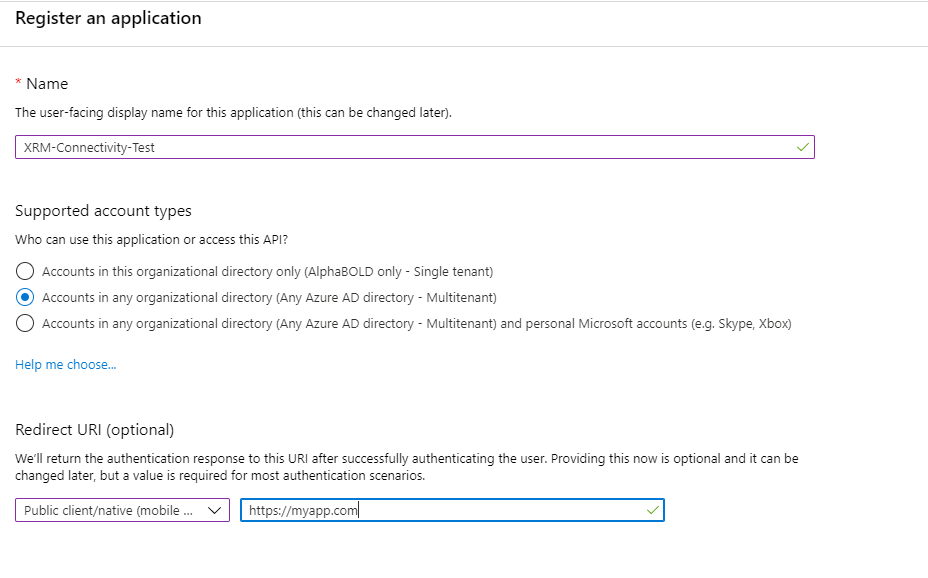
- Enter a meaningful App Name
- Select Accounts in any organizational directory option from the Supported account types
- Set the Redirect URI. In case you don’t have one, we will show you how to get Redirect URI in the next step. For now, leave the field blank and click Register.

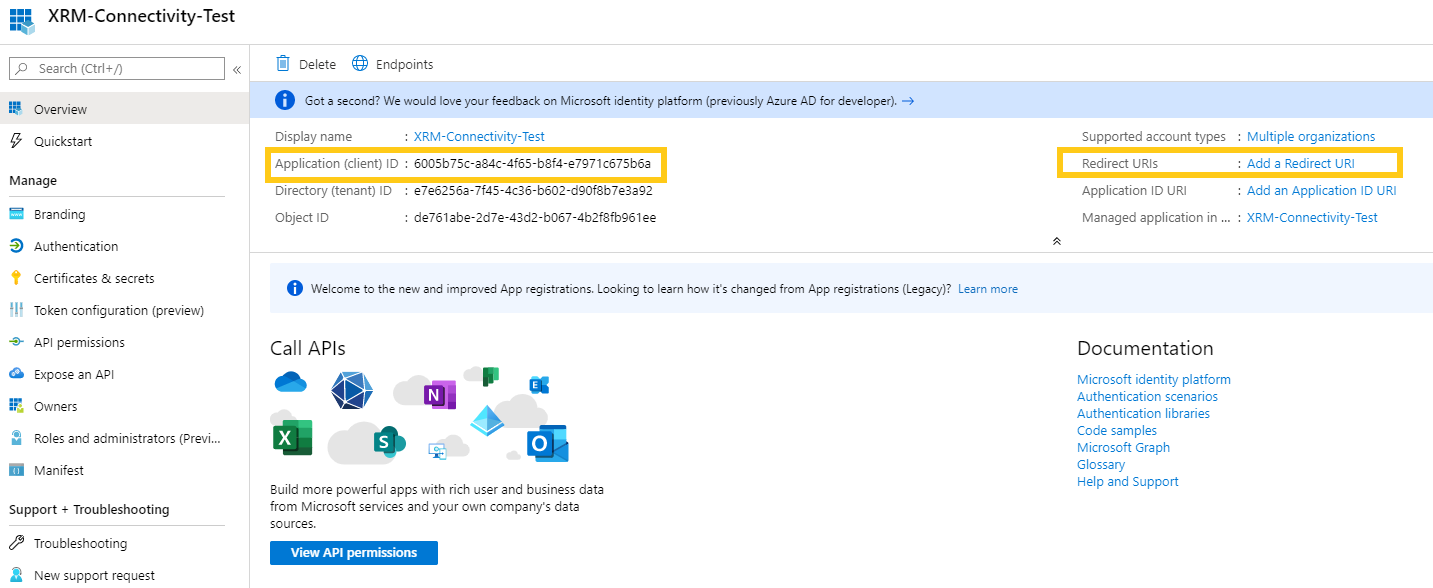
- Acquiring Redirect URI:
- Save the Application (client) ID for later use
- Click on Add a Redirect URI

- Click on Switch to the old experience

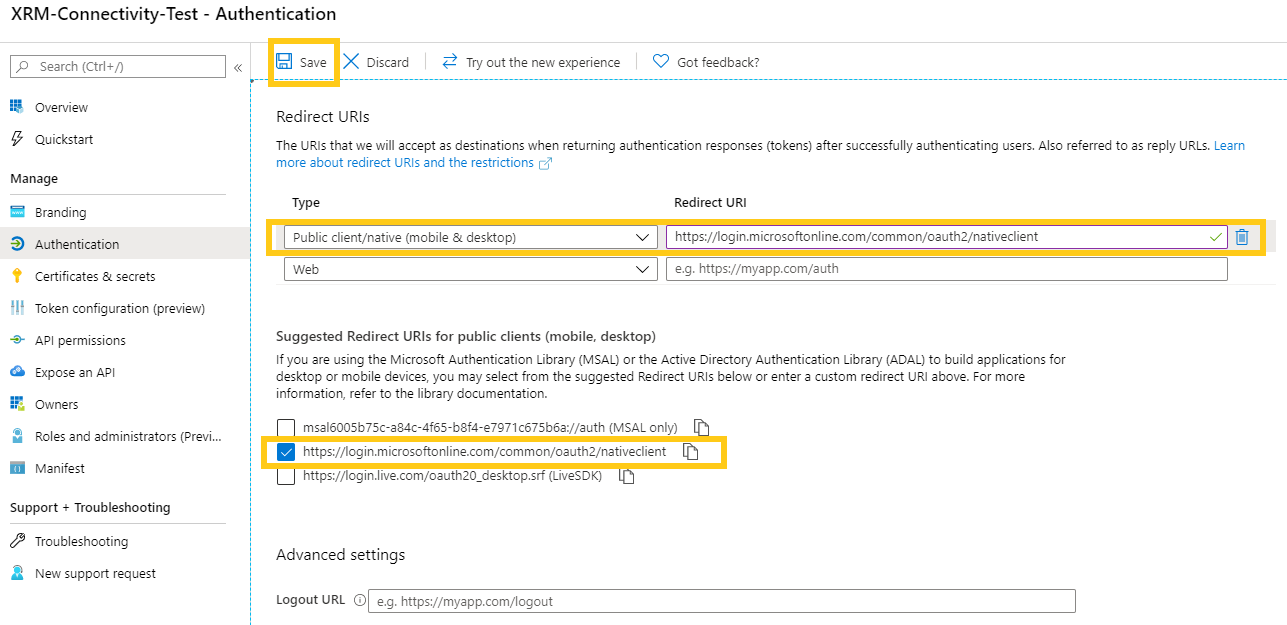
- In Suggested Redirect URIs for public client’s section, choose the URI as shown in the screenshot and copy it
- In Redirect URIs section, change the Type: Web to Public client/native (mobile & desktop) using the dropdown icon and paste the Redirect URI from the previous step
- Click Save

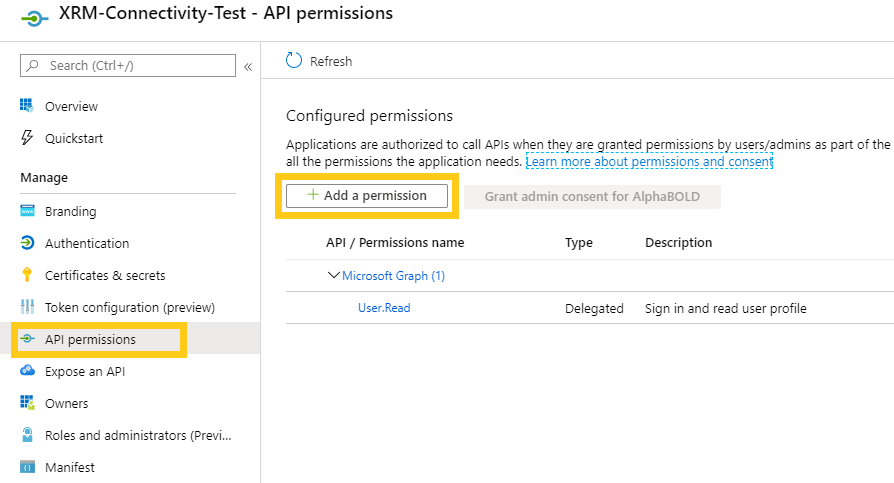
- Set API Permissions
- Select API permissions tab, click on Add a permission.

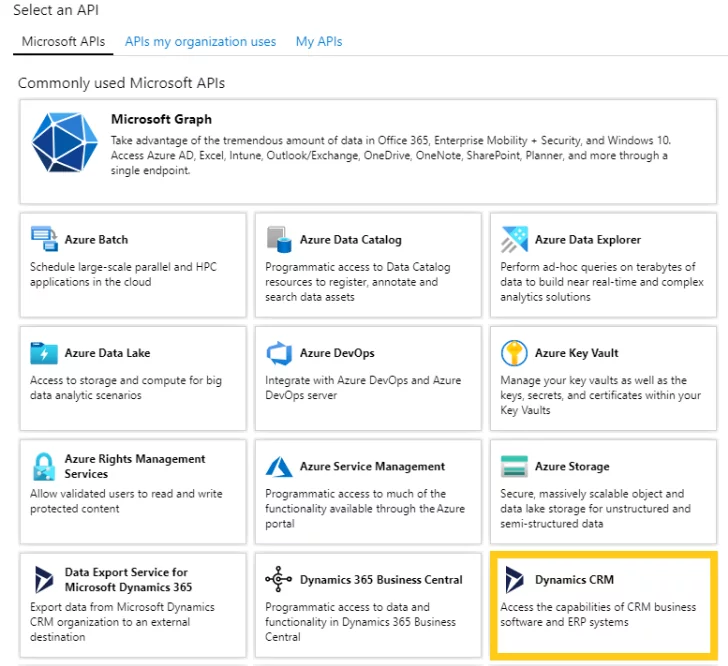
- Select Dynamics CRM from Microsoft APIs tab

- Click on Delegated Permissions and check the user_impersonation permission
- Click on Add Permissions at the bottom

- Select API permissions tab, click on Add a permission.


Testing the Connection
Now that we have registered an application, it’s time to check the connection using XrmToolBox.
- Open XrmToolBox and select Connect
- Choose Connection String option
AuthType=OAuth;[email protected];Password=your_password;Url=https://organizationname.crm.dynamics.com;AppId=bc7e0048-9516-4ba3-81c7-540d48d6bc71;RedirectUri=https://someurl;TokenCacheStorePath =c:\Temp\Oauth\cache.txt;LoginPrompt=Always
- Edit this connection string using your credentials and select
- Upon successful connection, the following dialogue box appears.
- You may name this connection for re-use.
There you have it, folks! Now, you can easily connect to secured D365 organizations using XrmToolBox. For further reading on how to register an app with azure active directory, click here. If you would like to access the Official XrmToolBox Documentation, click here.
Also, if you have any comments, questions, or insights on this blog, use the comment box below to get in touch with us! We will be more than happy to help with your questions!
If you have any question or queries, do not hesitate to reach out to us!
Happy Connecting!
[ninja_form id=4]