Introduction
In this blog post, we will learn how to create role-based SiteMap navigation in Dynamics 365 CE. In a role-based Sitemap, we will restrict the area of Sitemap based on the security roles of a user.
In Dynamics 365, the SiteMap provides you the structure for navigation.The system evaluates it alongside your security privileges to display navigation options within the application. If your security privileges do not provide read access to an entity laid out in the SiteMap, that navigation option will not be available to you. The <Privilege> element can also be used to specify privilege requirements to view a page that is not related to a specific entity.
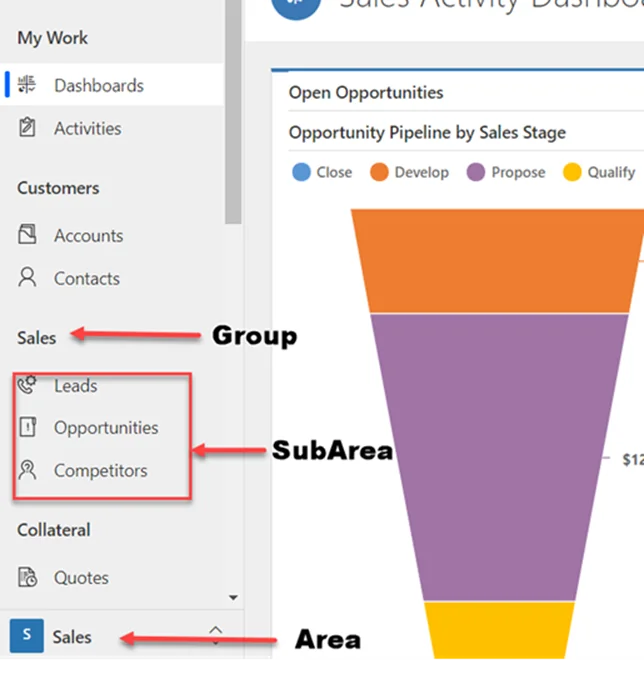
Moreover, in the SiteMap, we have areas, groups, and subareas. Selectable areas appear at the bottom of the navigation bar. When you select a certain area, it will be displayed on the navigation bar on the left. The available groups and subareas listed under that area are displayed, as shown in the following image:
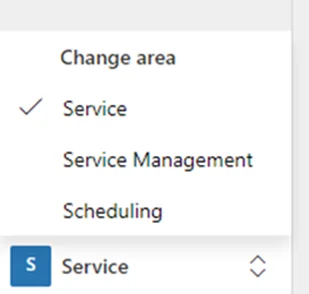
In the below image, you can see that we have multiple areas in our customer service hub, and now we will restrict these areas for users based on their security roles.
Read More: Dynamics 365 Customer Service – Which App Is Best For My Customer?
Optimize Dynamics 365 CE Navigation with AlphaBOLD!
Seeking a seamless navigation experience in Dynamics 365 CE? Partner with AlphaBOLD for expert guidance in creating a role-based sitemap that enhances user efficiency.
Request a DemoRole-Based SiteMap
To restrict navigation, we are going to perform the following steps:
- Create custom navigation entities so that D365 will create a custom security group for each entity.
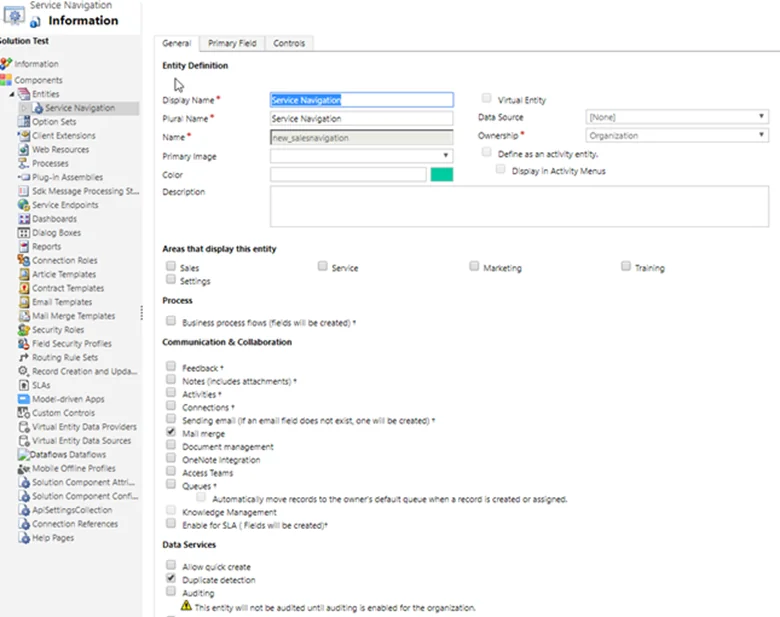
- Update the Base Security role for each of those groups with ‘Read’ privilege to the newly created Service navigation custom entity so that only the Service Users can access the service area.

- Next, we need to update the SiteMap privileges for all the Sub Areas.
- In the screenshot below, you can see that the main CRM navigation area (Service) that we are interested in hiding consists of Sub Areas, which are entities crucial to sitemap navigation in Dynamics 365.
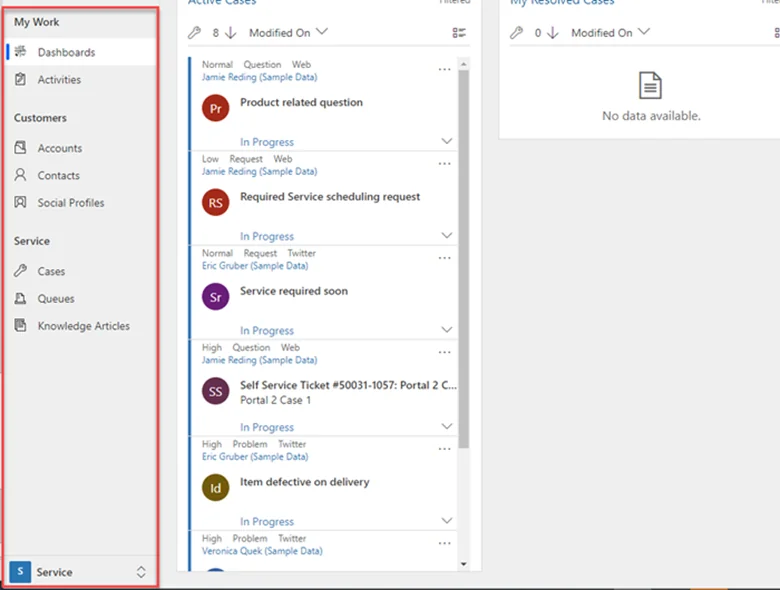
- To hide the Navigation Area, we need to hide all the Subarea objects. To do this, we need to set the Read privilege on the Subarea to the corresponding custom Navigation entity we created earlier.
- We can either export the SiteMap in the Solution RibbonDiffXML or use the out-of-the-box (OOB), SiteMap editor. This blog will focus on the second approach, the OOB Site Map Editor one.
Unlock Seamless Navigation in Dynamics 365 CE!
Enhance user experience with our Dynamics 365 Customer Engagement services. Elevate your sitemap navigation in Dynamics 365 strategy today!
Request a DemoSiteMap Editor
- To set the Privilege on the SubAreas using SiteMap editor, we need to perform the following steps:
- First click on the gear icon on the top right corner of your application and select advance setting.
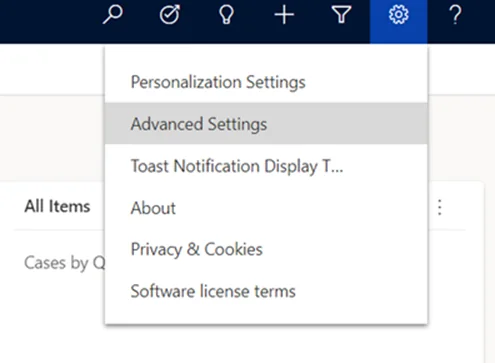
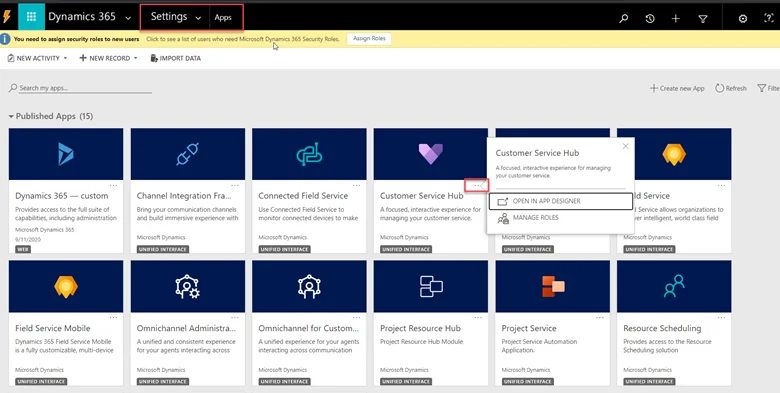
- Under settings, go to My Apps and select the application in which you want to restrict the navigation area. In our case, the app name is Customer Service Hub. After selecting the application, click on more options (…)
-
- Now click on the “OPEN IN APP DESIGNER” option. This will redirect you to the Power Apps App Designer page. On this page, click on “Site Map Designer” to customize the site map.
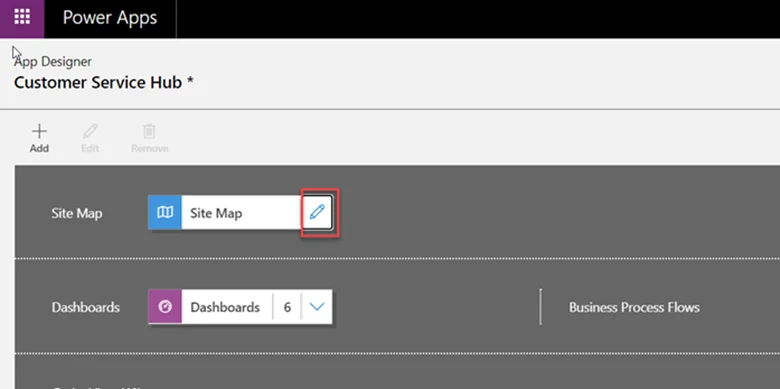
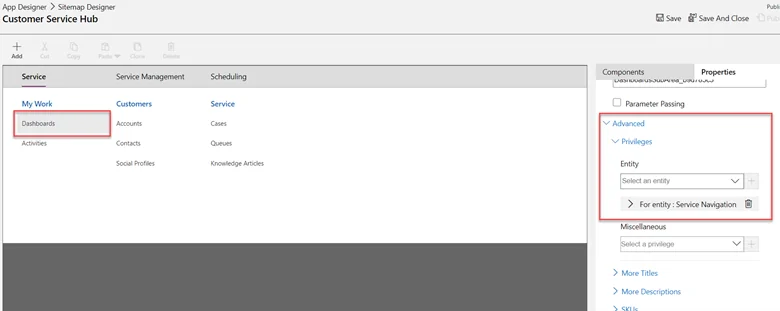
- Now select any of the SubAreas under Area Service.
- On the right side, under the properties window, click on Advance, then on Privileges. Select the entity ‘Service Navigation’ we created earlier, and then click on the “+” button.
-
- Expand the command and check only the Read command.
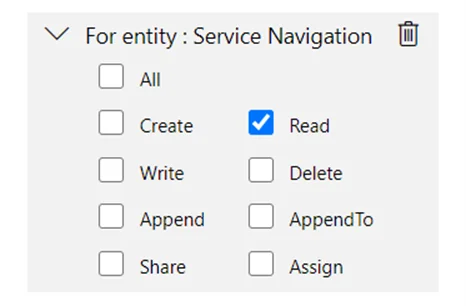
- Perform steps 4 and 5 for all the SubAreas appearing under the Service Area.
- After setting the Read privilege against all the SubAreas, click on Save on the top right corner and then click on Publish.
- Next, log in as a user without the “Service Navigation” Read Privilege, and you will not see the Service Area.
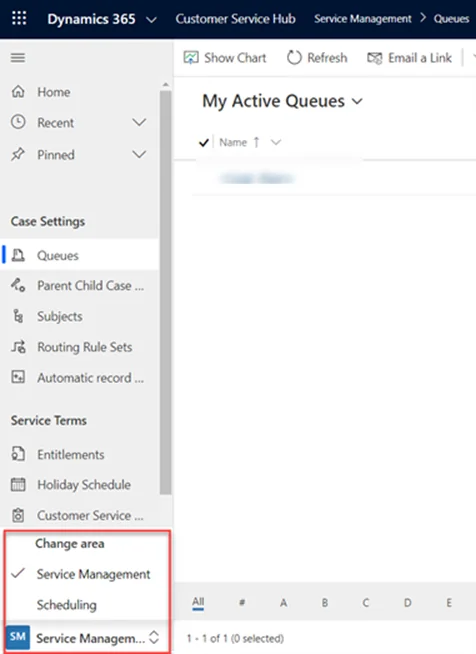
- As you see in the above screenshot, the “Service” area is no more visible to the logged-in user.
- Complete the Privileges for the rest of the Security Groups so that the Areas are locked down consistent with their corresponding custom navigation entity. In our case, there will be three Custom Navigation Entities:
- Service Navigation
- Service Management Navigation
- Scheduling Navigation
Conclusion
In this blog, we have learned how to restrict sitemap navigation in Dynamics 365 areas or navigation within an app based on the security roles of a user. Firstly, we created a custom entity and, based on the privileges associated with that entity, we restricted the subareas (entities). Subsequently, we utilized the OOB Sitemap editor to set the privileges on these subareas. By following the guidelines in this blog, you can significantly improve the sitemap navigation in Dynamics 365 for any app present in your Dynamics 365 CE.
Moreover, if you wish to reset your sitemap navigation in Dynamics 365 to the default settings, you have several options at your disposal. You can use various available SiteMap editors, such as XRMToolBox and XRM.tools, to roll back to the default settings if necessary.
If you have any question or queries, do not hesitate to reach out to us!
Explore Recent Blog Posts


