
Microsoft provides the benefit of building no-code apps from the canvas in PowerApps. One can design the complete app by just dragging and dropping elements on the canvas and adding simple expressions for specifying logic. Apps built in this way can use data from a variety of sources which are called connectors. These connectors include on-premises and online data sources such as Microsoft Dataverse, Power BI (Business Intelligence), SharePoint, Excel, Twitter, Office 365, etc. Now, once an app is built and published, it can be shared among users and can be run in a browser, mobile, or tablet or integrated with other apps such as Power BI and Teams, to name a few.
Canvas Apps have various templates to start with or completely design an app from scratch by customizing screens, adding forms, data sources, form viewer and galleries, dragging the elements such as shapes, icons, media, etc.
Learn more about Dynamics 365!
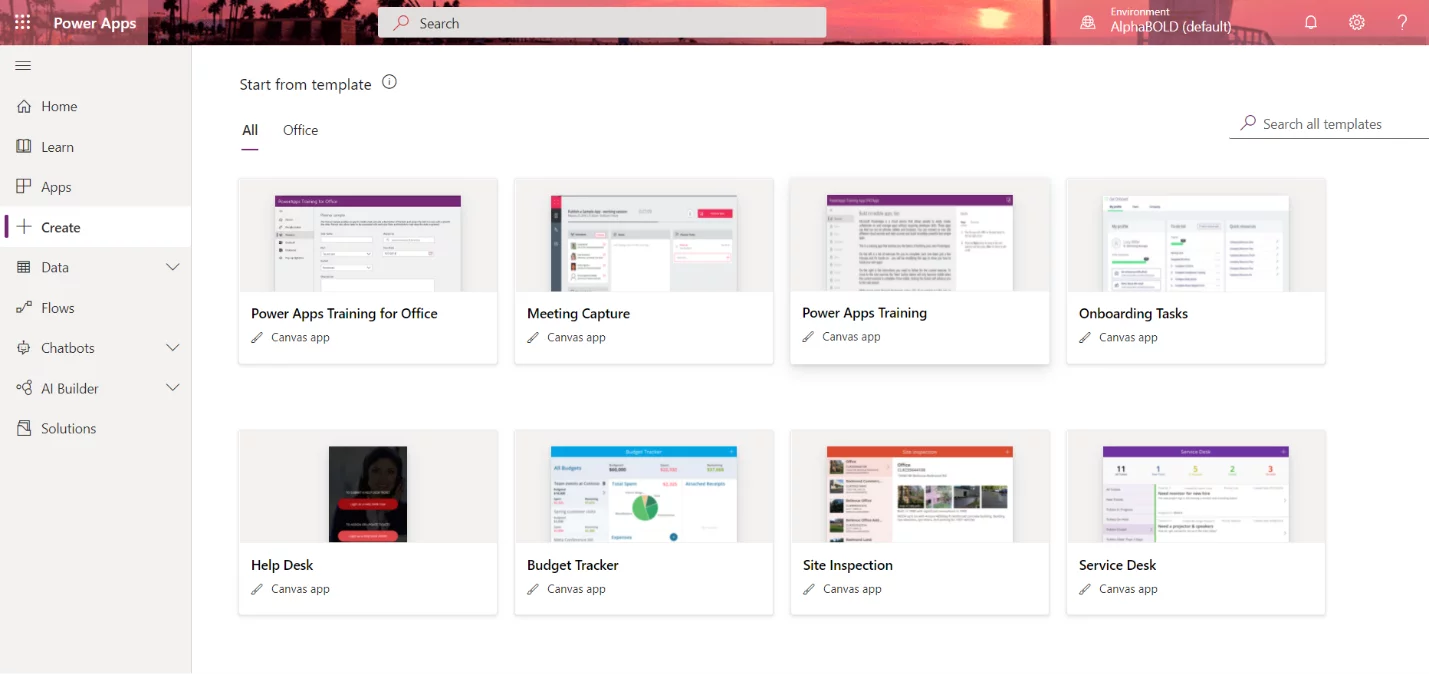
1. Above are a few of the templates offered by PowerApps. But here, we will be building a blank canvas app with a simple design for reserving blog topics. This App will use Excel online, Office 365 Users (for fetching user-related details), and embedded in Teams as a personal app.
Let us build a Canvas App!
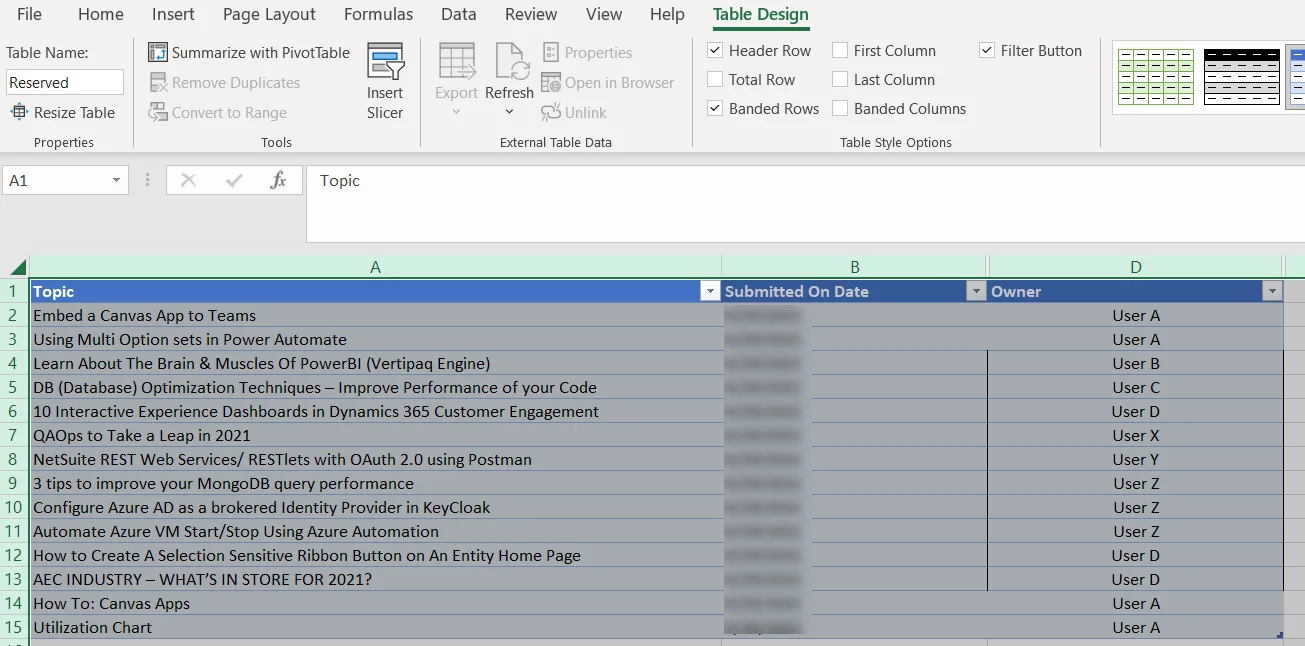
2. First, create an Excel online data source (Blog Topics) with three columns (Topic, Submitted On, and Owner) in a table (Reserved) and save this on cloud storage such as OneDrive. Enter some sample data if you want
3. Sign in to Power Apps and select Canvas app from blank, under Make your own App.
4. Name the App (Reserve A Topic) and choose a format (Tablet) and click create.
5. On the blank screen, connect to data sources specified above.
6. Design the App and add logic to controls.
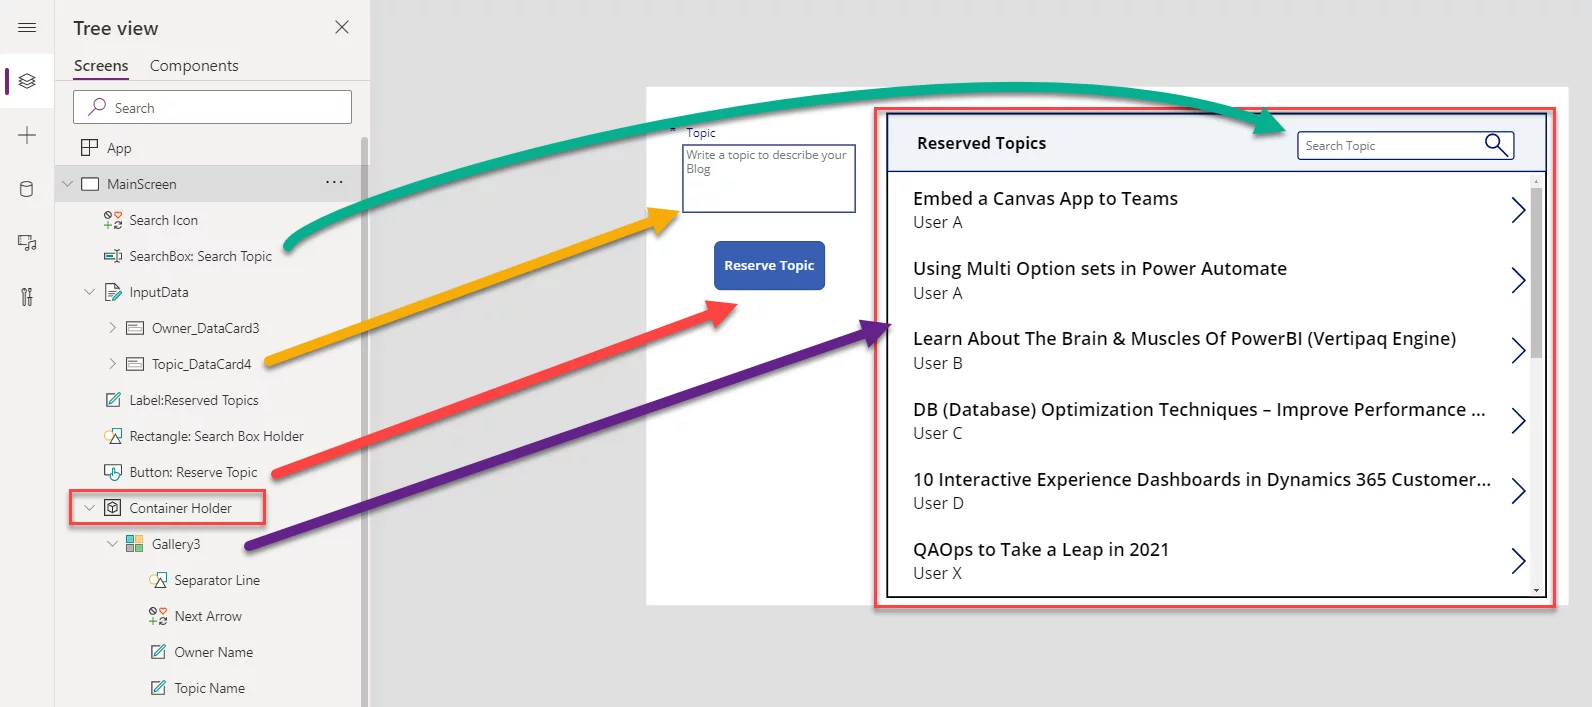
a. The Main Screen contains few elements, such as a Container Holder for Gallery, which shows the Topic Name as Title and Owner Name as Subtitle. There exists a search box with a search icon for searching the blog topics. Also, an Input Box is present to enter a blog topic and a button to finally reserve the topic.
- Owner Name under Input Control is hidden as it will be auto-generated by the logged-in user’s full name by setting the Default value of DataCardValue to User().FullName.
- Submitted On date is handled in excel for simplicity to avoid date format issues. But it can also be set, like Owner Name, by setting the default to Today() or Now(), depending upon the logic.
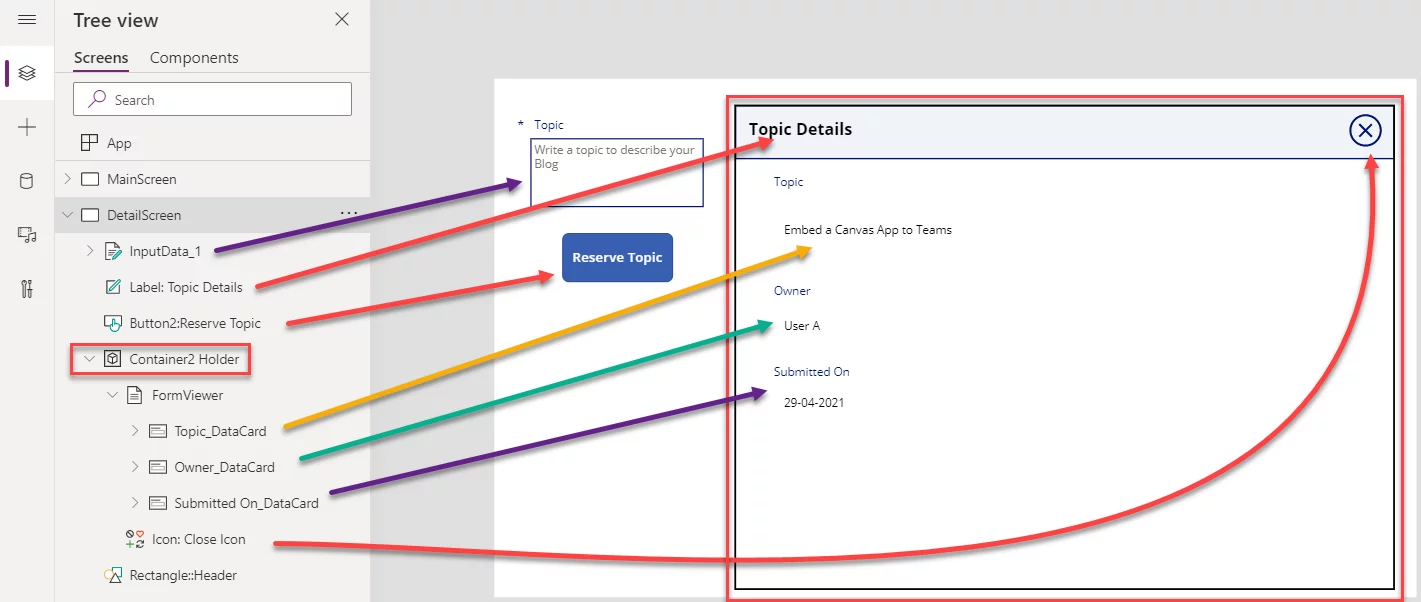
b. Detail Screen is a copy of the MainScreen but with a FormViewer control instead of Gallery Control. The arrow in front of each record in Gallery on Main Screen will navigate the related details of that record. A close button will take the user back to Main Screen while the user can also reserve a topic from the Detail screen (Similar Logic) instead of navigating back to the Main Screen.
7. Test, Save, and Publish the App in the last step
Let us Embed the App in Teams
The Canvas App can be embedded in Teams in several ways depending upon the need.
It can be published as a personal app, shared between few users, or published organization wide. For shared and organization-wide access, make sure the data sources are shared and users have all the necessary permissions.
Publish as a Personal App
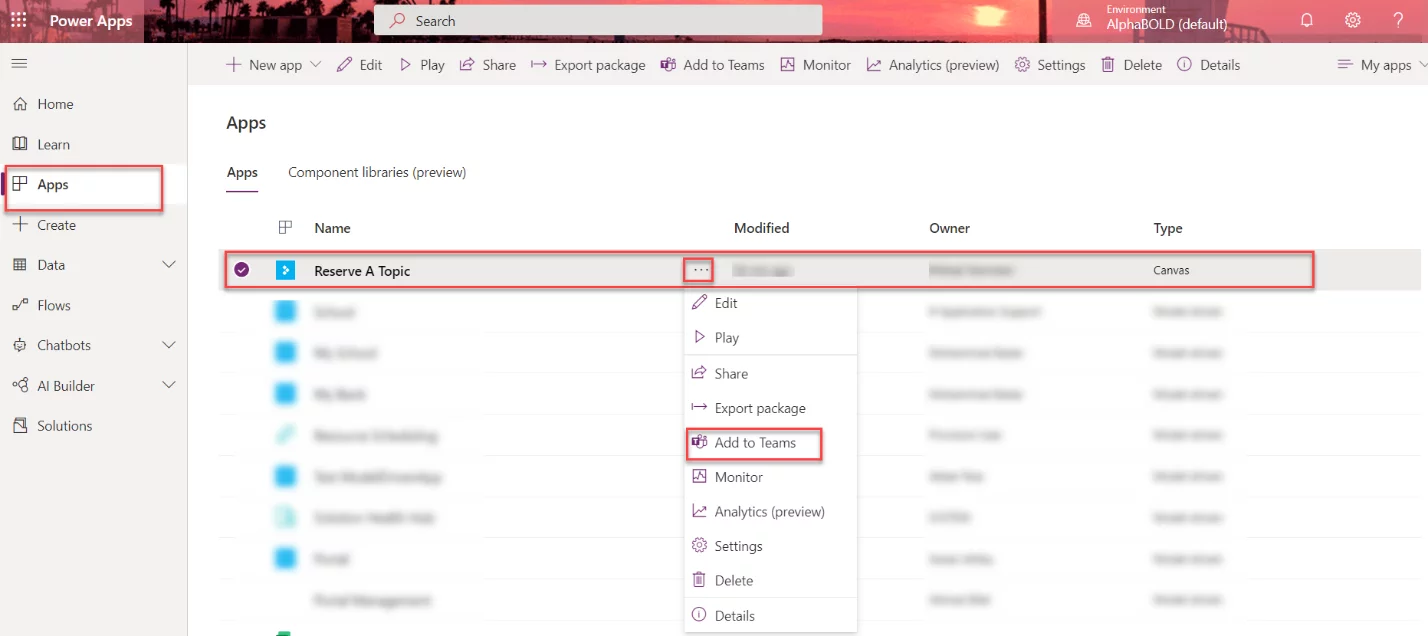
- Sign in to PowerApps, if not already, and go to Apps.
- Select three dots on the app that needs to be added and click Add to Teams.
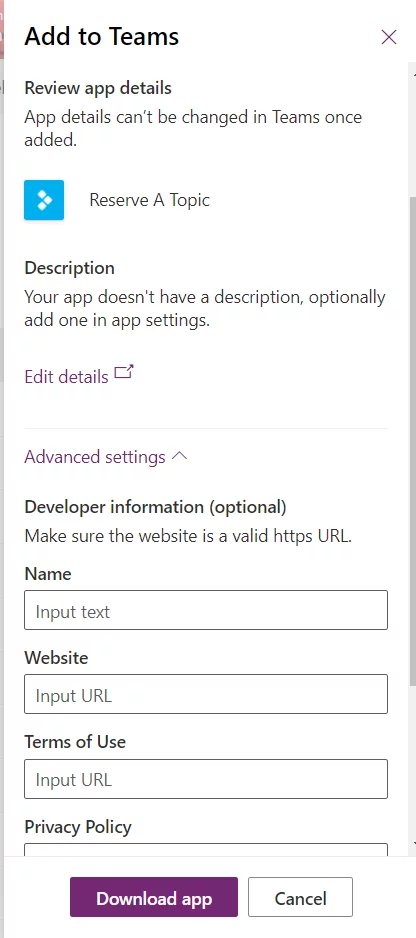
3. Review and download your app (.zip file)
4. Upload the app as a custom app to Teams or Submit it to the app catalog to be approved by the admin (This is to publish it across the organization)
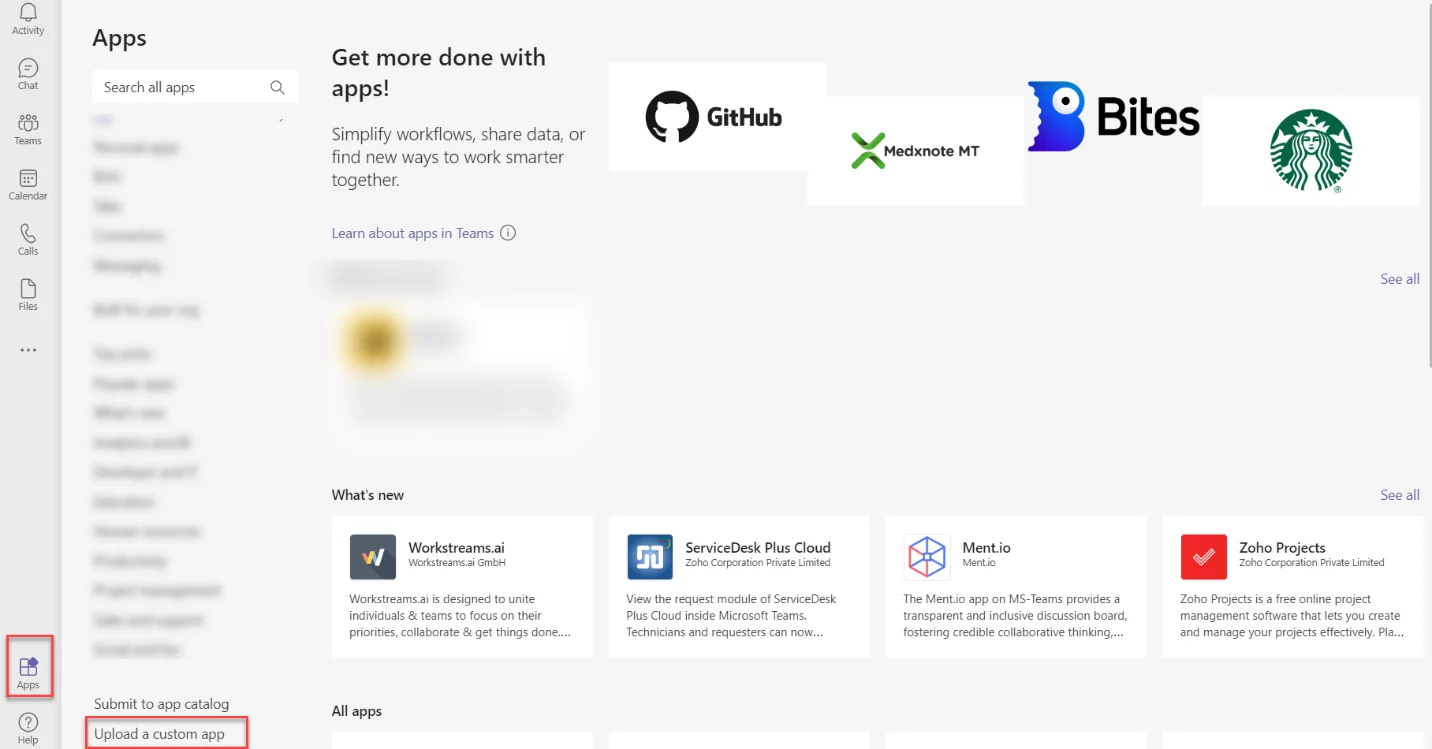
5. Choose the. Zip file downloaded earlier.
6. Click on Add (It can also be added to a particular chat or a Team as a tab if chosen from the dropdown)
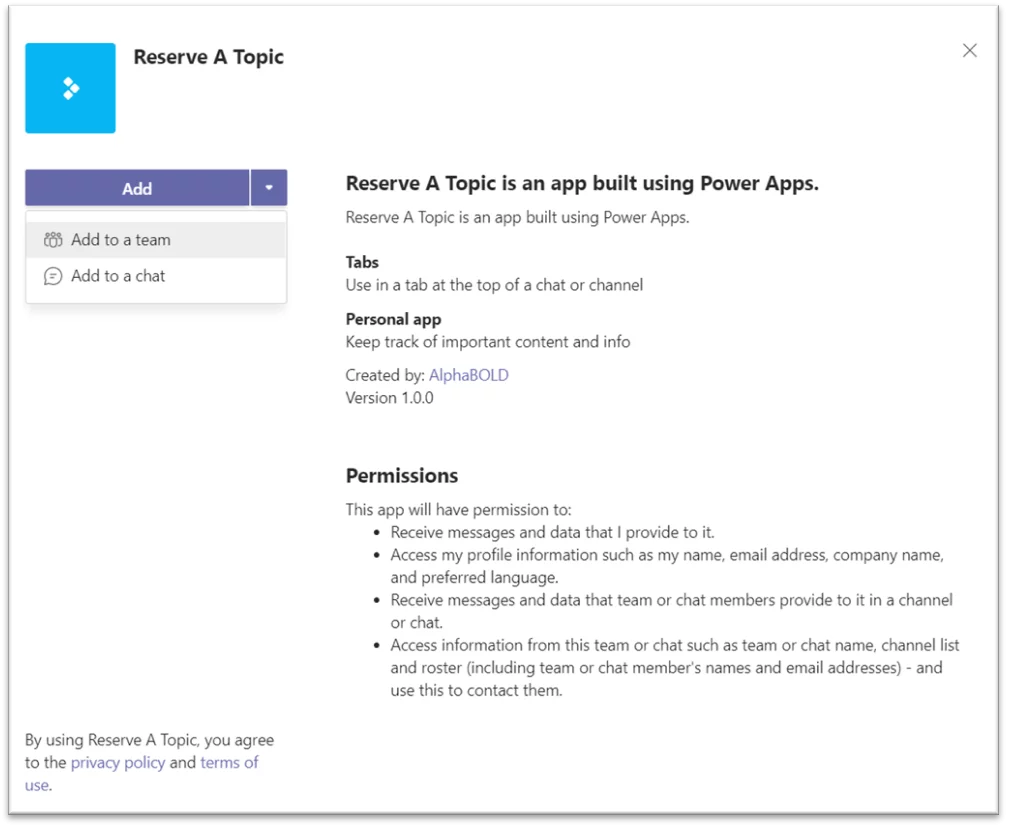
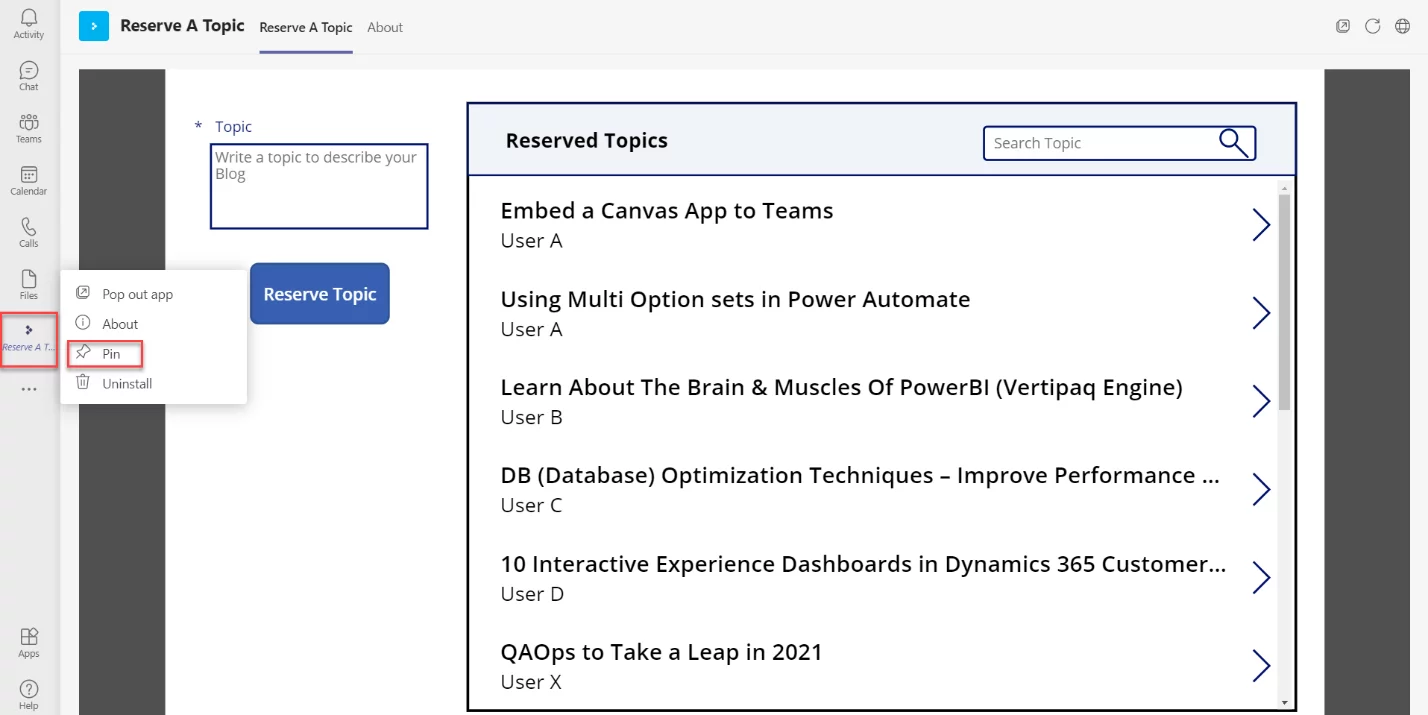
7. The app will now be visible and can be pinned under other apps.
Share an App with some User(s)
- To share the app with a specific user(s), select the app and click Share.
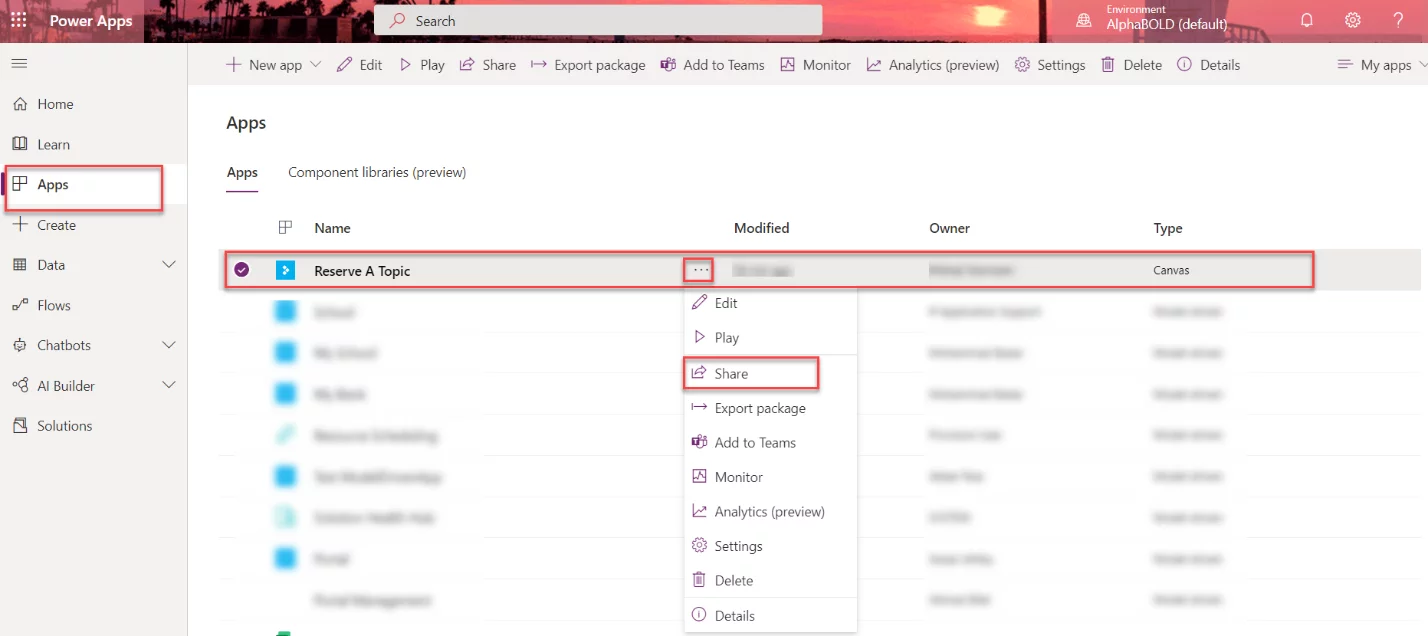
2. Select the user and give appropriate app permissions to the user(s) and click Share.
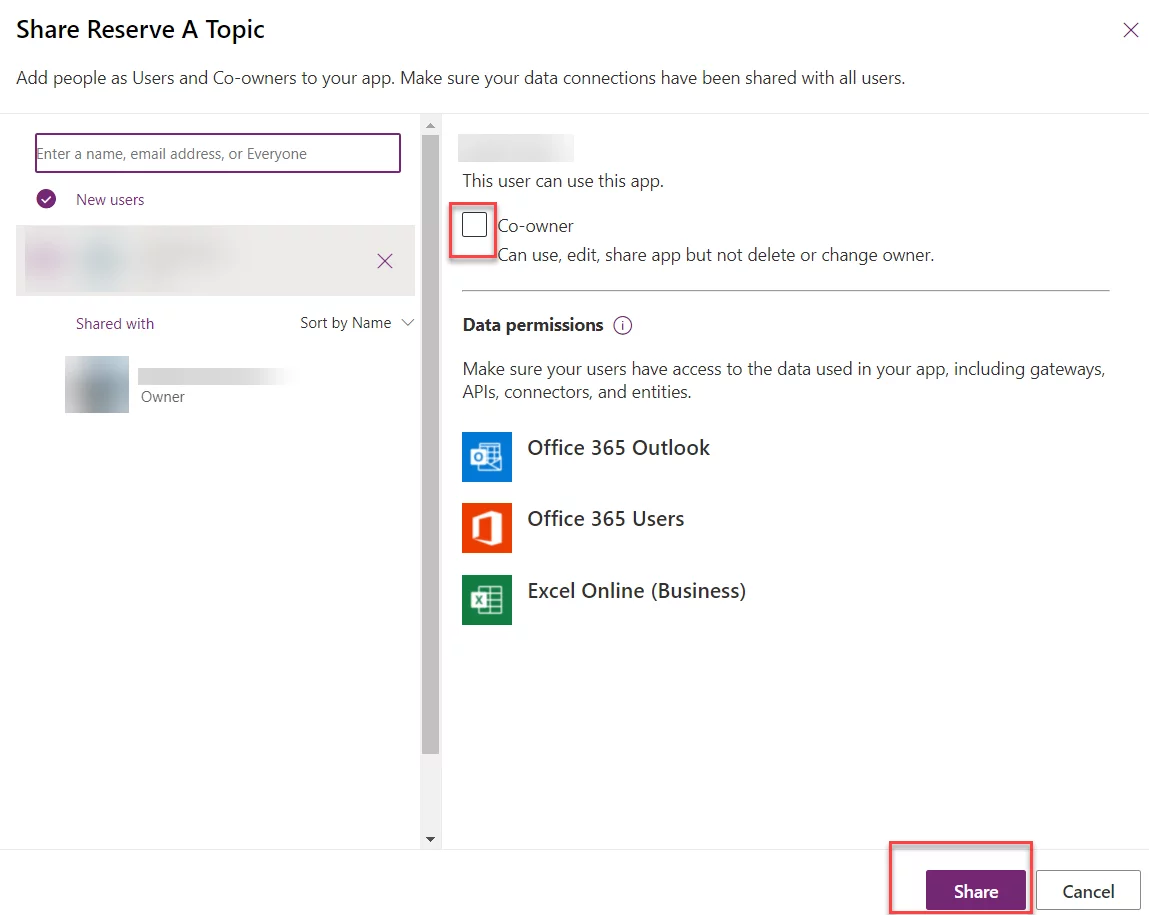
3. Now, it will be visible under Built for your org Apps to those users. The users can then add those apps like shown above in Step 7 and 8.

Conclusion
Here is how the app looks in Teams, and the data can be written to and read from the source Excel file specified.
This App or any other such app can be published across the organization to enable the users to get full advantage of its capabilities. Apps that require approvals, such as leave request, expense approval, etc., can take advantage of Power Automate functionality in Power Apps and can be used efficiently within Teams, without navigating to various places both for requester and approver. It will not only save time but can also be tailored to the organization’s needs.