Introduction
This is the second part of our series blog, which discusses the Smart Temperature Monitoring Systems (STMS). In the first blog, we introduced TMS and its different features. In this second part, we will dive into the numerous use cases of STMS, along with a tutorial and a live demo. STMS is becoming an essential industrial requirement. It allows tracking and maintaining the temperature of a product, a process, or an environment. In addition to tracking, a suitable STMS sends timely notifications and warnings in case of violations.
Learn more about IOT Services
Use Cases of Smart Temperature Monitoring System
Different sensors can be used to measure temperature values for different applications. These measurements are then logged through a logger device that can store data locally or on cloud storage. However, the choice of a sensor is an essential part of STMS. The sensor must fulfill the application’s required temperature range. The following are some use cases and suitable sensors:
- Liquid Temperature Measurement: Whether it’s a laboratory, food, or any other manufacturing industry, temperature plays a vital role in defining the properties of fluids. Moreover, the processes where fluids are handled often require a strict temperature range to be maintained; otherwise, it can affect the efficiency of the process. In such situations, a waterproof temperature sensor measures fluid temperature as the sensor needs to be submerged in the fluid. Standard sensors available for these applications are PT100, DS18B20, and K-type thermocouples.
- Supply Chain Temperature Measurement: One key feature of supply chain applications is connecting manufacturers, distributors, and consumers. The changing environmental conditions can affect the quality of the shipped products. However, when shipped from one location to another, companies develop special containers to maintain a suitable product environment. Additionally, Smart Temperature Monitoring Systems allow companies to track the environmental parameters in transit, even remotely. This IoT solution and advanced telemetry establish transparency in a supply chain [cold chain] and enable companies to deliver quality products. The most common sensors used for this application are RTD temperature probes, DS18B20, DHT11, DHT22, AM2301, AM2302, and AM2320.
Read more: Top 6 Open Source IoT Frameworks: Which One is Best for You?
Tutorial
For better understanding, let’s integrate a sensor with a temperature monitoring device and get the temperature values from the sensor. This tutorial will use the DS181B20 temperature sensor connected with a Raspberry Pi to measure the air and water temperature.
The following are the required items:
- Raspberry Pi
- Breadboard
- DS181B20 Sensor
- 10K resistor
- Jumper Wires
Setting up Hardware :
Integrate the DS181B20 sensor with Raspberry Pi, as shown in Fig 1. The red wire is VCC, the black wire is GND, and the yellow wire is the data out. We must also connect a 10k resistor parallel to the red and yellow wire.

Insert the sensor’s wires into the breadboard and connect it with a Raspberry Pi.
Enhance your IoT Ecosystem
Ready to enhance your IoT ecosystem with advanced temperature monitoring solutions? Join us at AlphaBOLD to unlock the full potential of IoT for unparalleled operational insights and efficiency.
Request a ConsultationConfiguring The Sensor:
The DS18B20 is a temperature sensor that is 1-wire programmable and can measure a wide range of temperatures from -55°C to +125°. Each DS18B20 sensor has a unique address and requires only one DIO pin of the MCU to transfer data. To test this sensor in Raspberry Pi, you first need to edit the config.txt file. For this, type sudo nano /boot/config.txt in the pi terminal and add a line: dtoverlay=w1-gpio in config.txt file, as shown in Fig 2. After adding the line, save the file and reboot the Raspberry Pi.
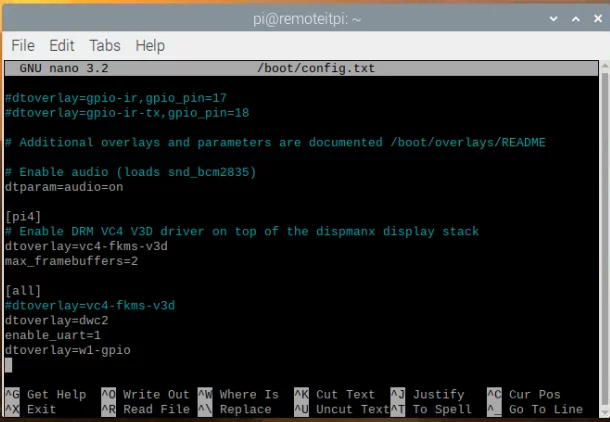
Fig 2: Config.txt File
Load the kernel modules by typing the following commands in the pi terminal.
sudo modprobe w1-gpio
sudo modprobe w1-therm
Run the following commands to find your sensor device.
cd /sys/bus/w1/devices
ls -la
This will show the device’s directory based on the given serial number. It should start with 28x, as shown in Fig 3.
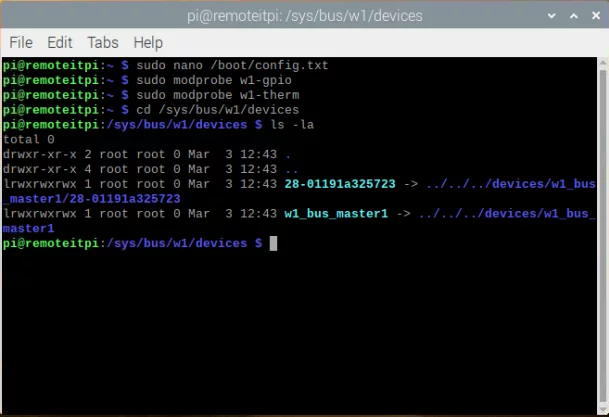
cd into that directory, then type cat w1_slave.
In Fig 4, if crc=da is yes, it confirms the sensor is working, and t = (some value) shows Celsius temperature x 1000.
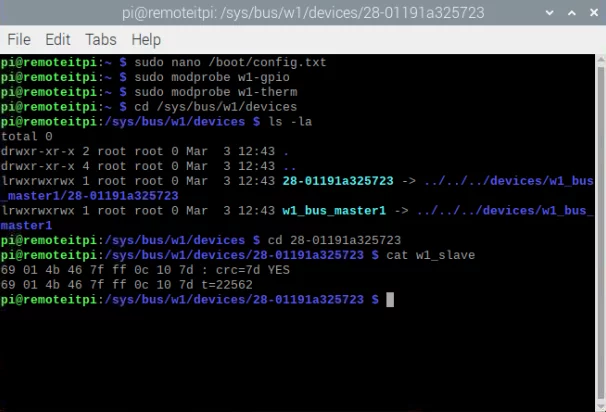
Fig 4: Sensor Test
Python Script for Getting Temperature Monitoring System Readings:
To measure the temperature of the sensor, we need a Python script. Here is the code:
import os
import glob
import time
os.system(‘modprobe w1-gpio’)
os.system(‘modprobe w1-therm’)
base_dir = ‘/sys/bus/w1/devices/’
device_folder = glob.glob(base_dir + ’28*’)[0]
device_file = device_folder + ‘/w1_slave’
def read_temp_raw():
f = open(device_file, ‘r’)
lines = f.readlines()
f.close()
return lines
def read_temp():
lines = read_temp_raw()
while lines[0].strip()[-3:] != ‘YES’:
time.sleep(0.2)
lines = read_temp_raw()
equals_pos = lines[1].find(‘t=’)
if equals_pos != -1:
temp_string = lines[1][equals_pos+2:]
temp_c = float(temp_string) / 1000.0
temp_f = temp_c * 9.0 / 5.0 + 32.0
return temp_c, temp_f
While True:
print(read_temp())
time.sleep(1)
This script is simple to understand. Firstly, it loads in the kernel modules and then reads the temperature sensor. The function read_temp() works so that it opens the sensor device and reads the raw temperature values. After that, it parses through the lines and gets Celsius and Fahrenheit values through a simple formula. Lastly, a while loop will print the temperature data every second.
In the first step, place the sensor in the air, as shown in Fig 5, and run the Python script. The output is shown in Fig 6.
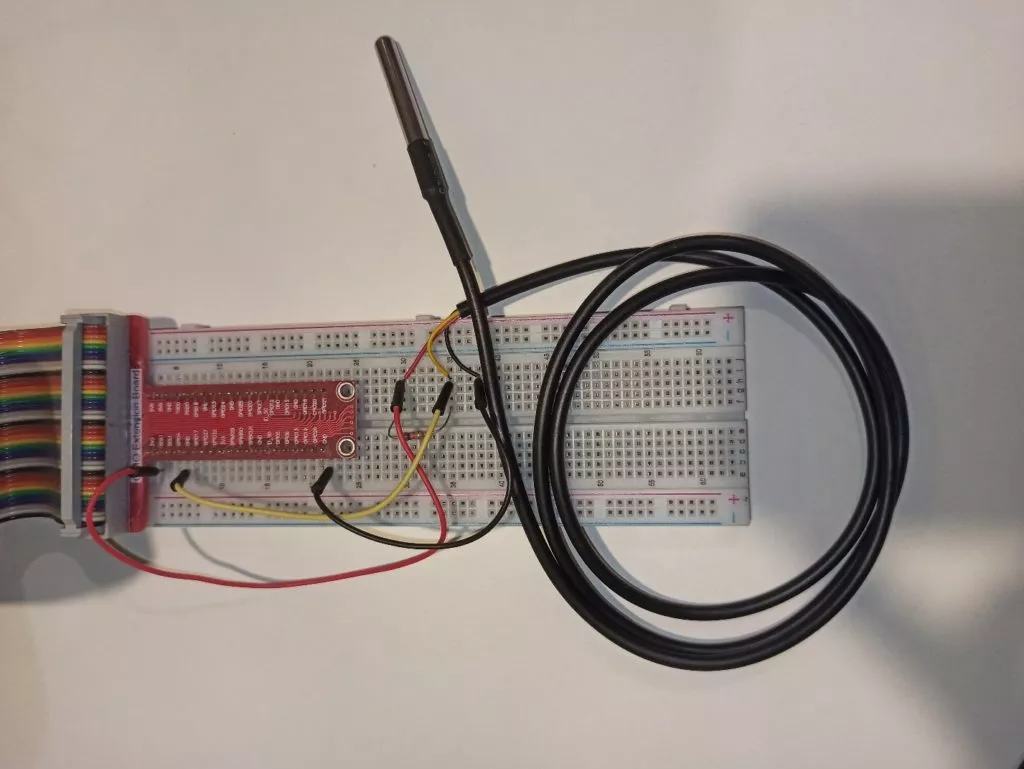
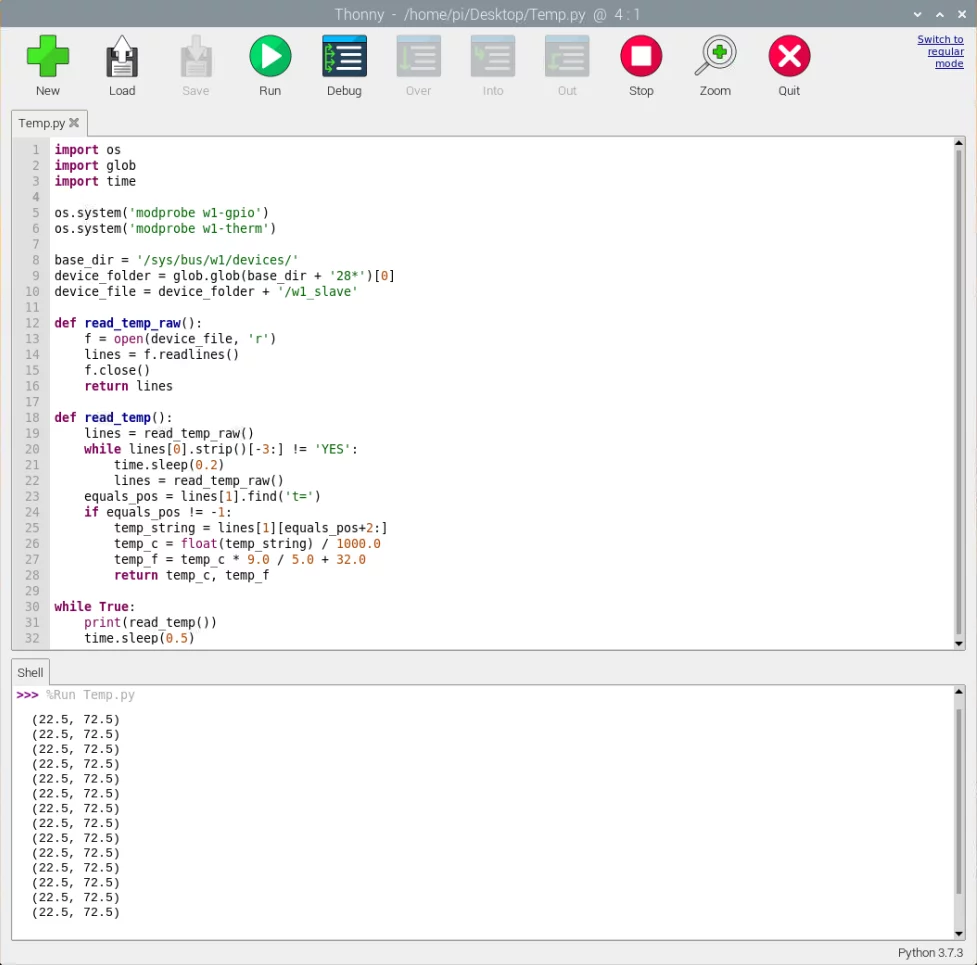
Fig 6: Output
The sensor is put into hot water, as shown in Figure 7, and the script is run. The output is shown in Fig 8.
Read more: Internet of Things (IoT): Consumer IoT vs. Industrial IoT
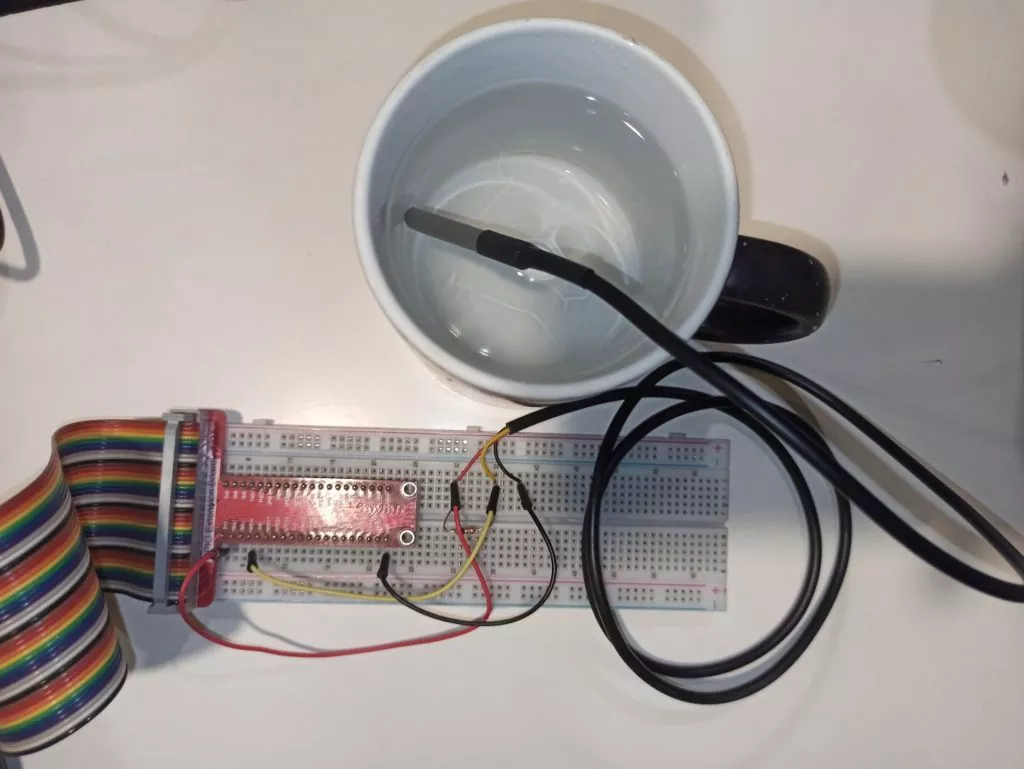
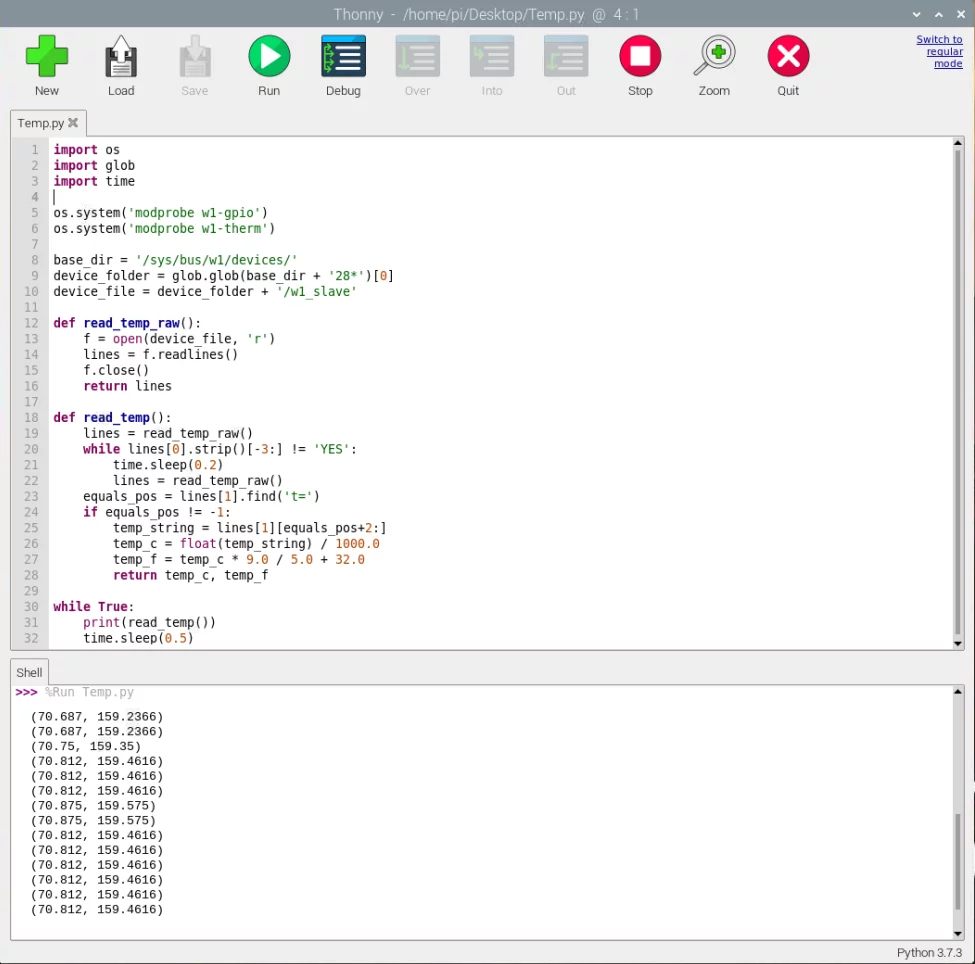
Fig 8: Output
Step into Smart IoT Solutions
Step into the world of smart IoT solutions with AlphaBOLD's innovative temperature monitoring technology. Discover how our IoT analytics can revolutionize your data management and decision-making processes.
Request a ConsultationConclusion
This article discussed how smart temperature monitoring systems can be used in an industry. The multiple use cases of the Smart Temperature Monitoring System make it an essential part of the manufacturing processes. STMS can help companies achieve the quality they need to deliver. We will bring more blogs on this topic to give you a better understanding of temperature monitoring systems.
If you want to learn more about Temperature Monitoring systems, contact us at [email protected] and follow our blogs for demo videos.
Explore Recent Blog Posts


