
“As a member of the Dynamics 365 community, we constantly interact with multiple tools that help make our Dynamics 365 solution better. In this article, we list down 4 top picks, chosen by consultants who have advanced expertise in working with Dynamics 365, helpful to CRM (Customer Relationship Management) consultants!
XRM Toolbox
The XRM toolbox consists of many solutions that are extremely useful when working on Dynamics 365 customizations; that is why most D365 consultants & developers use it & recommend it.
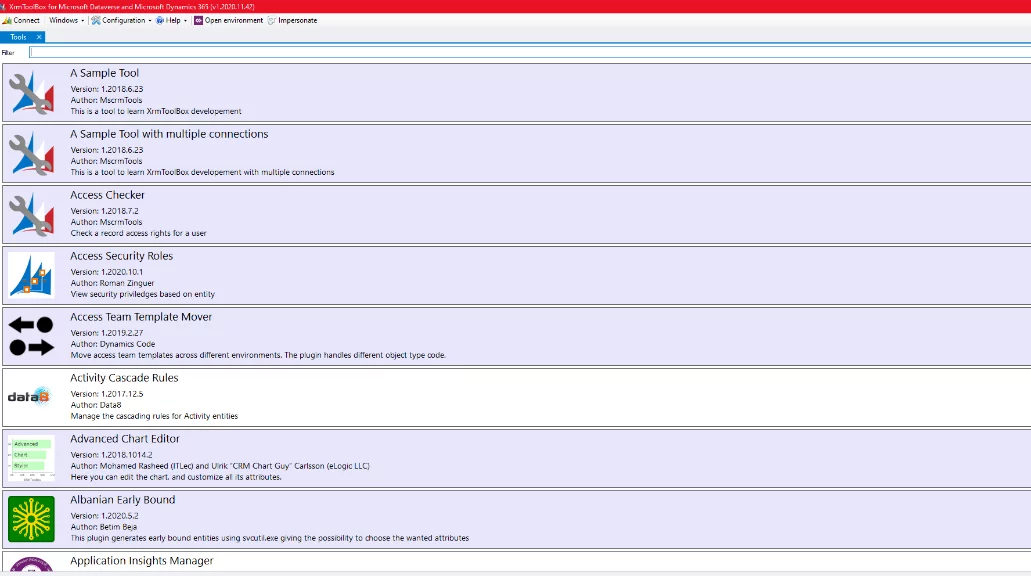
Here are the tools I use the most.
- N.B. a generic step you need to do before using any of the CRM tools is to connect to your organization.
-
Open Records using GUID.
As you may have guessed from its name, this tool uses the Entity or Records GUID to find & open what you are searching for.
For example, if you have an error msg & it is giving you the GUID for the record causing the error.
What you need to do is:
- Copy the GUID.
- Paste the GUID under “Record ID” highlighted below.
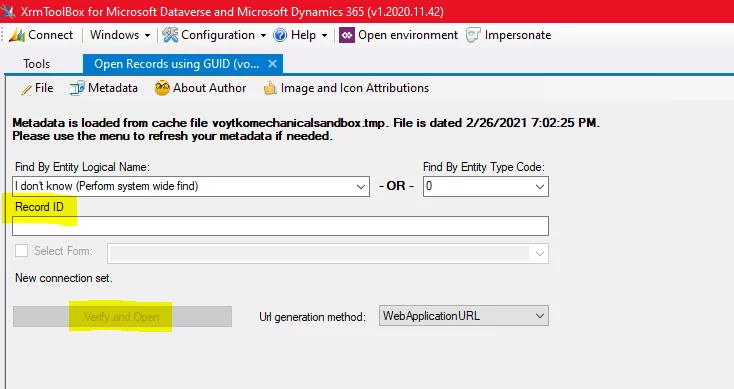
After that, the tool will search the records & customization to retrieve back your record. Then click “Verify and Open.”
Find out more about our Dynamics 365 offerings
2. BULK Workflow Execution
The bulk workflow execution tool is a very useful one, especially when you need to run an on demand workflow against all records of an entity, or the records returned from a query.
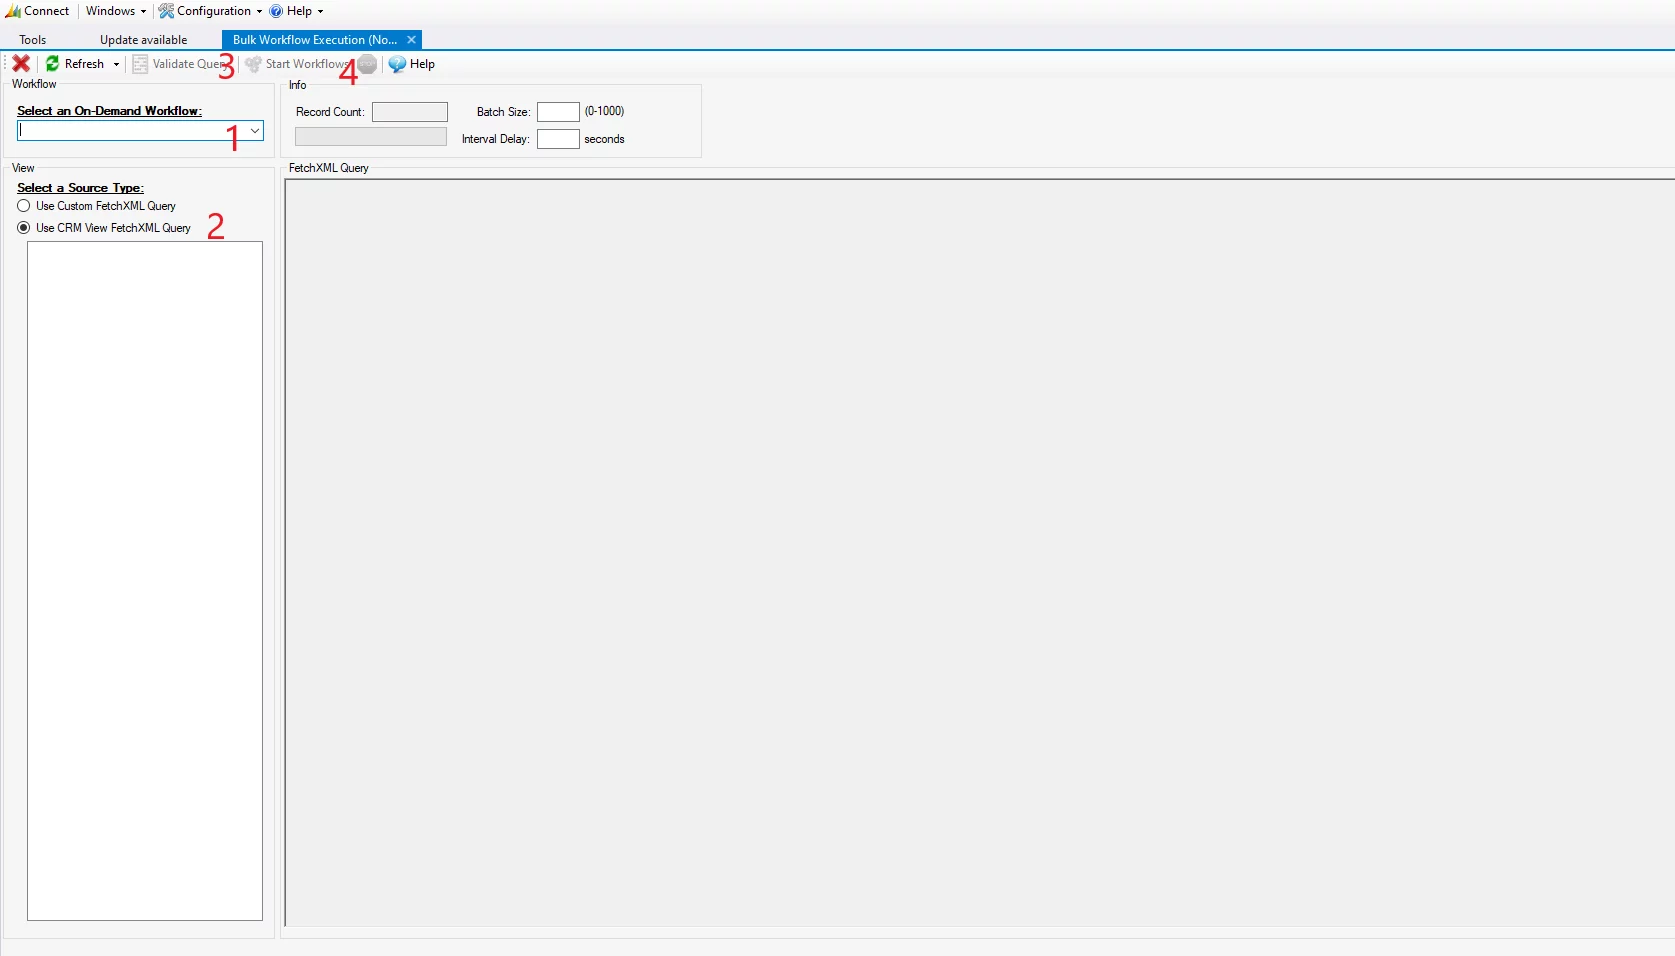
All you need to do is:
- Make sure the on-demand workflow in Dynamics 365 is activated.
- Open the tool in XRM tools.
- As seen in the screenshot above:
- Select the on-demand workflow from the drop-down.
- Select how to retrieve the record, you want to run the workflow against; either select the view or paste your fetchXML Query.
- Click Validate Query, which will give you the records count (some users use this tool to count records in a view or returned from a query)
- Click Start Workflow
- The tool will run against all records counted.
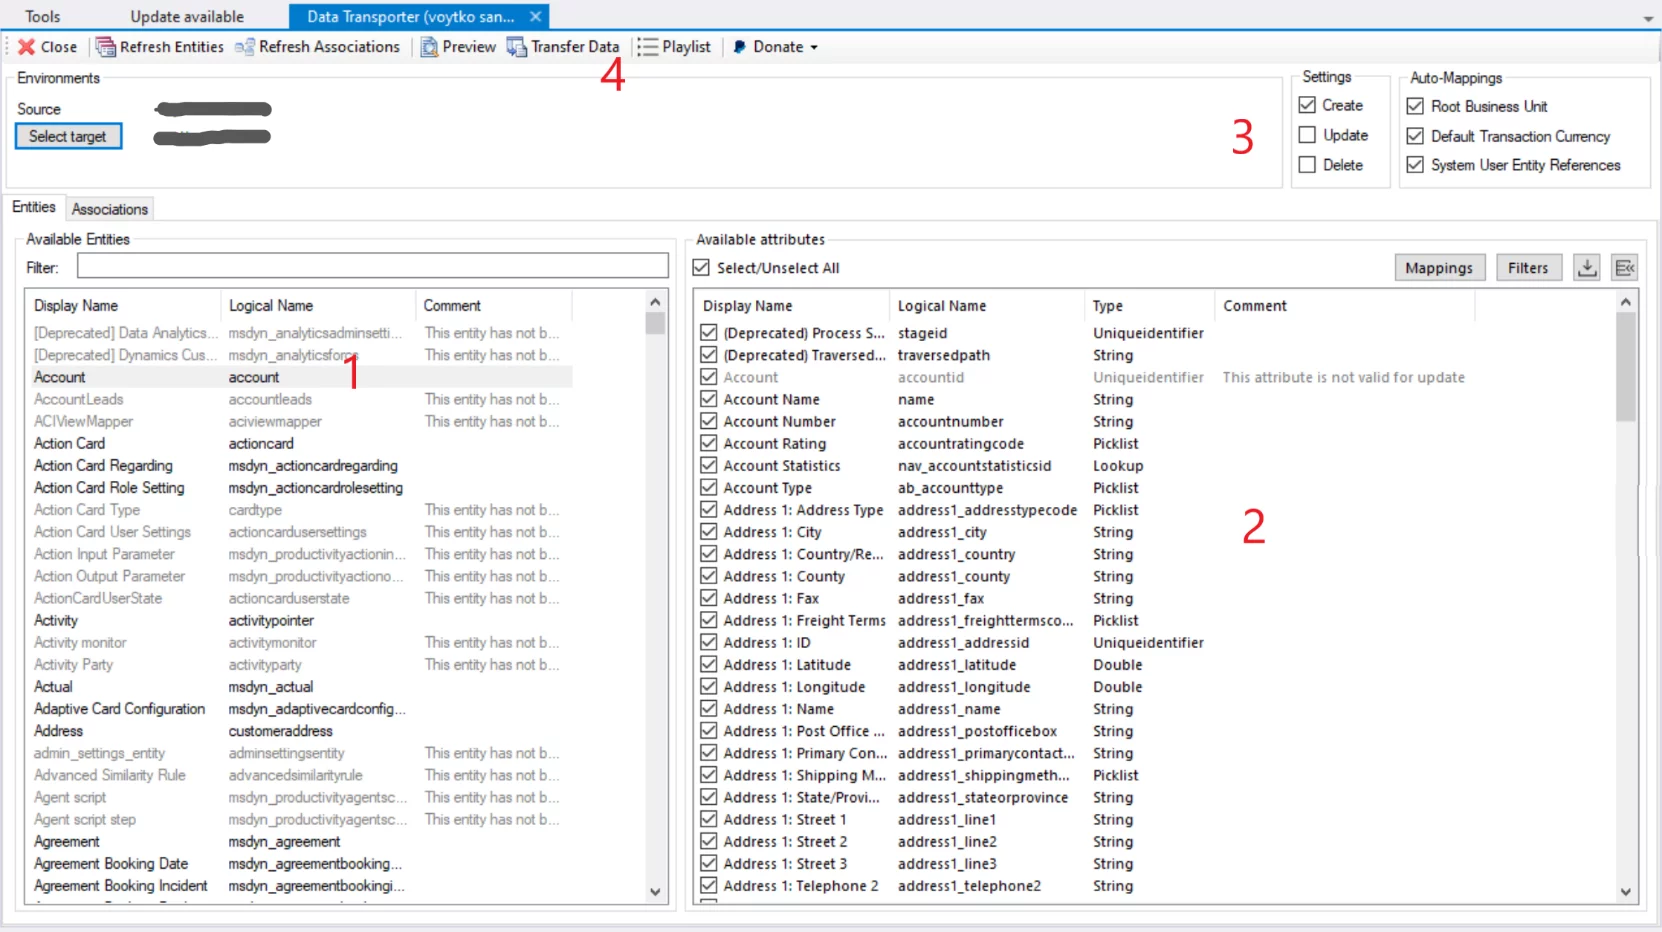
3. Data Transporter
This tool helps you import or create, update, or delete records & data between organization instances.

To use this tool, simply follow these steps:
1. The first thing you do is define your source instance (the instance that contains the data) & the “Target instance,” which is the instance you want to move the data to.
- The source instance is usually the organization that you connected to when you launched the XRM tool.
2. Once you have connected your instances, all the entities in your organization will be loaded, as you can see in the screenshot below (marked 1 & 2).
- Number 1 shows the entities in your source instance & number 2 is your target instance.
- Once you select an entity (table name) in your source instance (1), the list of fields in this target instance table will load on the number 2 side.
- You can select or unselect any of the fields that you do not want their data to be transported.
3. Also, you can choose either to create new records, update existing records, or delete records as shown.
4. After you are done with your selections, click “transfer data “this will start the data to flow from the source instance to the target instance.
4. View Layout Replicator
This tool makes it extremely easy to copy a design of 1 view to all the rest of the views selected. All you have to do is customize one of the views as per the requirements then the tool will do the rest.
Here are the steps you need to follow:
- After you connect to your organizations, click “load entities” This will load all your instance entities (tables) on the left-hand side.
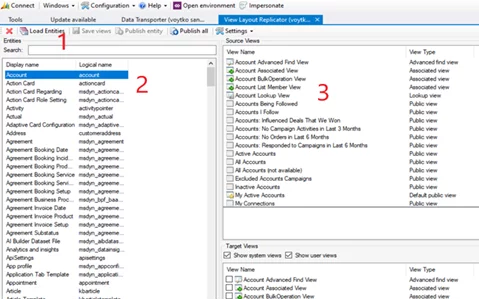
2. Click on the entity that you need to customize its views, and once you click it, all its views will be loaded on the right-hand side.
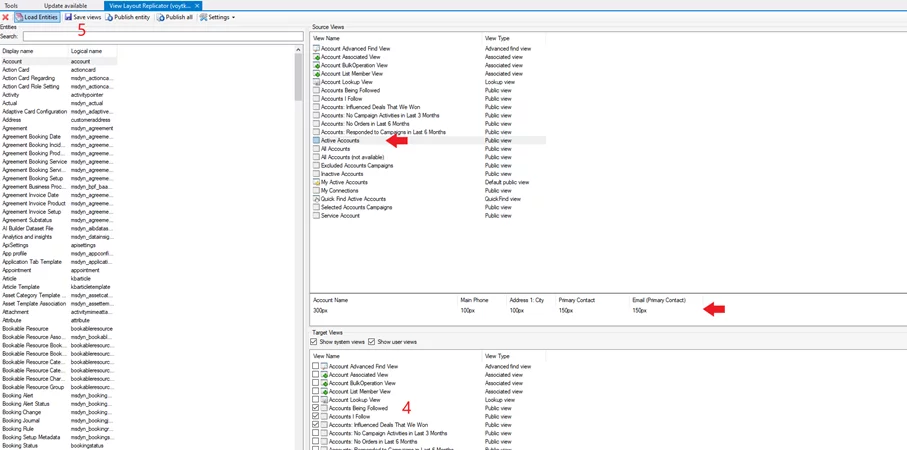
3. Select the view that you have already customized & want to copy. In this example, I selected “Active Accounts,” and as shown, its design will be previewed.
4. Go to the target views area & select all the views you want to have the same design as the “Active Accounts” view.
5. Click “Save Views.”
- You have the option to publish the entity after your views copying is done by clicking publish entity in the toolbar, or you can publish it normally from the CRM’s customization side.
I hope you find these tools useful to you as they have been useful to me & my team as we are extensively using it in our daily dynamic’s customizations.
Stay tuned for more useful consultants’ tools & tips on www.alphabold.com
Feel free to reach out to us if you have any questions here. alphabold.com/contact/
Reference for XRM tools: https://www.xrmtoolbox.com/