With the new Microsoft rebranding of Customer Engagement (CE) to Common Data Services (CDS), some features of the web UI are not available in Unified Client Interface (UCI). Composite full name and address fields are separated into individual fields when accessing UCI. These features have been deemed more of an issue for activities like customization rather than a benefit. Yet, Microsoft claims to be working on adding these in future releases. Regardless, a client may be working with the legacy web client UI and still wish to view composite fields. In this blog post, we will focus on composite address fields and how we can use a Power Apps Component Framework custom control (PCF) workaround for now – although this could be a one-stop shop alternative depending on future release notes for CDS.
This blog post was written during Server version 9.1.0000.8833 Client version 1.3.2281-190924-204338 tenure of CDS.
The prerequisites involved PCF building, packaging, and deploying a PCF-managed/unmanaged solution to an environment. These are not required because I have provided the link to the solution file in bullet point 3, but they are needed for knowledge transfer.
Deploying the Composite Address Control Managed Solution:
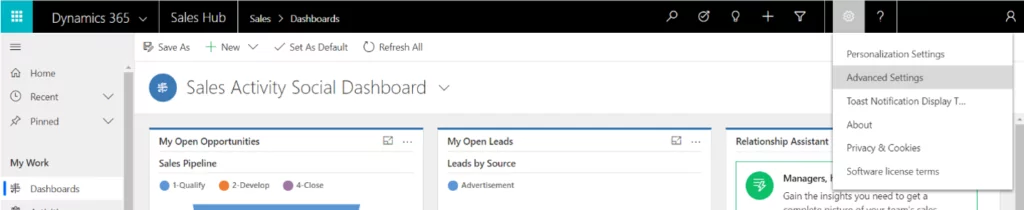
From the homepage of your default model-driven app, click on the gear icon in the upper righthand corner and then click on advanced settings.
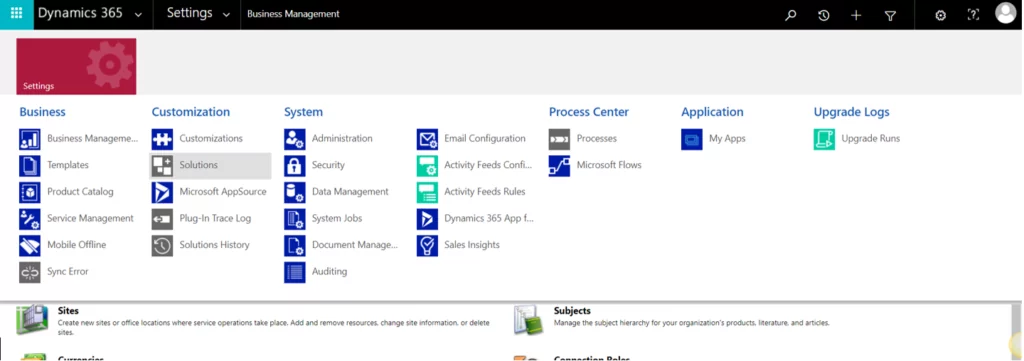
Click on solutions from the settings tile.
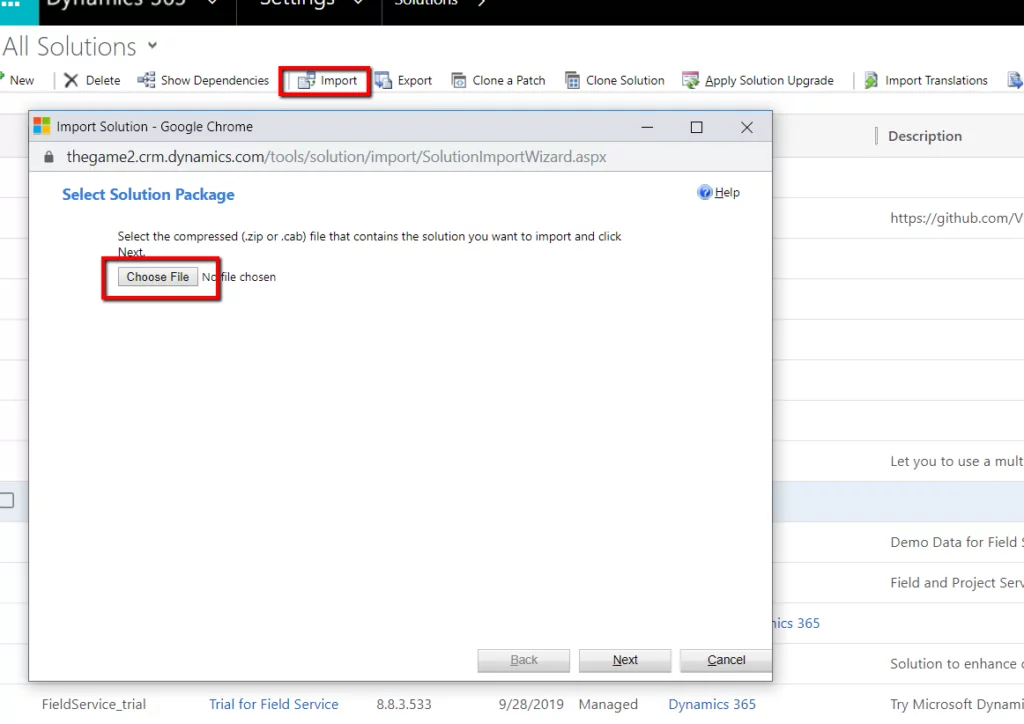
Click on import and upload the file from wherever you saved it.
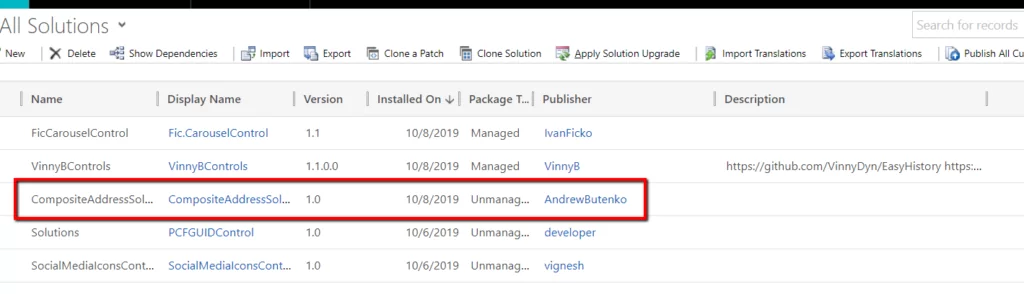
Click next, import, and then publish all customizations. The solution should now be visible in the list of solution components.
Maximize Efficiency with Custom PowerApps Solutions!
Ready to maximize your business efficiency with custom Power Apps solutions? AlphaBOLD is here to guide you through the process of transforming your ideas into reality. Let's create something amazing together.
Navigate back to the settings tile and select customizations, then customize the system on the next page – assuming you want to place the control directly into the default solution.
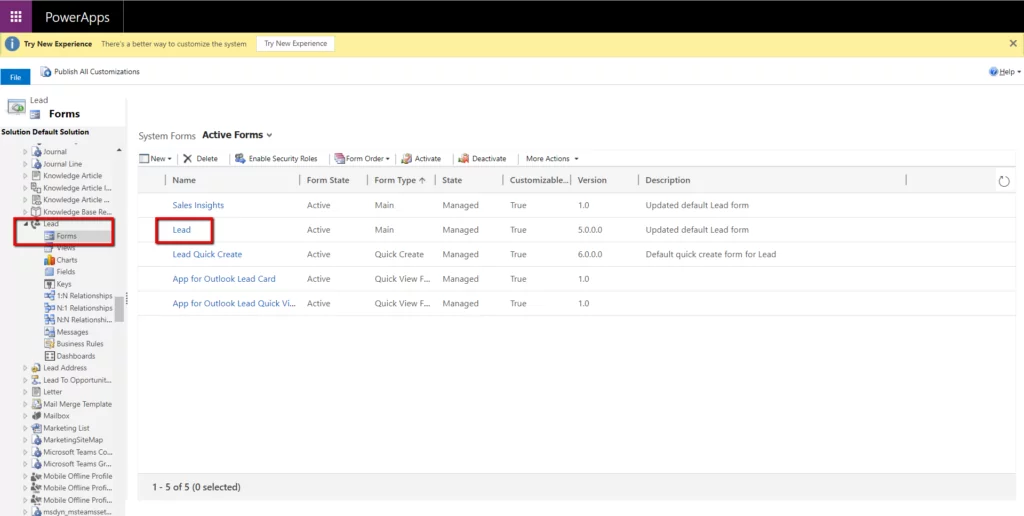
Navigate to the main form of an entity of your choosing. In this example, we will use the lead entity.
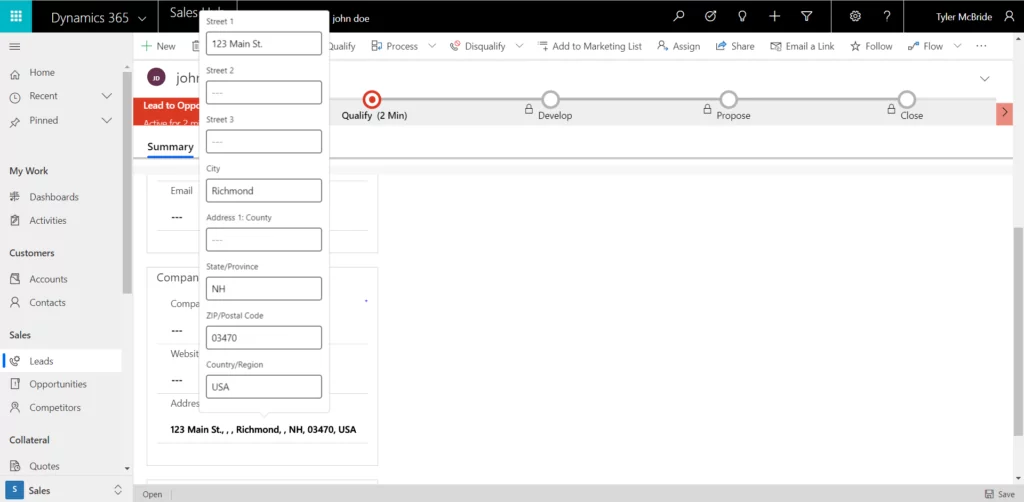
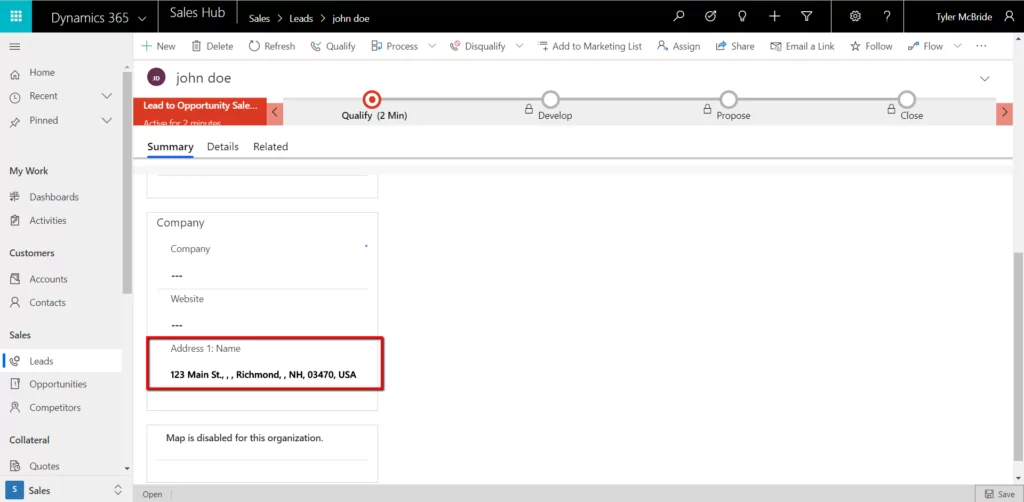
Add a single line of text field to the form. (Remove the existing address composite field to remove clutter if it’s there). In our case, we will be appending the PCF to an address name, but it can be any managed field or a custom single line of text field.
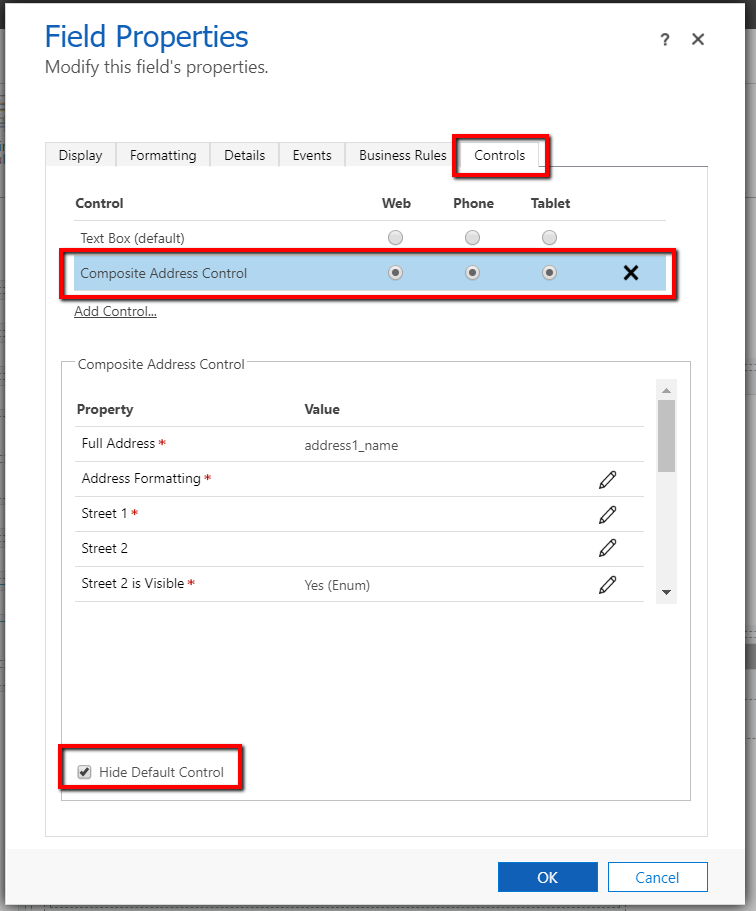
Open the field, click the controls tab, add the new address composite PCF control, and hide the default control.
Set the fields as the following. These fields will change when we bring the solution to the XRM Toolbox. We can also set some visibility of the fields to “No,” but we will leave them as is below for now. If you do deviate from the selections below, ensure that you populate the mandatory fields denoted with a red asterisk:
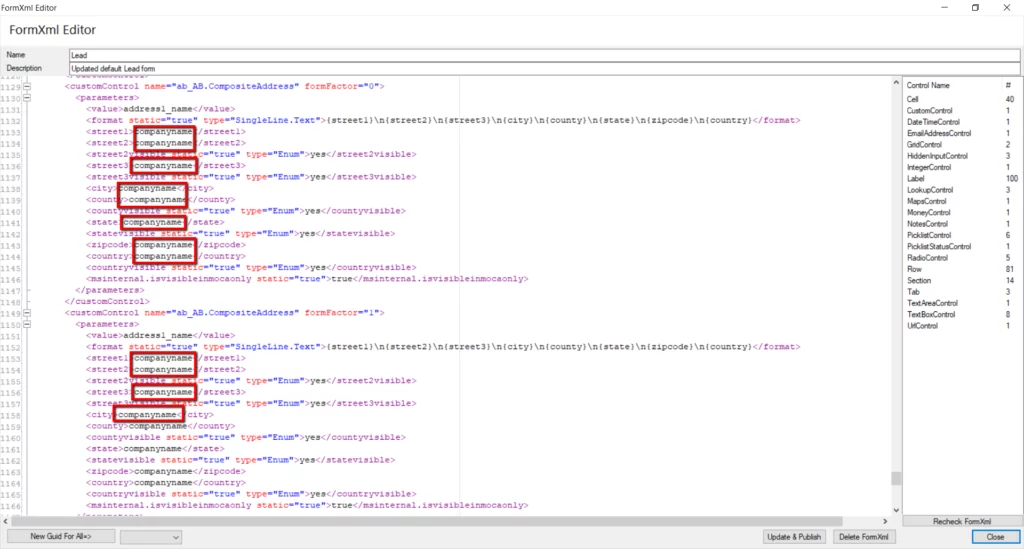
Yes, it is odd that we cannot see the address fields even if they are added to the form. That is why we need to open the XRM Toolbox to set them explicitly on the control. We use regex {}n to put line breaks between the address fields.
Click okay on the field dialogue, click save, and then publish the form.
Utilize the XRM Toolbox:
We now need to swap the placeholder fields we’ve inputted into the PCF control and set them to the more logical ones.
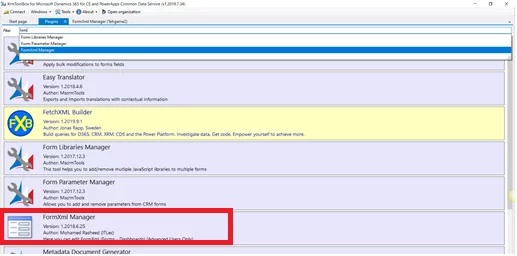
Search for the FormXml Manager plugin and open it.
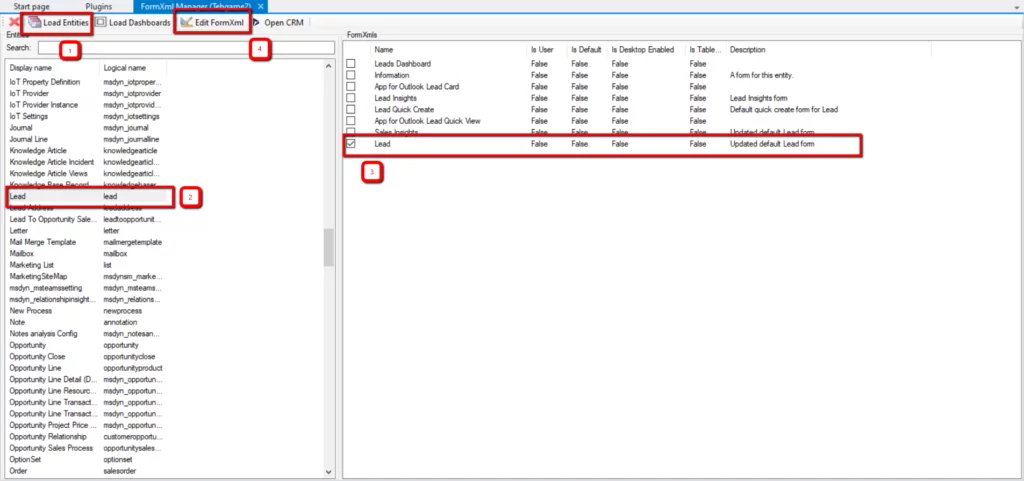
Load the entities, click on the lead entity, click on the checkbox for the main form, and then click on edit formxml.
Navigate to the custom controls. Find the composite address custom control. Enter the logical names for the fields that need to be changed. For example, Street 1 will be address1_line1. You will have to do this thrice for each field.
Update and publish the form.
Streamline Your Operations with Power Apps!
Wondering how Power Apps can streamline your business operations? Embark on a path to efficiency and growth with AlphaBOLD's expert guidance.