How to Create a Selection Sensitive Ribbon Button on an Entity Home Page

Daniel Gonet
Introduction
The Ribbon Workbench tool has been a core part of the Dynamics platform for many years, allowing for significant ribbon customizations. One of its lesser-used features is the ability to create buttons sensitive to the context of a subgrid, allowing users to perform actions on multiple related records simultaneously. This means that a user could, for example, navigate to an Account record and perform an action on a subset of its related orders, like sending information about each selected order to the email address on the account.
However, this functionality does not allow users to utilize an account hierarchy to send this information to a parent account or perform actions on unrelated orders. System configurators could create a new relationship between the account and order tables that refers specifically to the parent, though this introduces schema complexity and has limited flexibility. Another option, and the one we will cover in this blog, is to create a ribbon button on the child the child table’s home page (Orders, in this case) that is sensitive to the context of the entire table view. This process is similar to doing so on a form’s subgrid but materially different, so it makes sense to cover it separately.
Learn more about our Dynamics 365 Services
- Create a new JavaScript resource or modify an existing one by adding the following basic function:
processBulkAction: function (selectedItems) {
if (selectedItems && selectedItems.length) {
const selectedItemsJoined = “‘” + selectedItems.join(“‘,’”) + “‘”;
// use selectedItemsJoined to get data from the selected order headers if desired via a web API query
} else {
alert(“Please select at least one order header record.”);
}
}
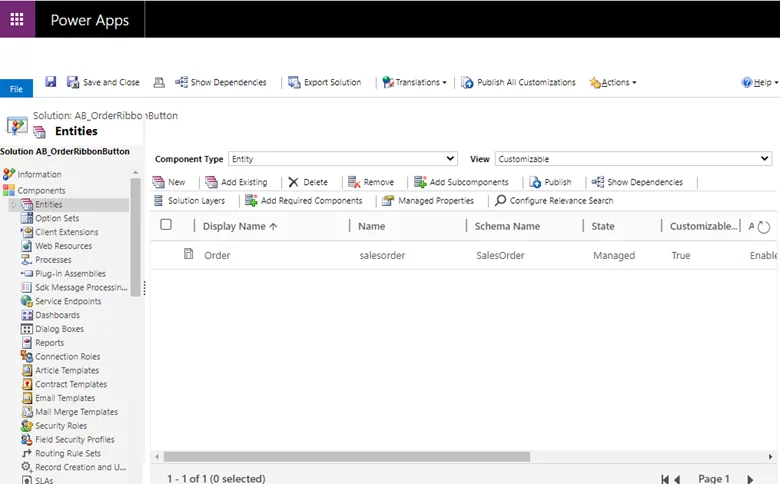
- Create a new solution for the ribbon workbench and include whichever table’s home page you would like the button to exist on (e.g., Order):
Elevate your Dynamics 365 Experience!
Dive deeper into personalized solutions and gain strategic advantages with AlphaBOLD. Discover how we can transform your Dynamics 365 experience together.
Request a Demo
- Open the solution using the Ribbon Workbench tool.
-
- If this tool is not installed in your environment, you can get it here. Once installed, it will be an available option in the Solutions section of your environment’s advanced settings:

-
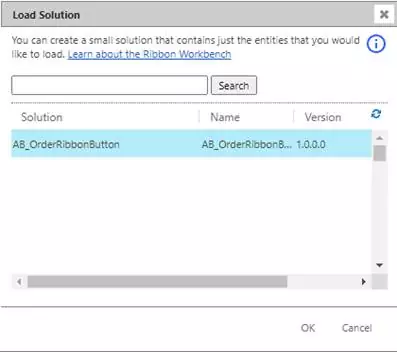
- Ribbon Workbench will first ask you to select a solution; choose the one you created for this purpose.

-
- Create a new command.
- In the Actions section, click Add Action and choose JavaScript Action.
- Find the JavaScript resource that contains the function we created earlier and add the function name to the appropriate field.
- Within the Javascript Action, click Add Parameter and choose CRM Parameter. Select SelectedControlSelectedItemIds as the value.
Read more: MS Dynamics CRM – Performance Testing Using StresStimulus: Results and Reporting
-
- Create a new button.
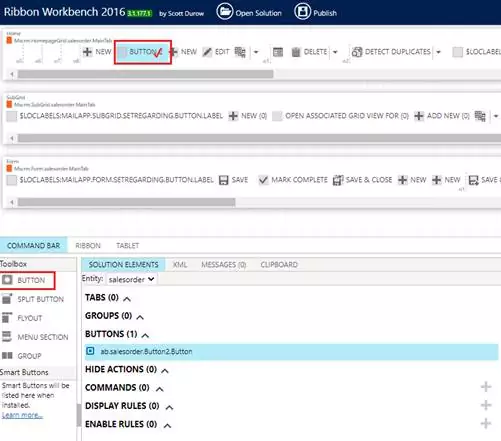
- Click and drag the BUTTON object from the Toolbox into the top bar, where it says Mscrm.HomepageGrid.salesorder.MainTab:


- Click on the newly created button in the Solution Elements section and select the new command in the Command field. Rename the button via the Label field if desired.

- Once finished, click the Publish button in the top navigation bar. This will link the ribbon button to the javascript function, and any subsequent changes made to that function will be reflected in the button’s functionality.
Read more: MS Dynamics CRM – Performance Testing Using StresStimulus: Record & Execute
Advance your Business with Intelligent Dynamics 365 Solutions!
Are you ready to take your Dynamics 365 setup to the next level with innovative customizations? AlphaBOLD is at your service, offering cutting-edge solutions and strategic insights to transform your business operations.
Request a DemoConclusion
This process will result in a new ribbon button ready for whatever logic is appropriate in the JavaScript, with the selected record IDs passed in when clicked. We have helped customers use this functionality for various purposes, including emailing records to hierarchy accounts, creating activities regarding unrelated records, and validating selection information that can span multiple parent tables.
Explore Recent Blog Posts


