In this blog post, we will show you how to import data in Dynamics CRM using KingswaySoft. This functionality was explored when a trusted client of AlphaBOLD inquired if we could find an easy solution to migrate their call center data to their Dynamics 365 instance.
If you are not familiar with KingswaySoft or do not know how to add connections in KingswaySoft, please refer to our previous blog series mentioned below:
Now that we have covered the initial connectivity process, let’s move on to our solution journey!
The Solution Journey to Import Data in CRM
With a ton of data that needed to be migrated to Dynamics 365, we began our exploration journey to find the easiest solution for our client. In our first attempt, we tried using the D365 import wizard for data migrations, but that process was too slow and complicated. For example, if the number of failed records exceeded 5000 during the import, we had to delete the existing records and then start the import process from the beginning. This was because D365 only provided us with the first 5000 failed records.
After reviewing multiple other solutions, we finally landed upon KingswaySoft for data migration. KingswaySoft is known as the best data integration and migration tool in the market for a good reason.
Benefits of KingswaySoft
Codeless Integration: Development can be done in a matter of minutes.
Flexible and Easy-to-use: User-friendly and simple interface.
Cost-Effective: A streamlined development experience and simple licensing model.
Unparallel Performance: Budget-friendly targeted feature set that allows for optimal performance.
Interested in learning more about this tool? Click below to review their website: www.kingswaysoft.com/
Now that we have understood the background of our dilemma and gone over the benefits of our selected solution, we can move on to the steps we need to take to import the data in CRM using KingswaySoft!
KingswaySoft- Steps to Import Data in CRM
To import data from Excel sheets to D365 using KingswaySoft, we need to perform the following steps:
Dump all the Excel sheets in your DBMS
Go to SQL Server Management Studio
Create a new database or use your existing database.
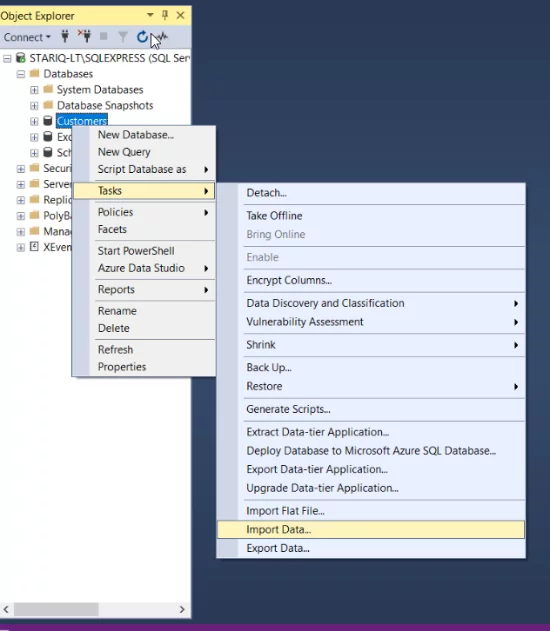
Right-click on the database and select Task -> Data Import
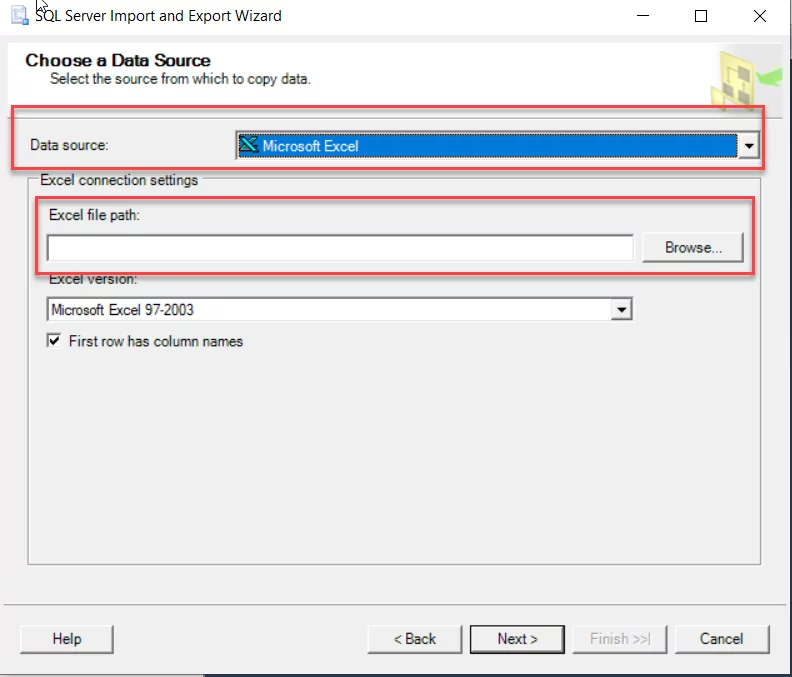
This will open a SQL Server Import and Export wizard, select Microsoft Excel in Data Source, and then give the path of the Excel sheet.
Easily Import Data in CRM seamlessly with AlphaBOLD
Looking to enhance your Dynamics CRM with streamlined data integration? AlphaBOLD is here to help you navigate the complexities of KingswaySoft. Begin your path to a more integrated and efficient CRM system.
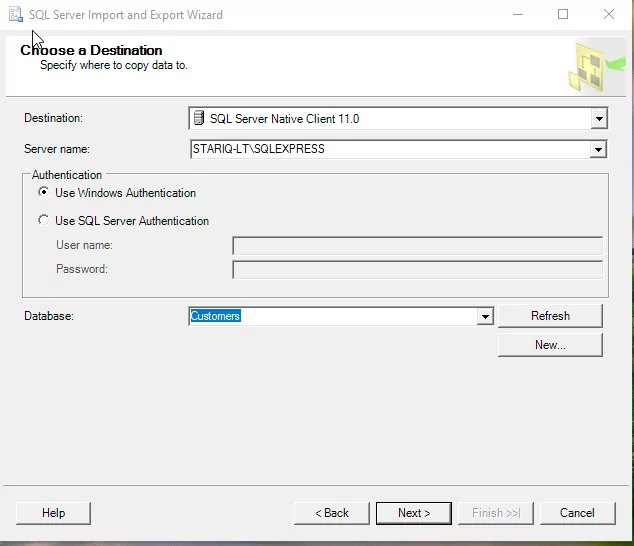
Click Next and select SQL Server Native Client 11.0 as a destination. Provide it with the Server name, the Authentication credentials, and the Database name.
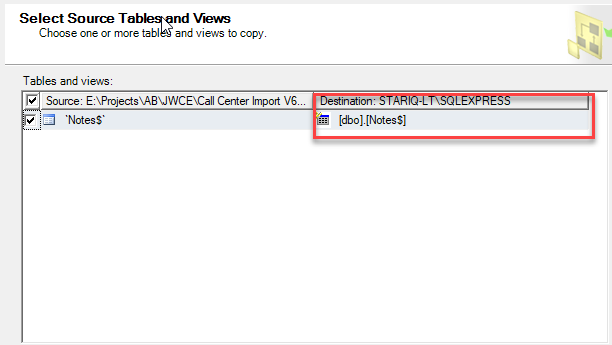
Click on the Next button and then give names to the tables (DB table names)
Click on Finish to dump all your data in the database.
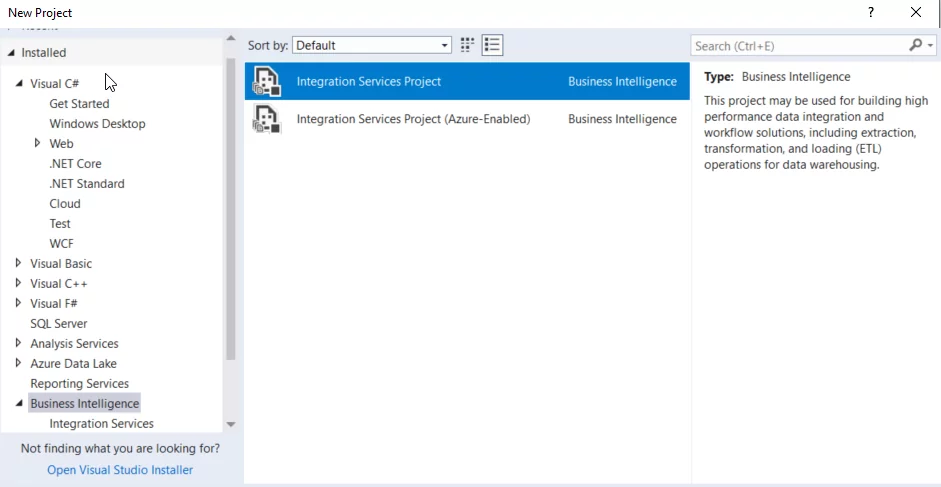
The next step is to create a new Integration Service Project in Visual Studio.
Now right-click Connection Manager, select New Connection -> DynamicsCRM, and click Add. Provide all the required connection details to CRM Connection Manager(when you enter the username and password, then all the organizations against that user will be listed down in the Organization area).
After adding the CRM connections, right-click again on Connection Manager, select New OLB Db Connection, and add a new database connection.
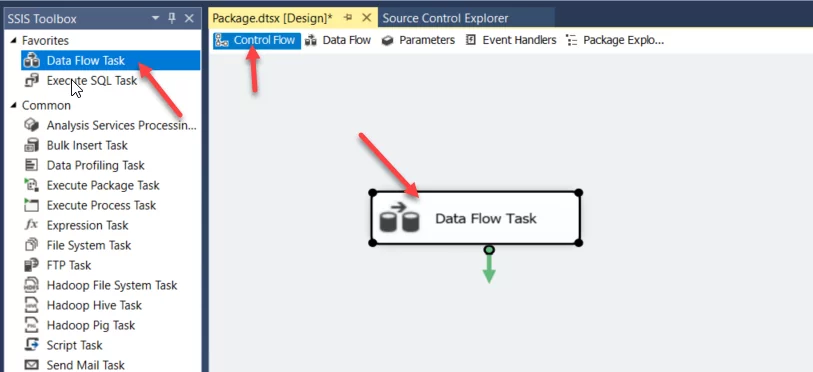
Once the connections are added, select the Data Flow Task option from the SSIS Toolbox and drop it in the Control Flow.
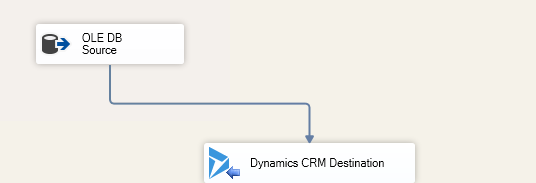
Double-click on the Data Flow Task. Drag the OLB DB Source and Dynamics CRM Destination option to the Data Flow Task and drop them in the main window. Extend the blue colored arrowfrom OLB DB Source to Dynamics CRM Destination.
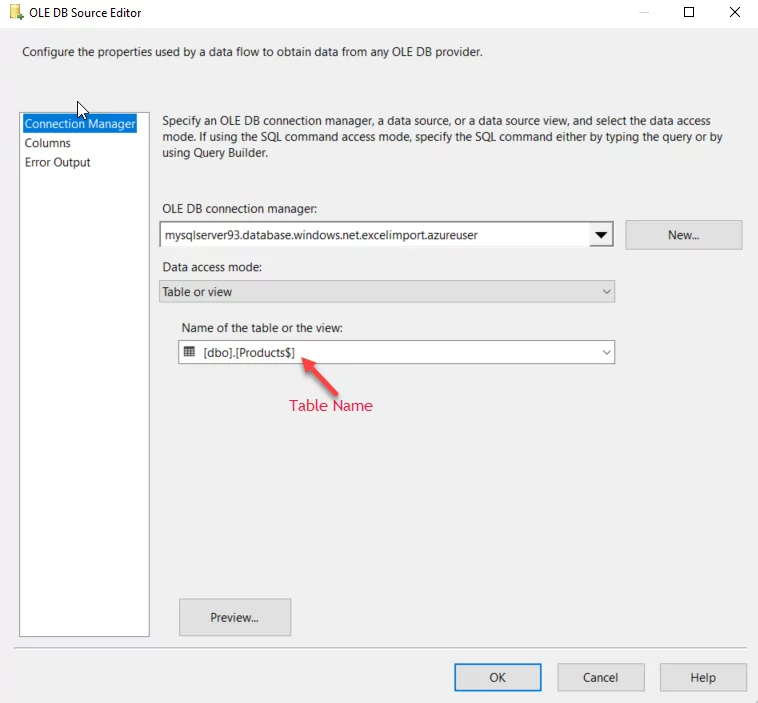
After that, double-click on OLE DB Source, select the connection added in Step 4, and then select the table.
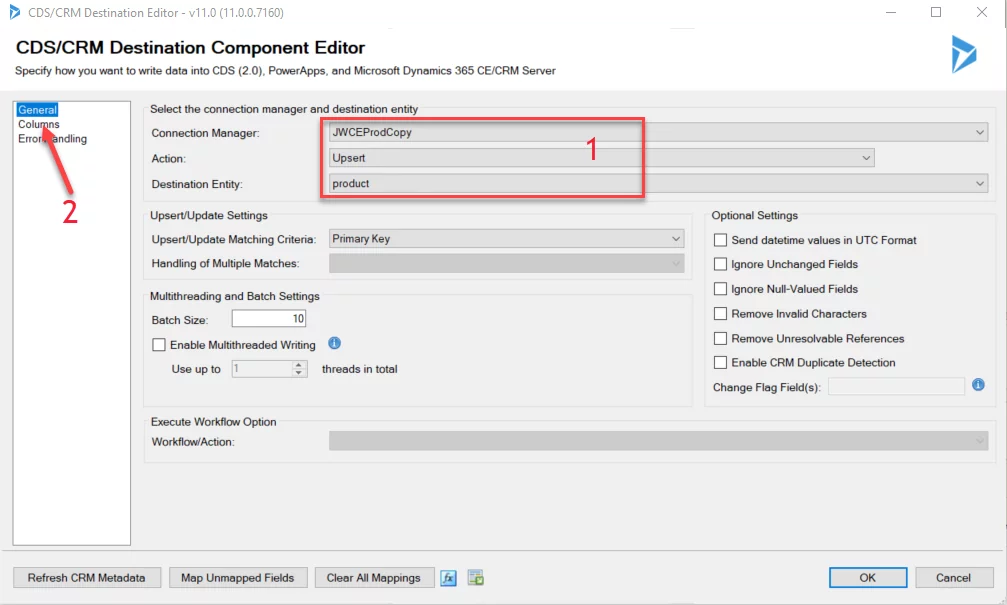
Now, double-click on Dynamics CRM Destination and the steps mentioned below:
Step 1: Provide the wizard with the
CRM Connection (added in step 3)
Action name: In our case, we need to update and create new records. To do this, we selected the Upsert (update and insert) action
Destination entity name
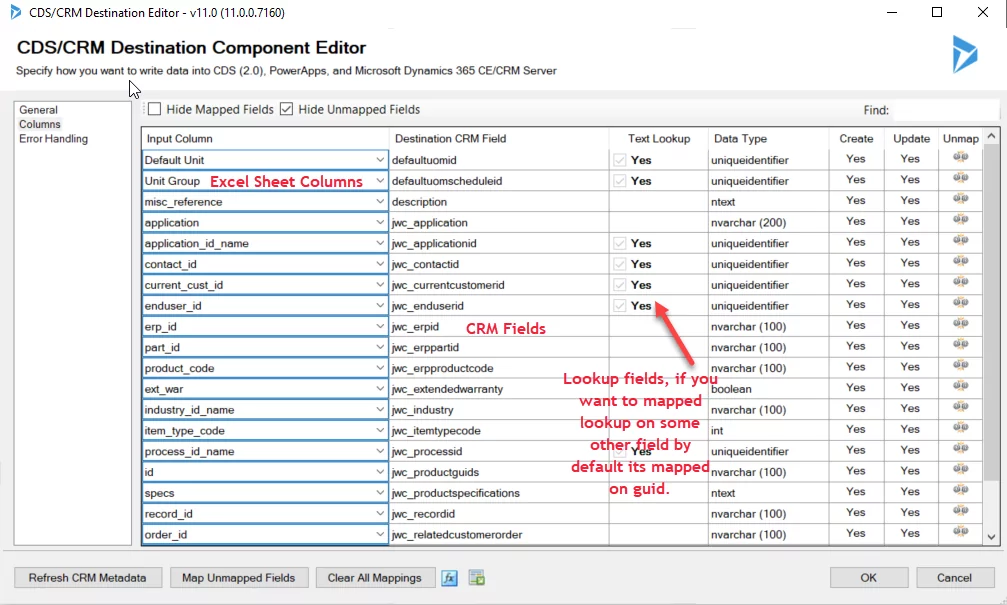
Step 2:
Click on Columns and then map the DB columns with the CRM fields.
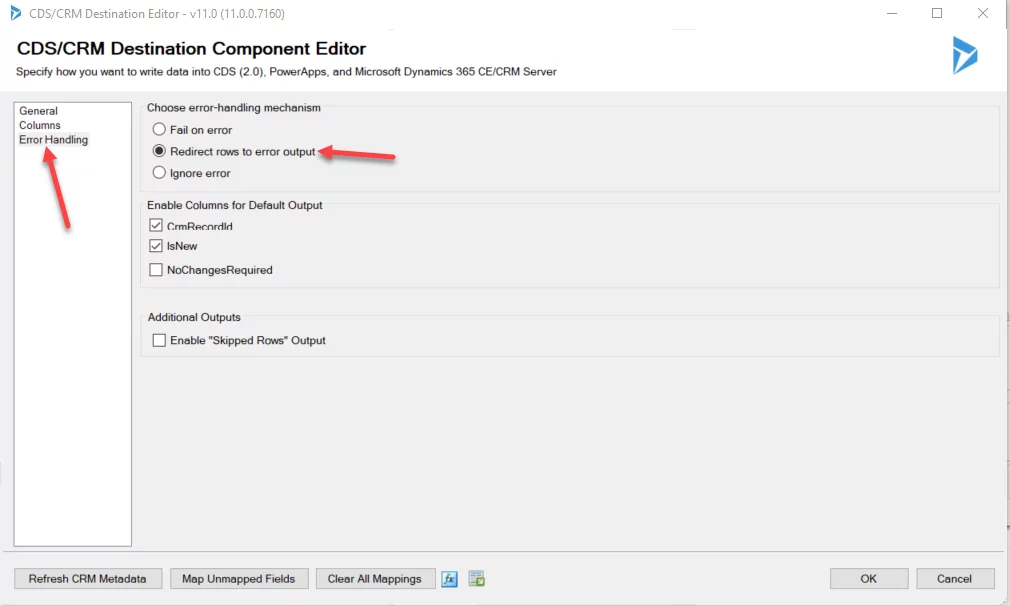
After successfully mapping the columns, you must do some Error Handling. Error handling is used to recognize failed fields and to determine the reason for their failure. Error handling allows us to import only the failed records. To do this, we need to perform a few steps:
Go to Dynamics CRM Destination, click Error Handling, and choose “Redirect rows to error output”.
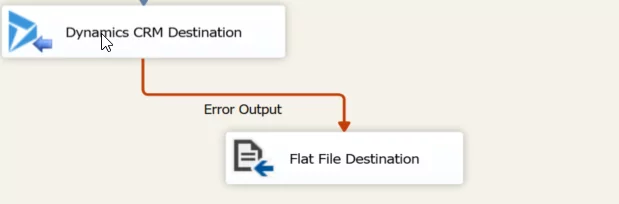
Drag the Flat File destination option from the SSIS Toolbox and drop it in the main window. Double-click on the option and then provide the file connection name and the file name you want to record the issues.
Extend the red color arrow from Dynamics CRM Destination to the Flat File Destination
Save the project, build it, and click the Start button. Your data will start importing in CRM.
Elevate your Dynamics CRM Experience!
Interested in seamless data integration for Dynamics CRM through KingswaySoft? Dive deeper into efficient data management and unlock the full potential of your CRM system with AlphaBOLD.
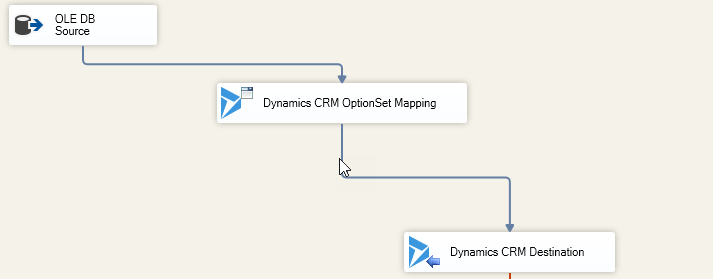
This data integration software also provides us with an Optionset Mapping option. When we import data to the CRM, the CRM only accepts the exact match options. If the data is not an exact match, it will throw exceptions. To import data that is not an exact match, you will need to add the Optionset Mapping Block. This option block should be set between OLB DB Source and Dynamics CRM Destination.
KingswaySoft proved to be a fast and reliable data import tool in Dynamics 365. It provided us with nine write action types (create, update, upsert, delete, convert, merge, execute the workflow, send, and bulk delete) – more than any tool offered in the market. This data integration tool met our client’s requirements. It gave them additional benefits, such as integrating multiple data sources and destinations like D365 online, on-premise CRM, Excel, SQL, etc.
I hope this blog clarifies your importing dilemmas and helps you successfully import data from Dynamics CRM using KingswaySoft. If you have any questions or insights about the blog, please contact us! If you have any questions or queries, please contact us!
1 thought on “Import Data in CRM using KingswaySoft”
We are glad to hear that our SSIS Integration Toolkits proved to be extremely useful. Thank you for the mention! We are always here to help to make data integration that much easier. And as you perfectly concluded, “Happy Importing!”


We are glad to hear that our SSIS Integration Toolkits proved to be extremely useful. Thank you for the mention! We are always here to help to make data integration that much easier. And as you perfectly concluded, “Happy Importing!”