

Introduction
As part of the new feature roll-out, NetSuite decided to provide Advanced Order Management (AOM) free of charge to its users.
AOM is a set of features or a module that facilitates and simplifies location assignments and order fulfillment. If, in the past, you had to constantly watch over your inventory stocks in each warehouse/store location to eliminate backorders, this is no longer needed with AOM features turned on.
When configured, the module will pick up the most appropriate or the closest location to your Customer and set it on your order lines, ensuring that every order can be fulfilled promptly. Additionally, the module introduces new transactions such as ‘Fulfillment Request’ or ‘Store Pickup Fulfillments’ that provide greater insight into the order process while decoupling the traditional shipping transaction (Item Fulfillment) in NetSuite. The latter can be very useful in the context of 3PL fulfillment and complex EDI flows. In this blog, we will be exploring what this module does through a step by step demonstration!
Prerequisites
Before we begin, please enable the following features (go to: Setup > Company > Enabled Features):
- Automatic Location Assignment (‘Transactions’ Tab)
- Fulfillment Request (‘Transactions’ Tab)
- Store Pickup (‘Transactions’ Tab)
AOM provides 3 important features that are indispensable to distribution companies:
- Automatic Location Assignment (ALA)
- Calculates the optimal fulfillment location/fulfillment path and sets it on each order line.
- The logic is fully configurable
- Enables omni-channel scenarios
- Fulfillment Requests
- The new transaction that exists between the Sales Order and Item Fulfillment.
- Facilitates release of order lines for fulfillment
- Can be generated manually or automatically, through an ALA engine
- Store Pickup Fulfillment
- Separate fulfillment transaction that manages store pickups
- Out of the box notifications for customers and staff
Here, I will not cover the configuration and setup in detail. The instructions are readily available in SuiteAnswers (please log-in to SuiteAnswers and click on this that said, I will walk you through the main setup steps and demonstrate the benefits this module provides.
Configuration
The following diagram depicts the main steps you need to perform to configure ALA:
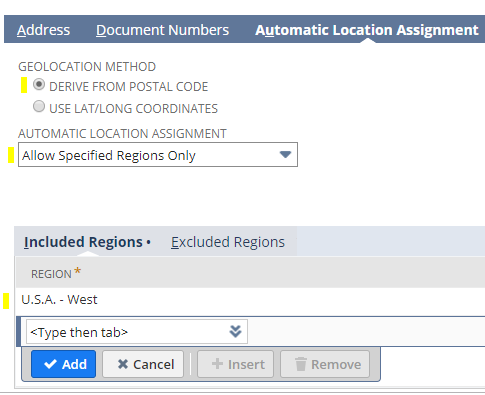
- Note, I created U.S. regions to better manage fulfillment. You may choose the same. To access the regions, you must go here:
Setup > Company > RegionsI divided my regions by U.S. states, you may choose to do this differently.
- Back on the location record (Automatic Location Assignment tab), you may set the regions you want to include in your auto location assignment.

- There are plenty of other options available, to learn more about each one and their effect on fulfillment, please review this article in SuiteAnswers. The system will consider these location settings when processing assignments. article in SuiteAnswers.
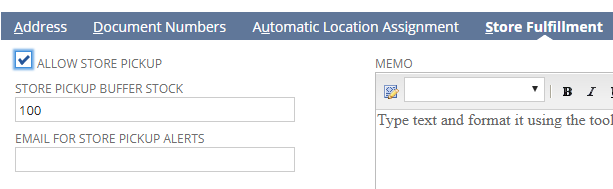
- ‘Allow Store Pickup’ check-box (Store Fulfillment tab) must be checked if the location represents the store where customers will be able to pick up their orders.

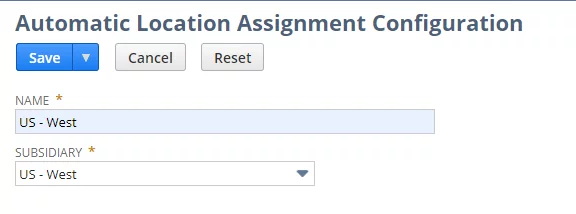
Next, you must create a configuration record(s) that will tell NetSuite how to auto-assign locations on your orders.
- Go to: Setup > Order Management > Configurations > New
- The next screen is a bit confusing. Don’t worry, just enter the name for your configuration, I used the region name, and I picked the Subsidiary (for those of you who run in a OneWorld environment).

- Once you save the configuration record, edit the record, and you will be able to proceed to the next step.
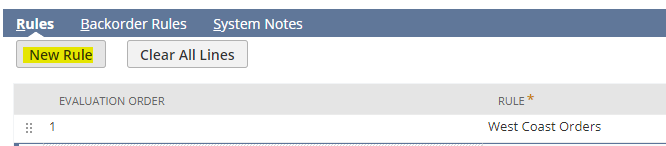
In this step, you define how the assignment will be calculated.
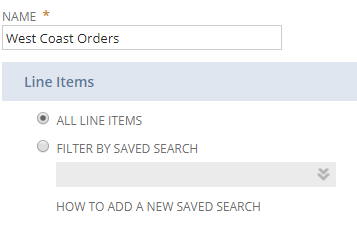
- Please start by clicking on the [New Rule] button

- On this page, you have two options: 1) apply the rule to all items; 2) apply the rule to the items returned by a Saved Search

- The rest is self-explanatory, if you want to learn how each field will affect your system, please read the following in SuiteAnswers.

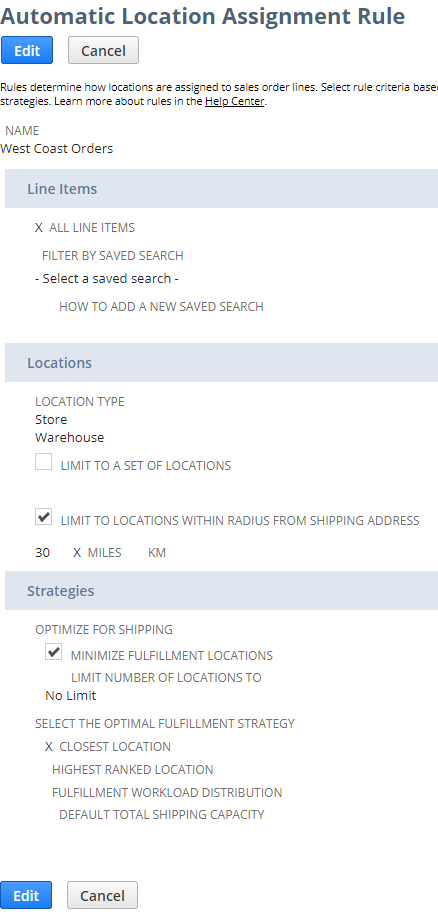
- To learn more about each setting and its impact on fulfillment and location assignments, please read the following (you must be logged in to SuiteAnswers).
- Note, if you run OneWorld NetSuite environment, in the ‘Automatic Location Assignment’ tab you can assign the default configuration per subsidiary.
Walk-through
Now that the tough part is completed, let’s test our configuration.
Before you begin:
- please make sure that you have enough inventory in all the locations that will be used for assignment and fulfillment.
- Expose the following fields on your Sales Order form (go to: Customization > Forms > Transaction Forms):
- Header Fields (Items Tab):
- Automatic Location Assignment Configuration
- Fulfillment Choice

- Line Fields / Sublist Fields:
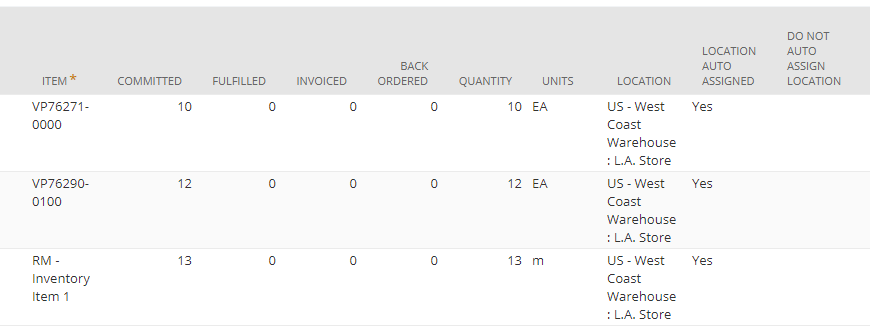
- Location Auto Assigned
- Do Not Auto Assign Location

- Header Fields (Items Tab):
Note, if these fields are not exposed, the auto-assignment will not work correctly.
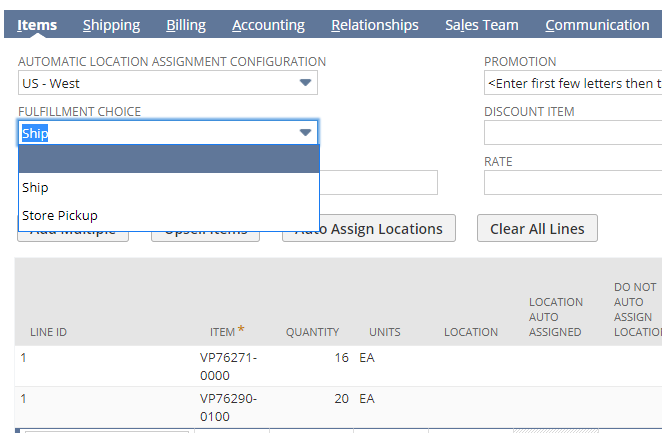
Scenario 1: Create Sales Order for a customer with the shipping address in Denver, Colorado
- On the order, please select the ‘fulfillment choice’ (ship/store pickup)

- Once you make your choice, save this transaction.
- Depending on your settings on the ‘Advanced Order Management’ page (Setup > Order Management > Advanced Order Management), the system will either create the fulfillment request immediately, or delay the duration which you can specify here:

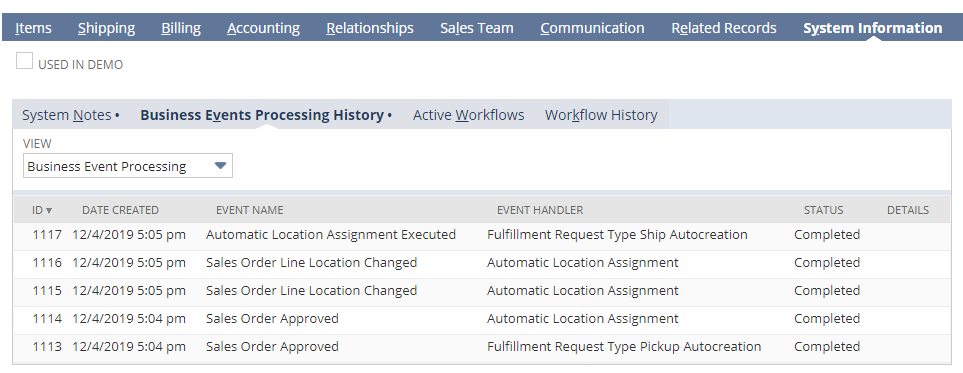
- To check the status of auto-assignment and review the back-end processing, please review the ‘Business Events Processing History’ tab on your Sales Order

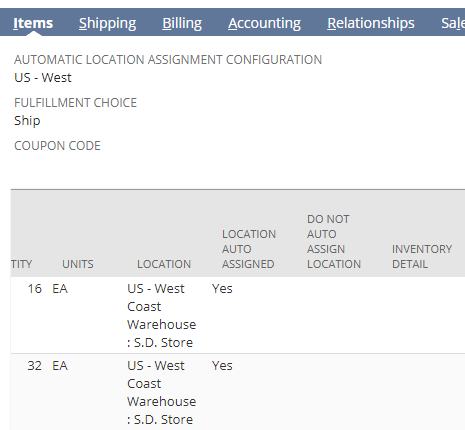
- When you go back to your transaction lines, you will see some changes in the location fields.

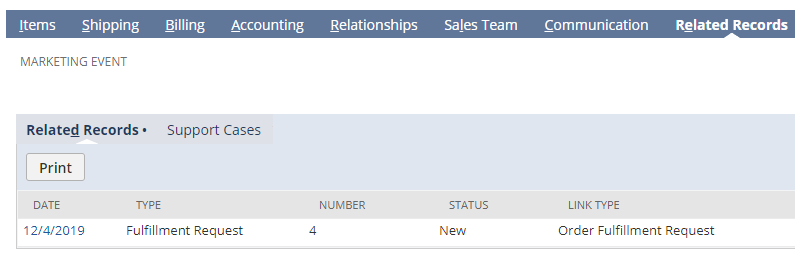
- Fulfillment Request was generated automatically, and the appropriate system users can see these transactions in their ‘reminders’ portlet.

- Fulfillment Request is a non-posting transaction, and it is used for special processing of orders. This is NOT a required step and is often used with store pickups.

Scenario 2: Perform in-store pickup
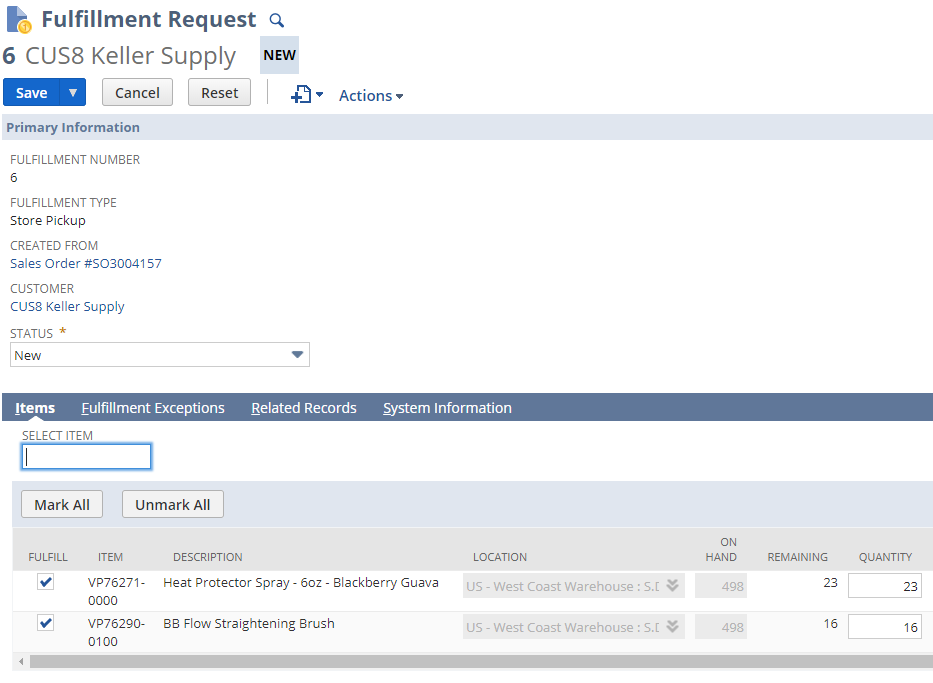
- Now, let’s assume that a different, local customer is picking up the products in-store. CUS8 Keller Supply is in Vista (CA), and this is close to our San Diego store location.
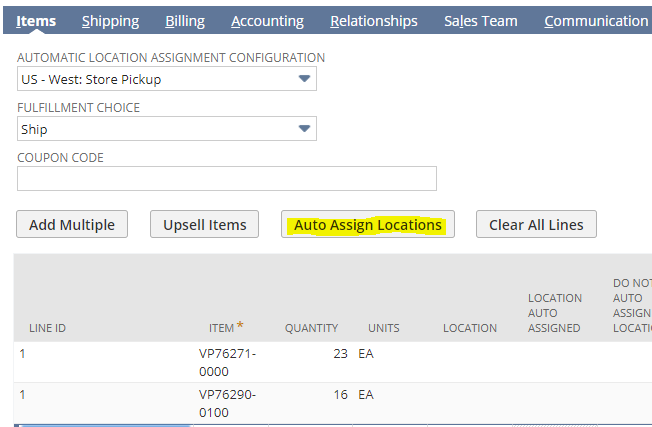
- When the order is entered, the SD store location is automatically assigned based on our settings (see the configuration above). Note, it’s important to select the correct ‘fulfillment choice’ as this will drive the transactional workflow. For store pickups, use the ‘Store Pickup’ selection.
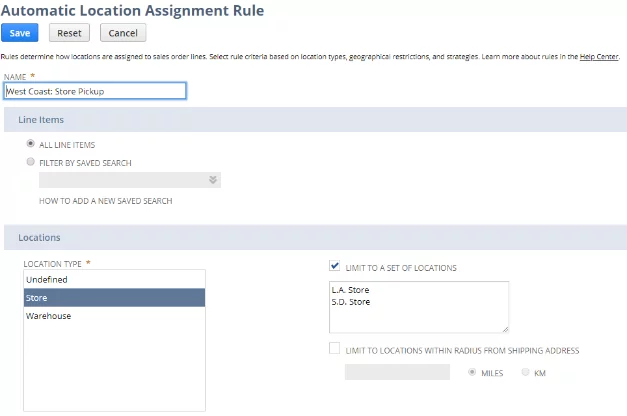
- Also, when using store pickup fulfillment choice, ‘auto-assign of locations won’t work, so you must enter the locations manually. One workaround would be to create a configuration for store-pickups, see ‘US West: Store Pickup’. In this configuration, you can make sure that only the locations that are designated as stores are used for fulfillment.

- On the order, you will select this configuration and click on [Auto Assign Locations] button. This will set the correct location on the lines, and then you will be able to select the correct fulfillment choice ‘Store Pickup’.


- The Fulfillment Request will be generated 3 minutes after the location assignment as per our settings above.

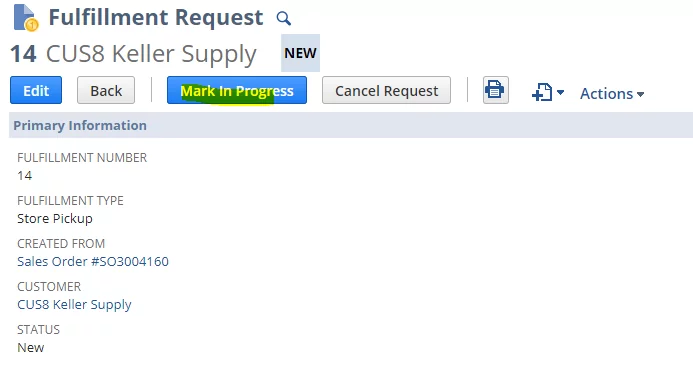
- The in-store employee will open the fulfillment request and commence processing the order fulfillment (picking the order).

- Once the Fulfillment Request is saved, click on [Mark in Progress] button.

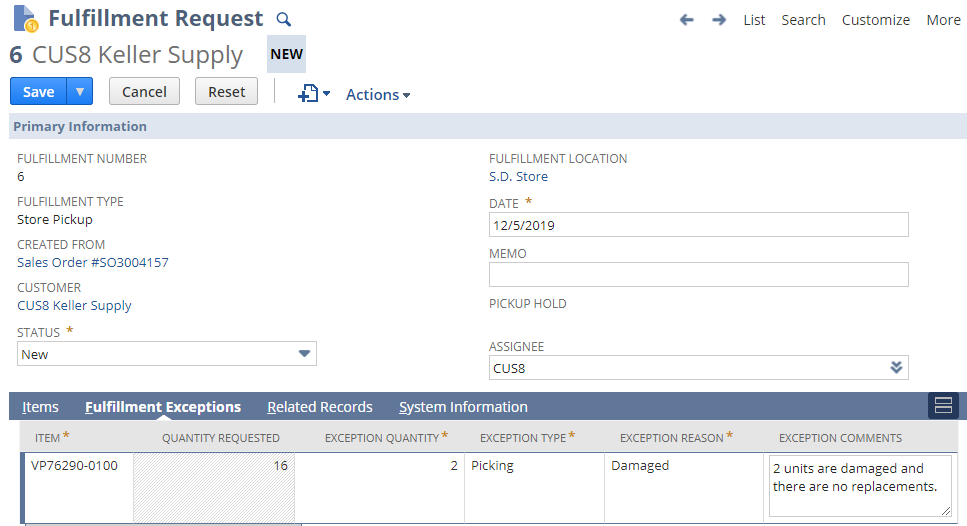
- Let us assume that some of the inventory is damaged, and we cannot find replacements in the store. When this scenario occurs, the employee will record something NetSuite calls a ‘Fulfillment Exception’. This is done on a separate tab of the Fulfillment Request transaction.

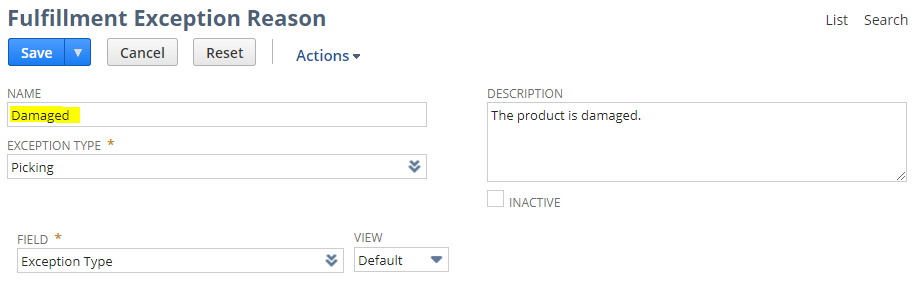
- The following is slightly confusing, so bear with me. The exception reasons can be customized, and you can add as many reasons as needed. This can be done by navigating to the following page (Administrator): Setup > Order Management > Fulfillment Exception Reasons > New. Note, the ‘type’ cannot be modified, you must use the available ones, the reason that you see in the screenshot above comes from the value you put in the highlighted ‘name’ field on the ‘Fulfillment Exception Reason’ record.

- Back to the Fulfillment Request (FR). Once the exception reasons are submitted, and the FR is saved, the customer service agent or the customer can be notified of this exception. The store clerk/customer service agent will contact the customer and determine how to handle the missing inventory.
- If we assume that the customer decided to pick up only the available units, the store clerk will fulfill only the available inventory.

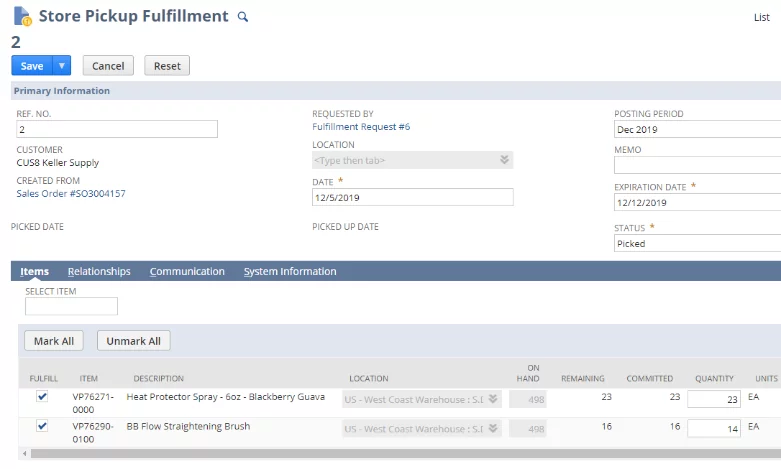
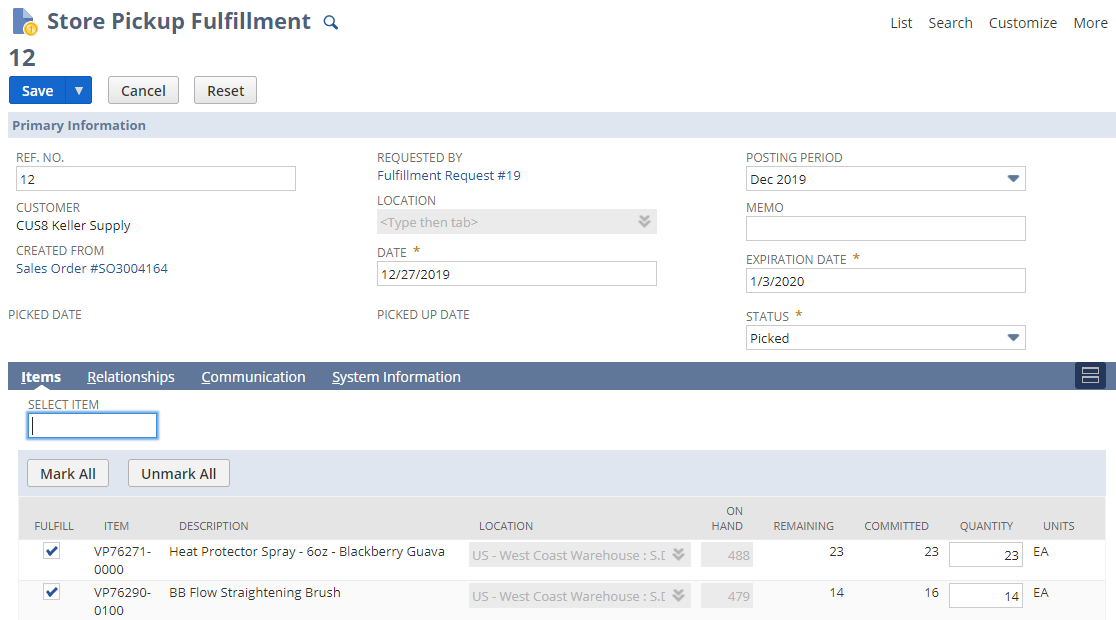
- Continue fulfilling the items that are available on the shelves, by clicking on the [Fulfill] button on the Fulfillment Request. NetSuite will create a Store Pickup transaction for you. Select the quantities that you can fulfill, only.

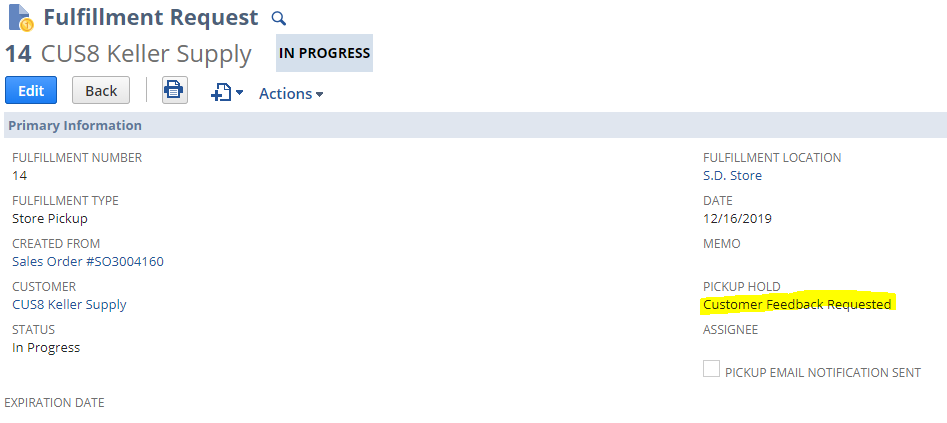
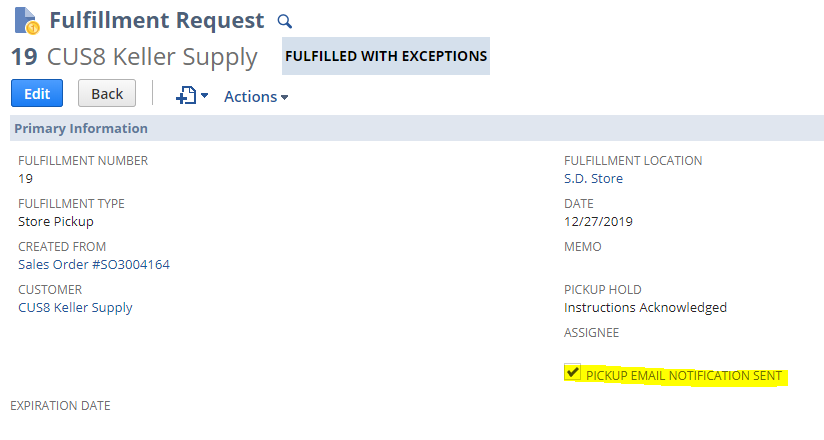
- Notice, once you save the Store Pickup Fulfillment and go back to your Fulfillment Request, you will notice this note in the ‘Pickup Hold’ field. This means that the Customer Service rep. must contact the customer and resolve the fulfillment issue.

- Once the customer replies, their instructions are applied to the fulfillment request. Let us assume that the customer will ask us not to fulfill the damaged units.
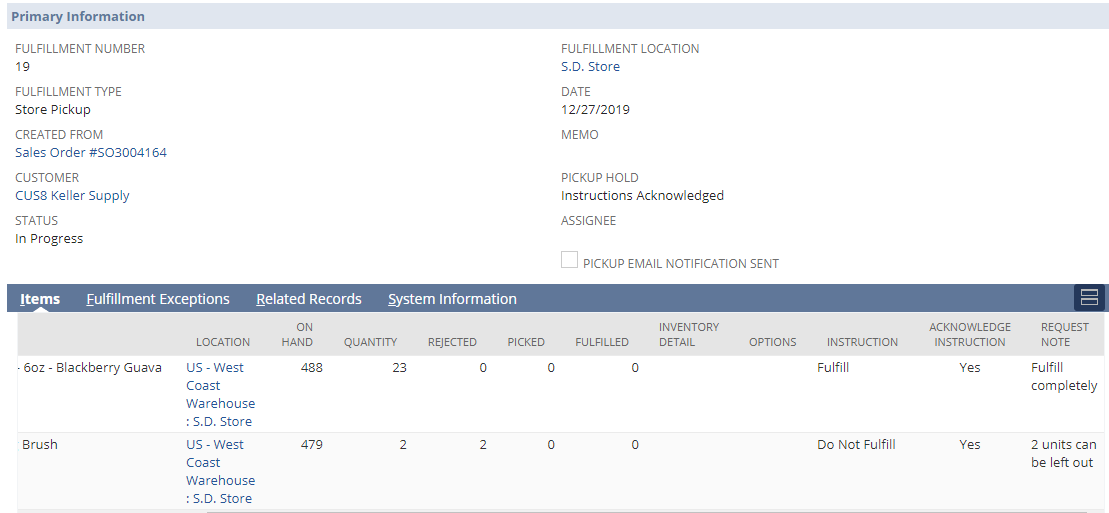
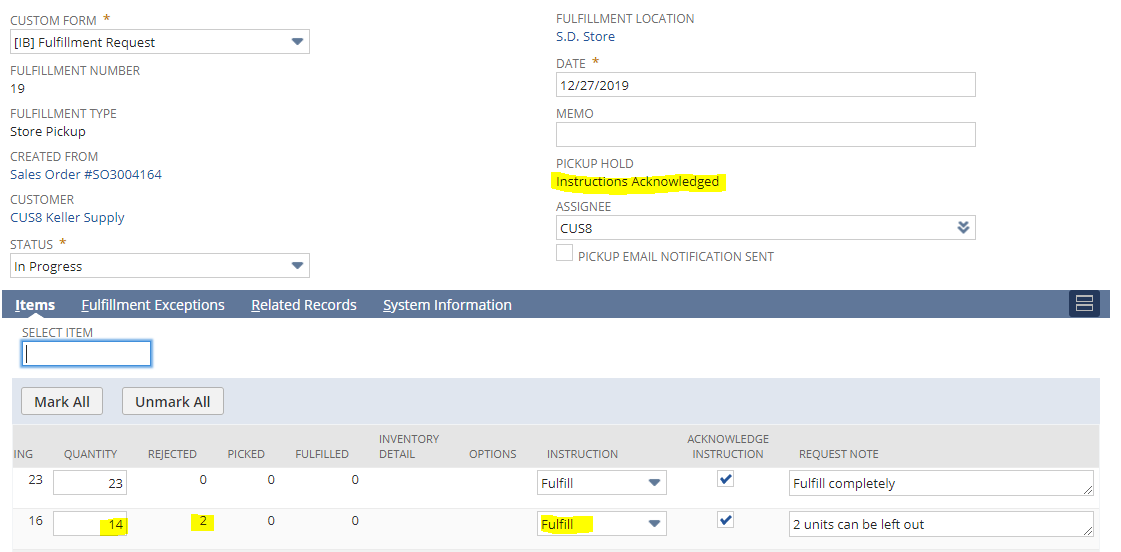
- Edit the Fulfillment Request and populate the ‘Instruction’ column on the item line-level

- Edit the Fulfillment Request and populate the ‘Instruction’ column on the item line-level
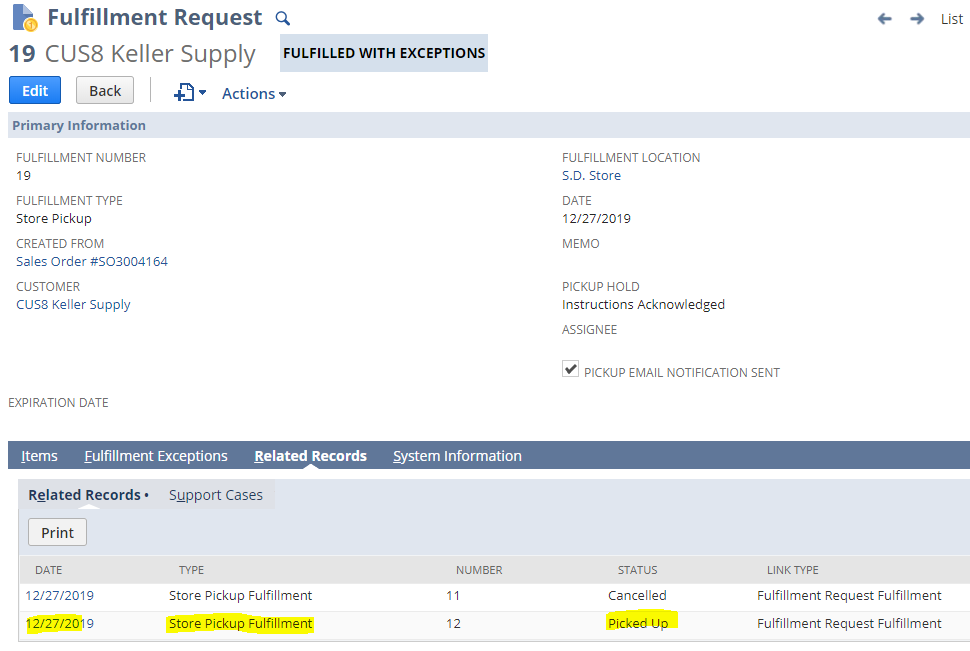
- Note, the original pickup fulfillment transaction is cancelled automatically. It is thus important to remember to go back to the Fulfillment Request line and change the quantity you wish to fulfill the number of units that are available for pickup. Also, notice the value in the Pickup Hold will change to ‘Instructions Acknowledged.’

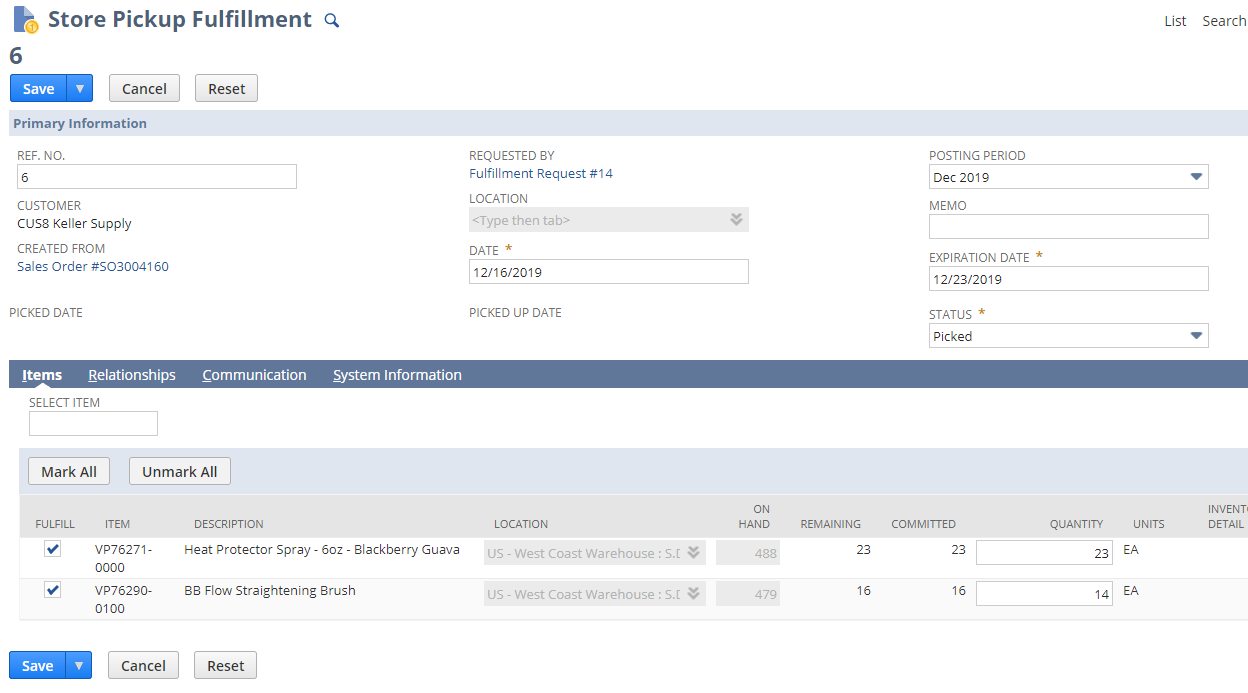
- [Save] this transaction and once again click on [Fulfill] button. The system creates a new Store Pickup Fulfillment transaction.

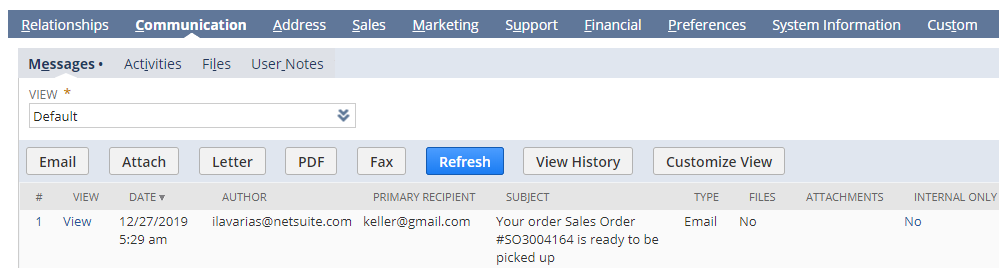
- When the order is saved, a pickup reminder, email is sent to the customer.


- Back on the Sales Order, the customer service will complete the billing and close the remaining lines so that no future inventory is committed to this order.


Conclusion
We found this module very useful to Wholesale Distribution and Retail companies that have an omnichannel approach to satisfying demand for their products. Once configured, the module assigns and re-assigns store and warehouse locations ensuring that there are no delays in product delivery. More importantly, the process is automated and straightforward, requiring very little user intervention.
To maintain our objectivity, it is important to say that we did find the store-pickup functionality less automated and, at times, difficult to use. We feel that a SuiteFlow workflow can assist in making that fulfillment process more straightforward.
We hope that this article was informative. If you have any questions or interesting use-cases that you would like to share with us, please feel free to reach out to us at [email protected], we would love to hear from you.