Microsoft Dynamics CRM is a Customer Relationship Management software by Microsoft. The main areas it focuses on are sales, marketing, and help desk. Microsoft has been promoting Dynamics CRM as a Customer Relationship Management and advised to use it once proprietary. It can also be customized by using an Open Source (.NET based) framework.
Here we will discuss the automated deployments (Continuous Integration and Continuous Deployment) of MS Dynamics CRM on On- Premise and Cloud Using Azure DevOps Pipelines.
Types of CRM Solutions
MS Dynamics Solution:
An MS CRM solution is a package that is customized or developed by customers to extend the CRM. Any update that needs to be done on a Microsoft CRM can be packaged in a solution and then deployed on the target organization.
Managed Solution:
A solution that is finalized and planned to be distributed is known as a managed solution. Once deployed on a target organization, it cannot be modified on the target organization, and when uninstalled, all the customizations done would be rolled back.
Unmanaged Solution:
A solution that is still under development and not aimed to be delivered is called an unmanaged solution. It can be modified even on the target organizations. It contains all the components that were customized or updated in the development organization. Once installed on an organization, the customization done by the unmanaged solution cannot be rolled back, even if the solution is uninstalled.
Continuous Integration and Continuous Deployment Using Azure Pipelines
Azure DevOps allows us to use its build and release pipelines to set up CI/CD of CRM Solutions.
Continuous Integration:
Azure DevOps Build Pipelines are used for continuous integration. CI triggers when there is a commit in a specified branch and repo. In the case of Pipeline for Microsoft Dynamics CRM, the build pipeline will be used to export our CRM solution from the specified source organization. Using Azure DevOps, you have plenty of tasks for exporting a CRM solution. You can also use a PowerShell Script for this purpose.
Continuous Deployment is, whenever a build pipeline is completed successfully, the artifacts published by that build pipeline should be deployed to the destination organization. Microsoft Azure DevOps Release Pipelines can be used for Continuous Deployment of Dynamics CRM Solution.
Elevate Your Dynamics 365 Integration
Ready to streamline Dynamics 365 CRM solutions with CI/CD? Consult with AlphaBOLD for expert insights and seamless integration strategies. Let's optimize together!
Setting up a Build Pipeline (Continuous Integration):
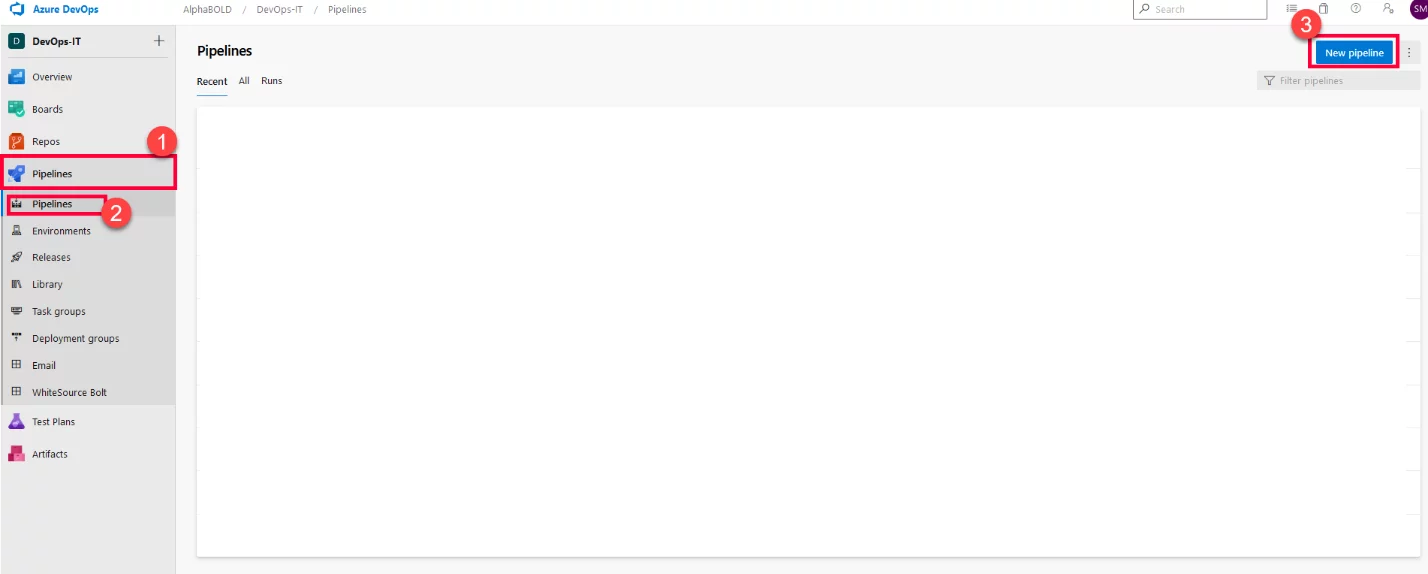
Navigate to the project you want to create a pipeline for.
Click on the pipelines, select pipelines, and Create a new pipeline using the New Pipeline Button.
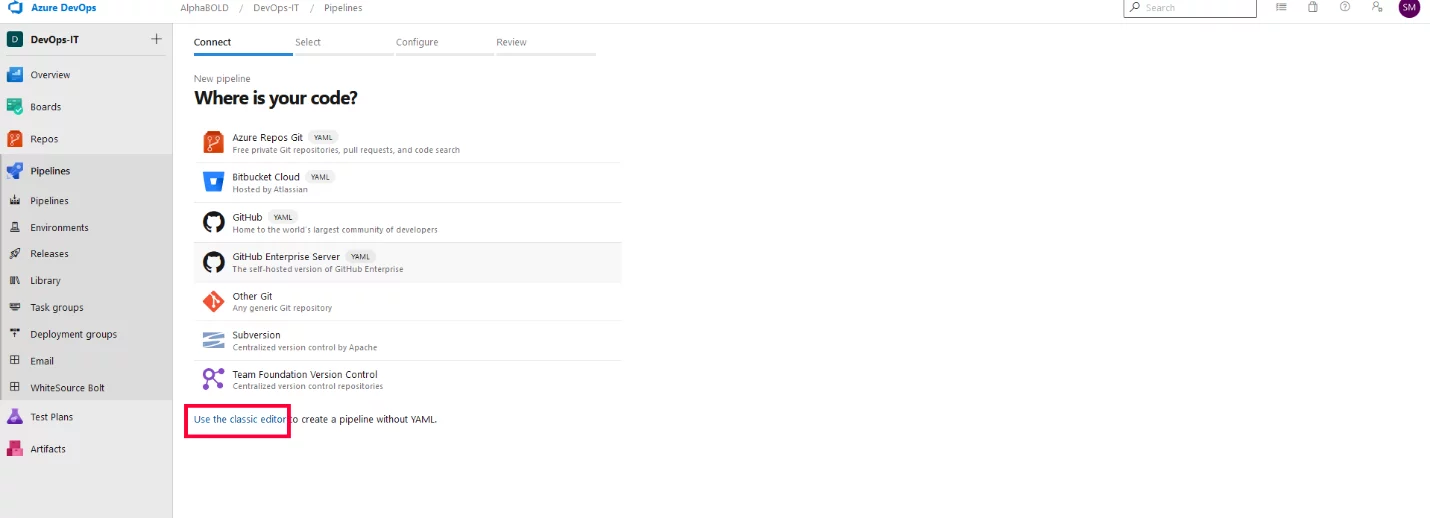
Click on the Use Classic Editor.
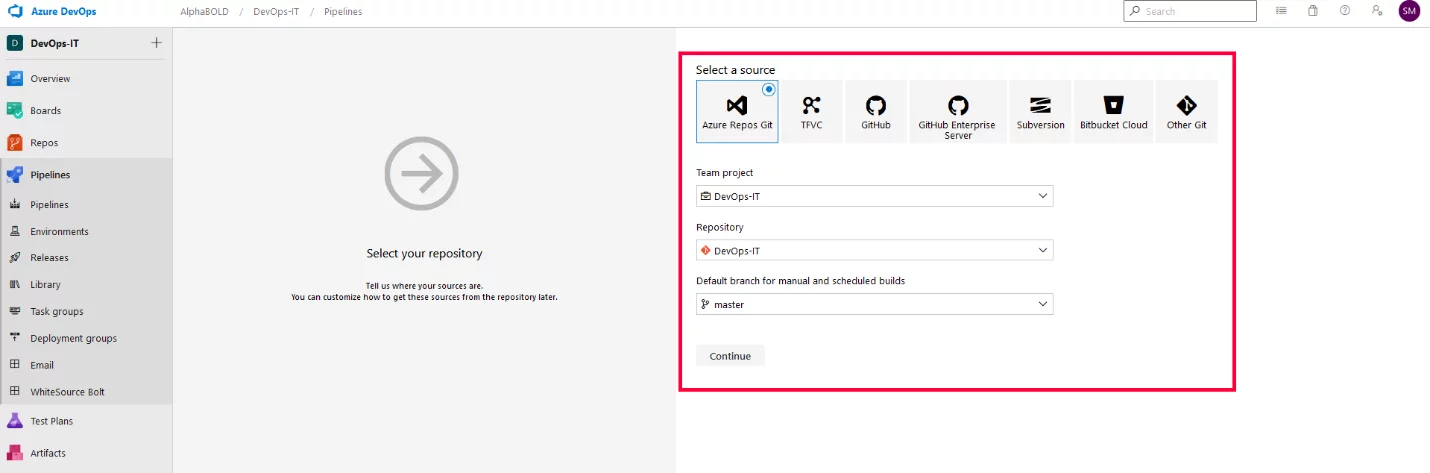
Specify the Repo where your code resides and to which you want to Enable CI and create the pipeline with Empty Task.
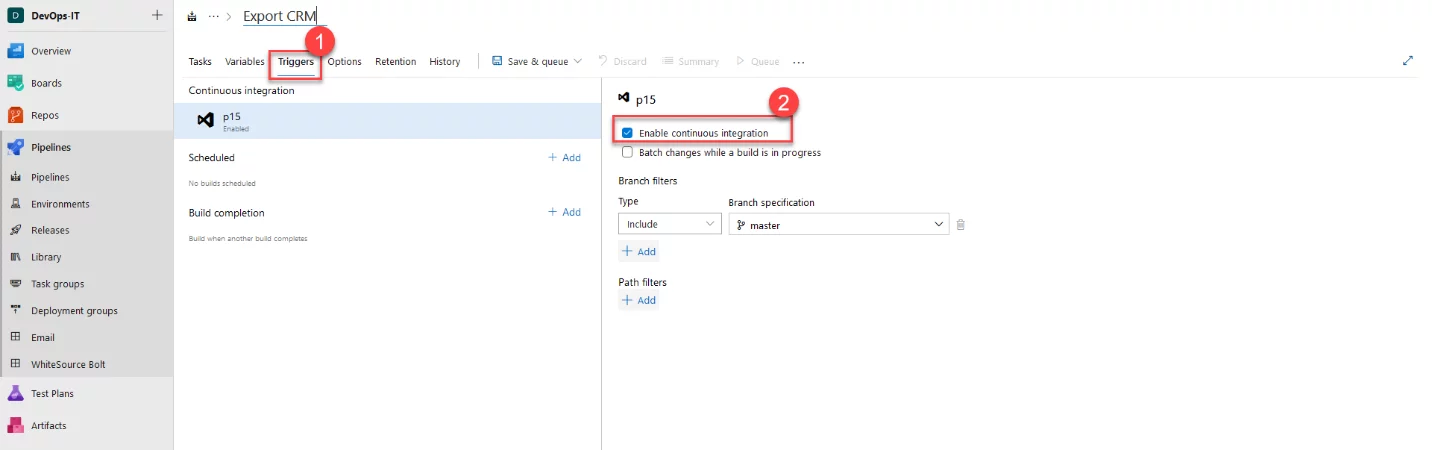
Enable Continuous Integration of Azure Pipelines. Click on the trigger button and check the box “Enable Continuous Integration.
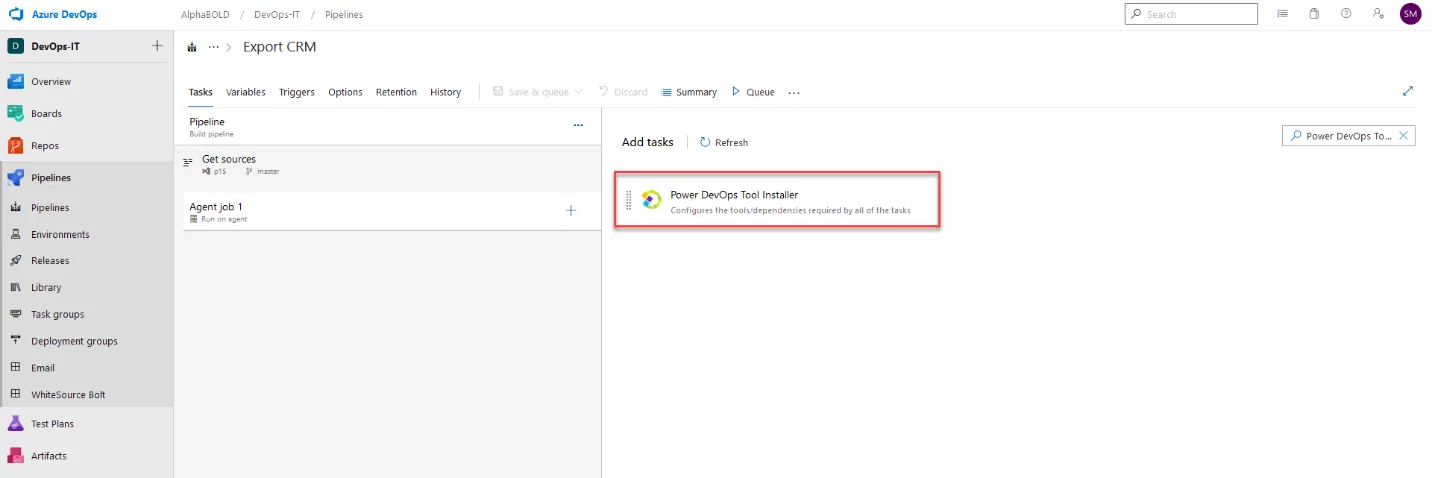
Add the Task for Power DevOps Tool Installer.
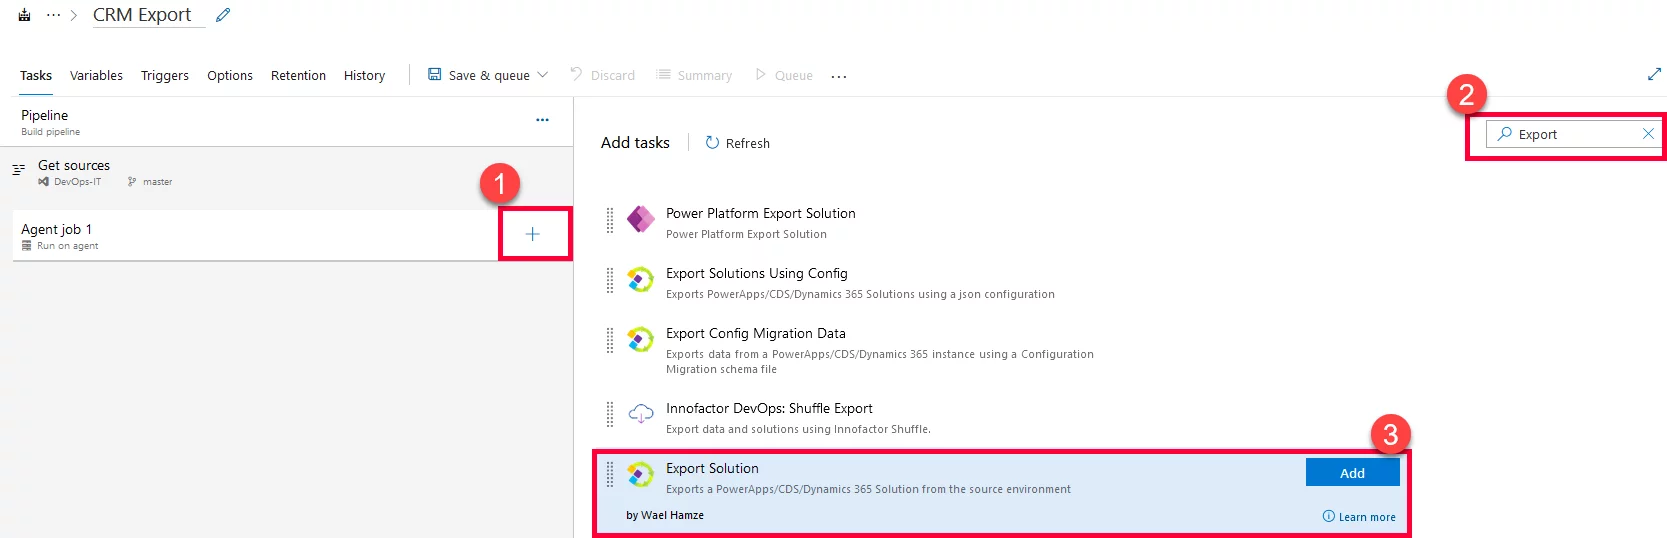
Now add the task for Solution Export. You can use the task that you want to;, we will be using the following one.
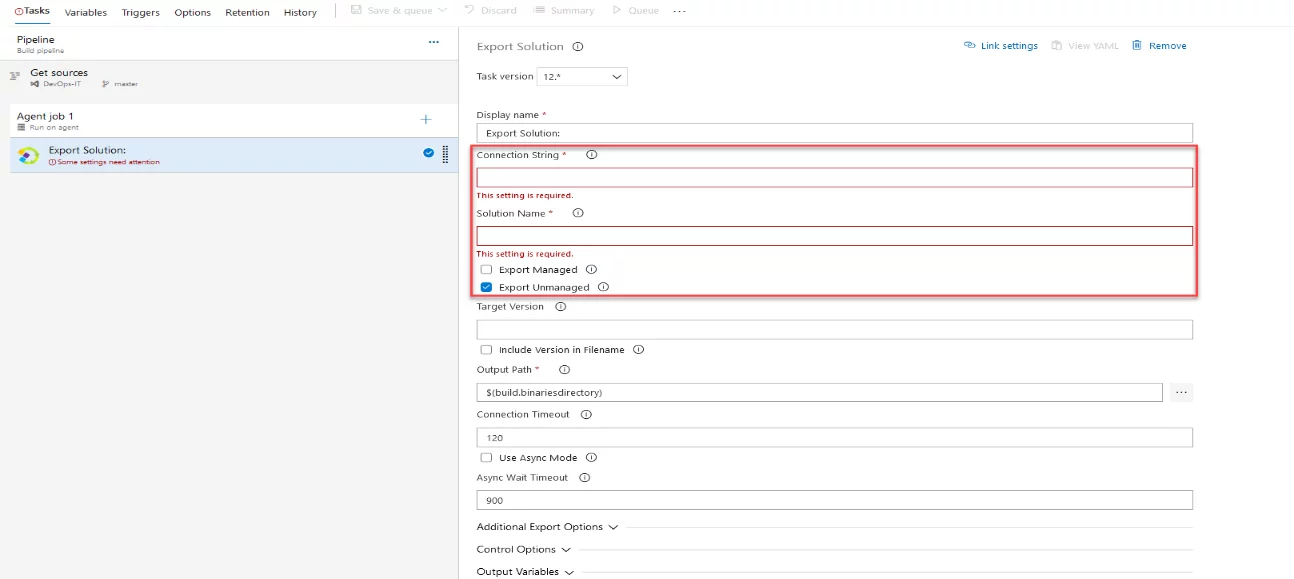
Now provide the connection string and the name of the solution to the task. The connection string would be like this:
“AuthType=Office365; Url=<url to CRM Server>; UserName=<[email protected]>;Password=<*******>”.
You can also specify the task whether you want to export the solution as Managed or Unmanaged. Keep in mind or copy the Output Path it would be needed in the next step.
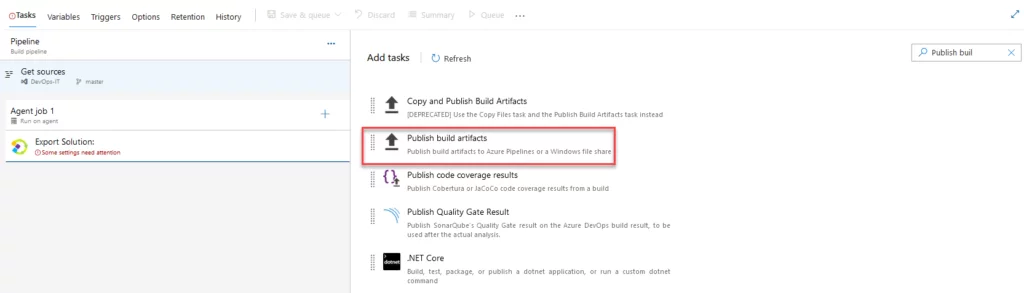
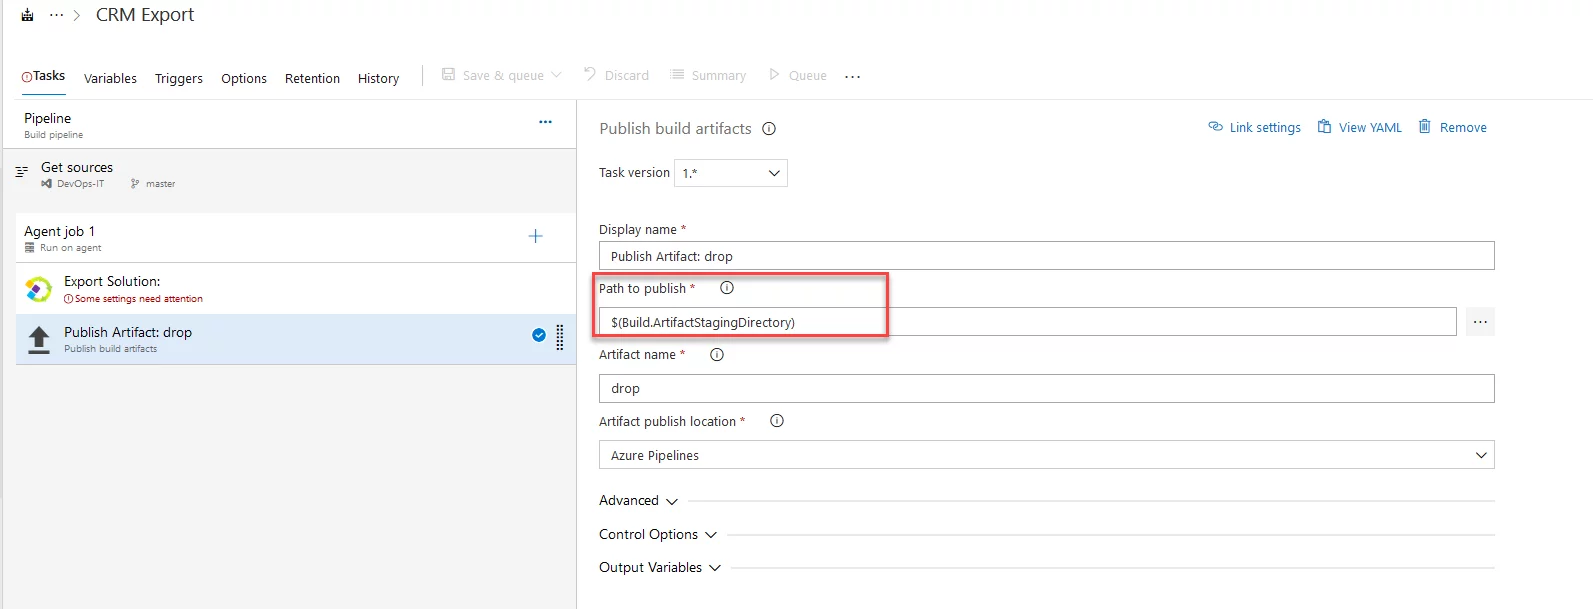
Once the Microsoft Dynamics CRM solution is exported, you need to publish it as an Artifact. Publish Build Artifact is an Azure DevOps Build Pipeline task that can be used to do so.
Paste the output path in the “Path to Publish” you copied in the previous task to Publish the CRM Solution an artifact. You can also rename the artifact’s name. This name would be used in the release while importing the CRM solution.
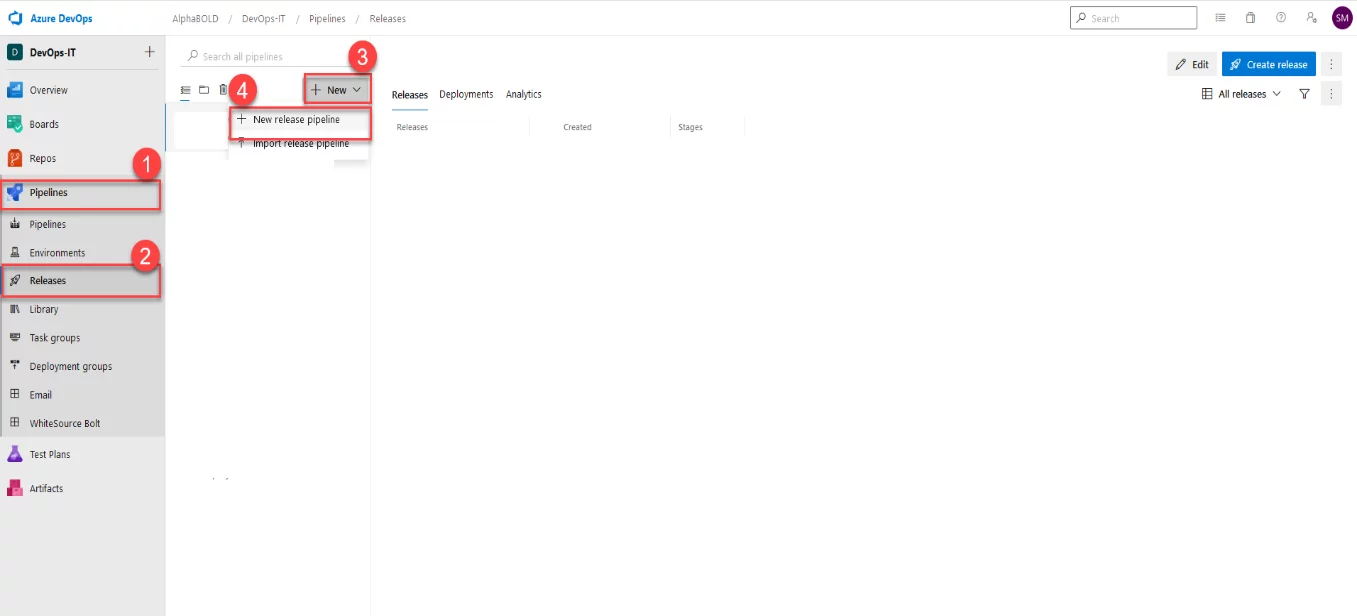
Setting up a Release Pipeline (Continuous Deployment):
Navigate to the project where you want to set up the Continuous Deployment. Click on the Pipelines, Select Releases and Create New Release Pipeline. Start with the Empty Job.
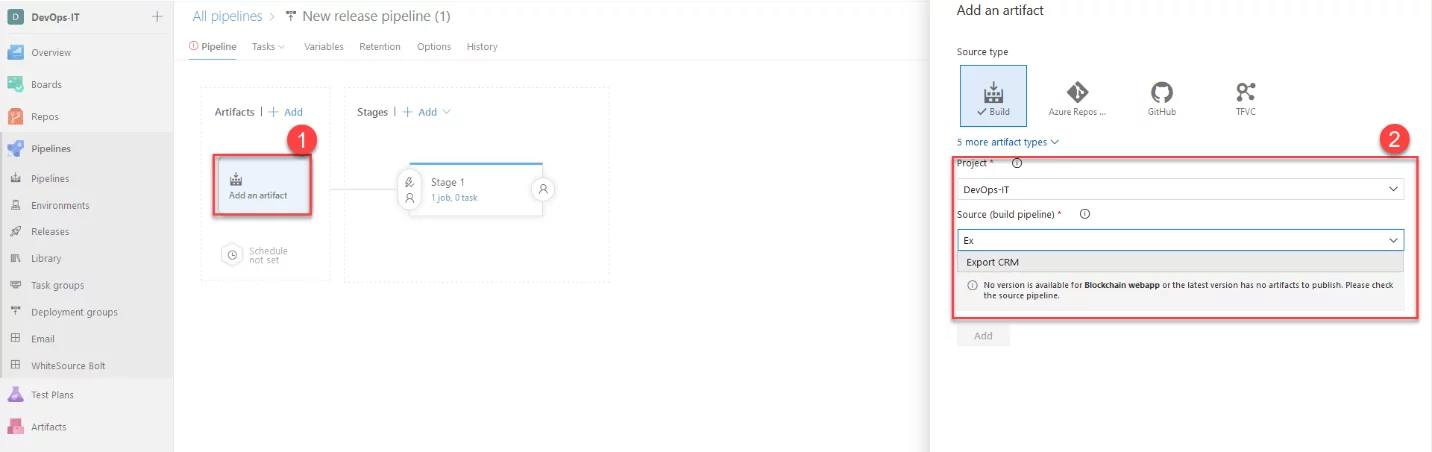
Link the build pipeline to the Continuous Deployment pipeline by using the Add an Artifact button.
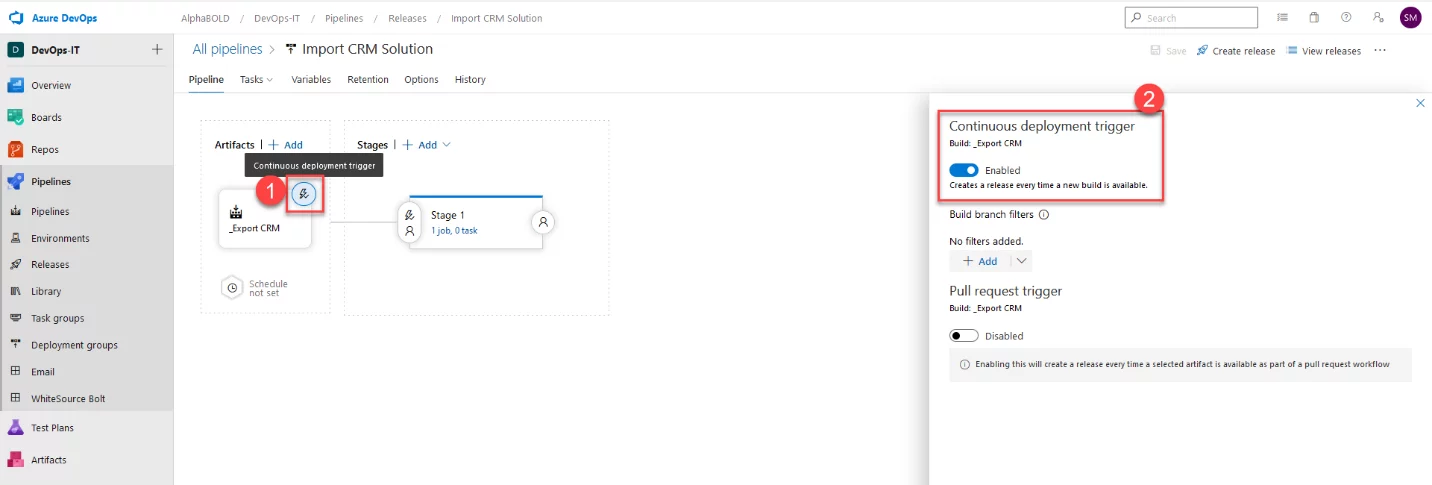
Enable CD by using the Continuous Deployment Trigger Button.
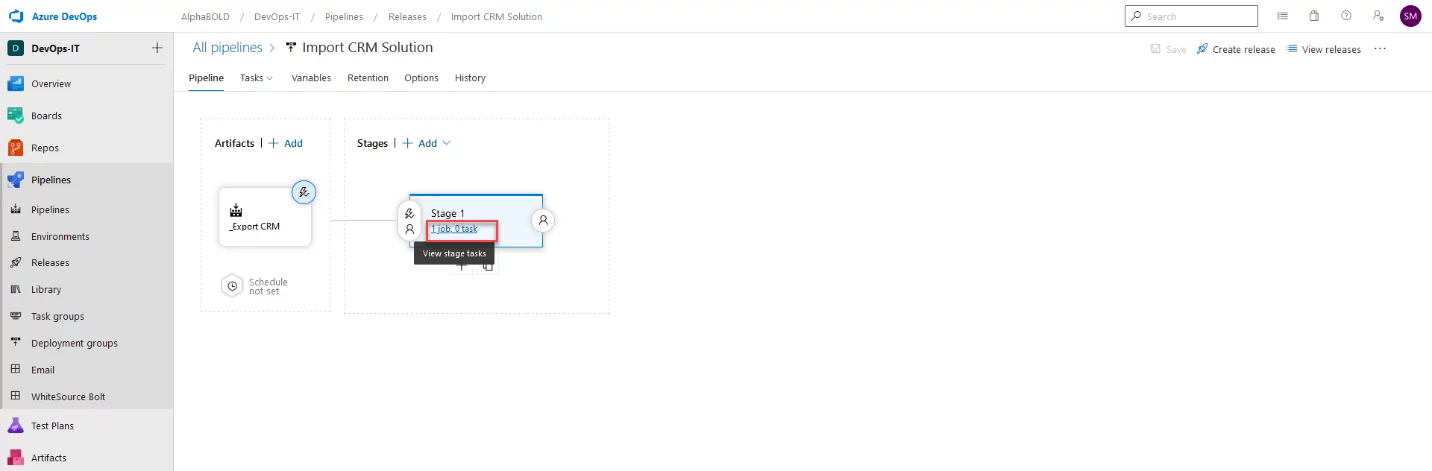
Now add the steps to the release pipeline by clicking on the Job, Task button under the Stage name.
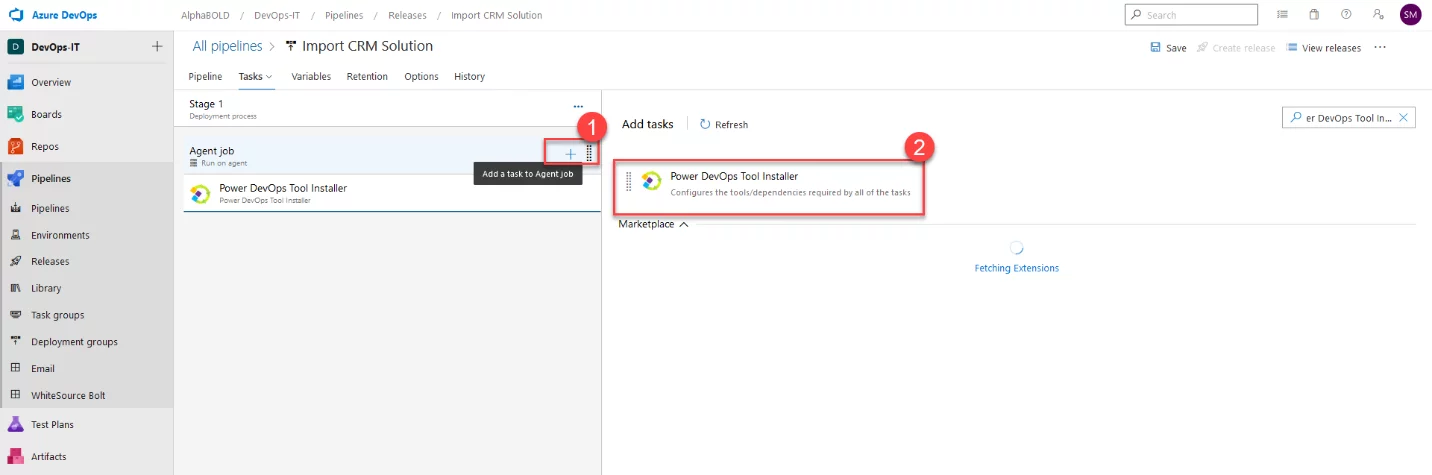
Add the Power DevOps Tool Installer task.
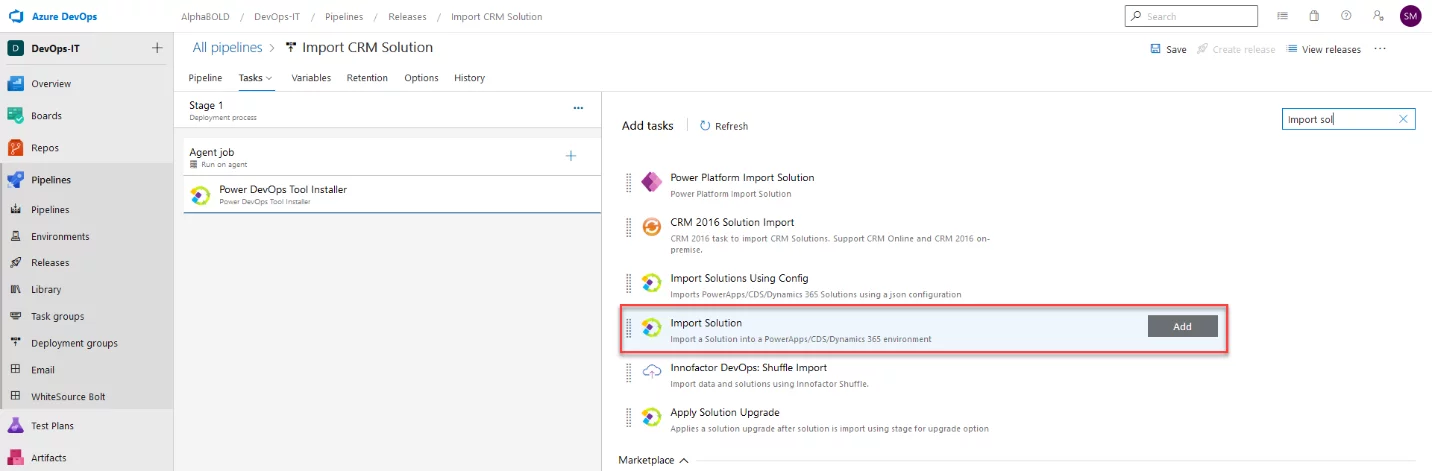
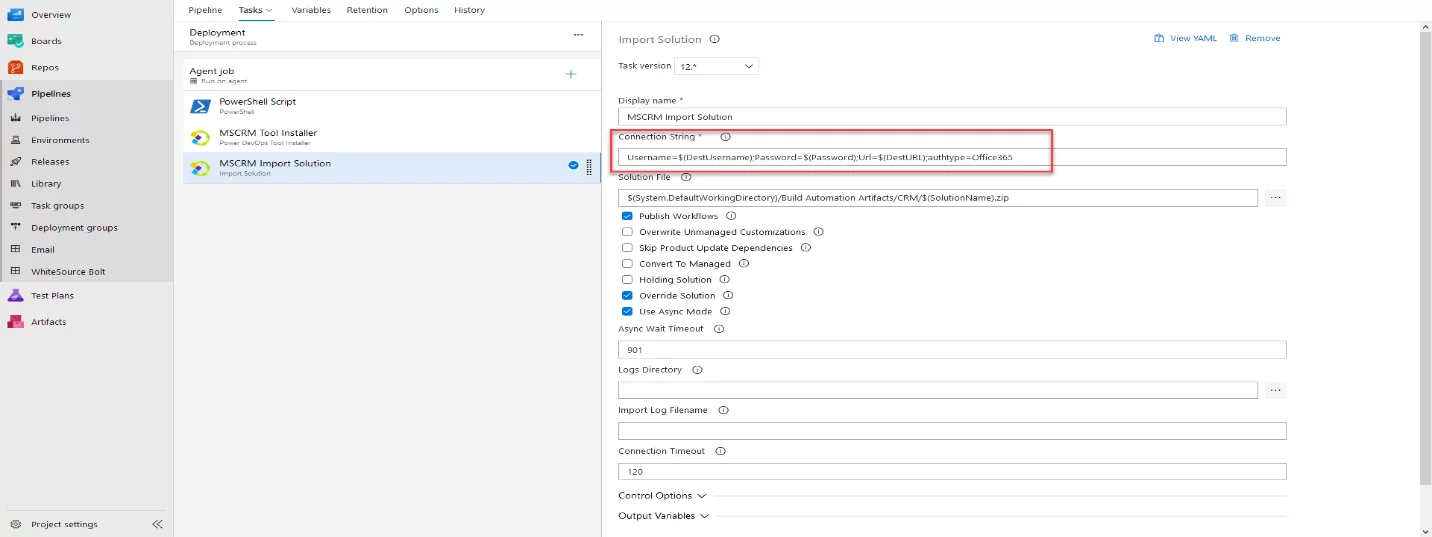
Add the Import Solution task.
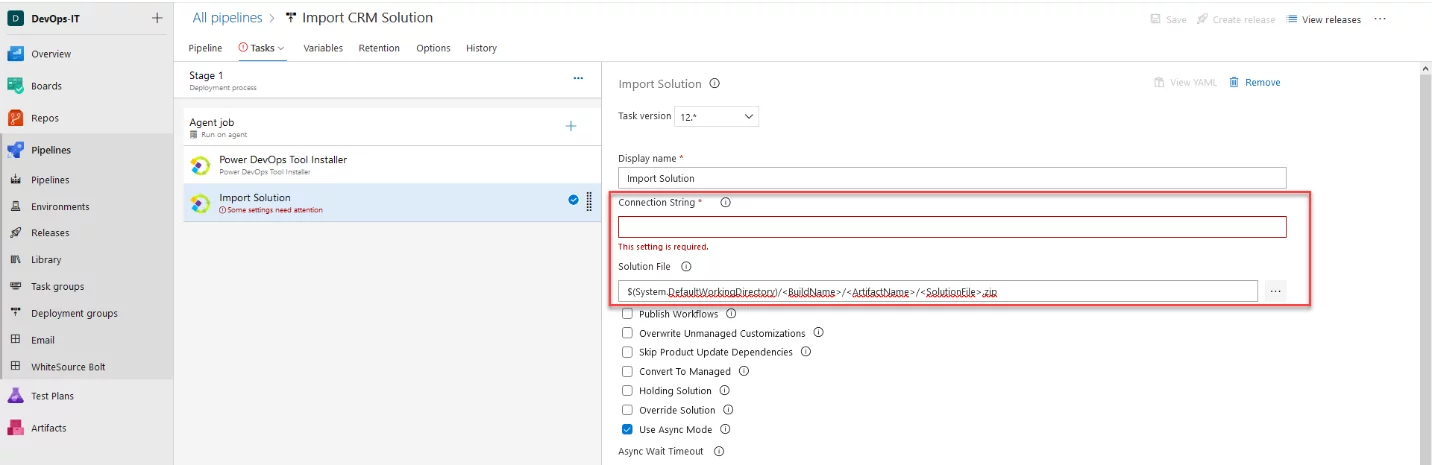
Add the connection string for the Destination org where you want to Deploy Microsoft Dynamics 365 solution. Also, link the solution file that was published as a build artifact in the linked pipeline. The path name would be like
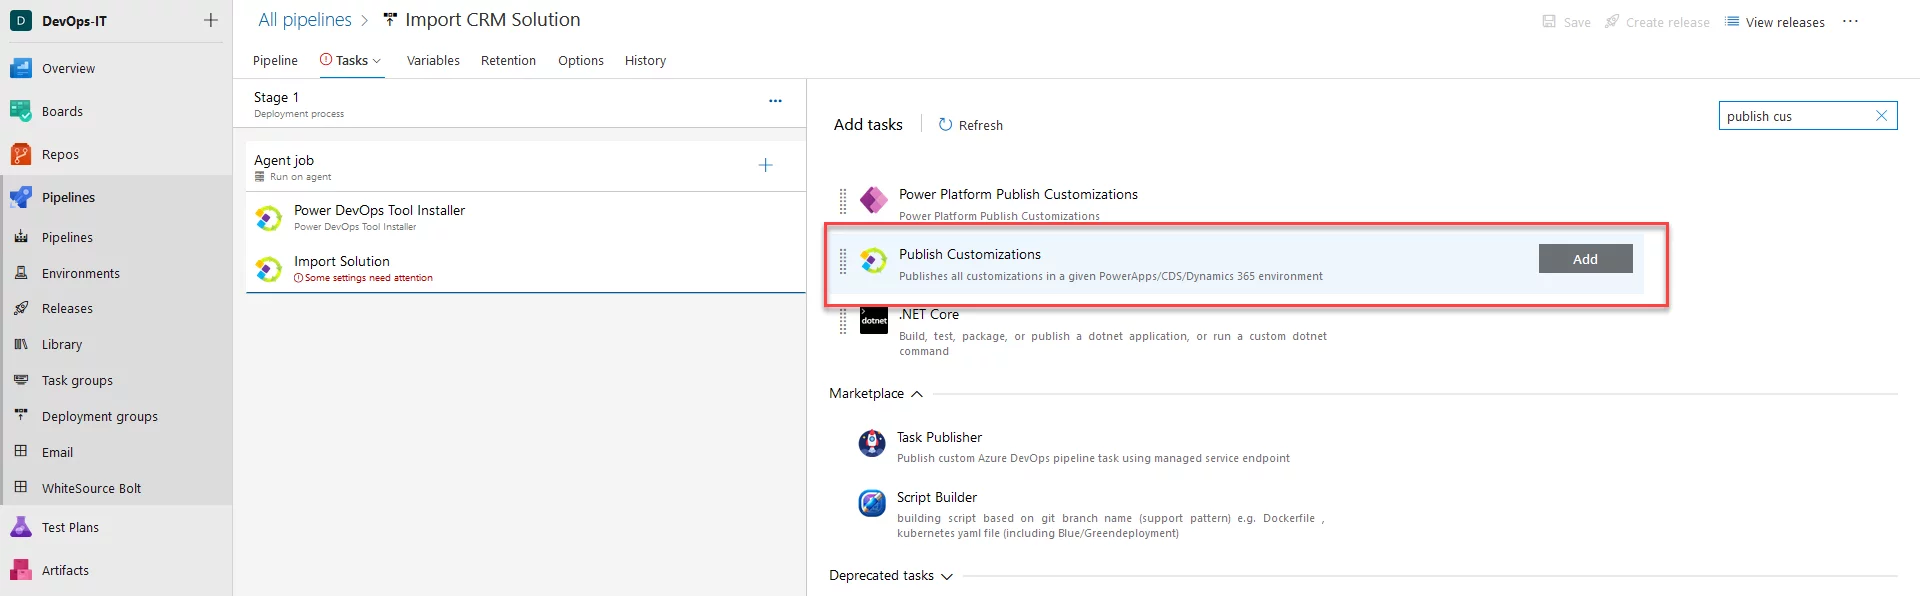
Now add the Publish Customization task to your Release.
Drive Innovation in Dynamics 365 - AlphaBOLD’s CI/CD Expertise
Ready to innovate your Dynamics 365 solutions? Partner with AlphaBOLD for CI/CD excellence. Let's drive innovation and efficiency in your Dynamics 365 ecosystem.
Controlling Deployment Pipelines through PowerShell Script:
You can control the Continuous Integration and Continuous Deployment of MS Dynamics Solution by adding a PowerShell script in your source. Add a PS with the information like the Source organization from where the solution would be exported, Solution Name, Username, and the Destination organization where you want to deploy. You can also add a switch “Deploy CRM” to control either the CRM should be deployed on commit or not. Copy the PowerShell Script to control the Continuous Integration and Continuous Deployment of MS Dynamics Solution and commit this as a .ps1 file in your repo.
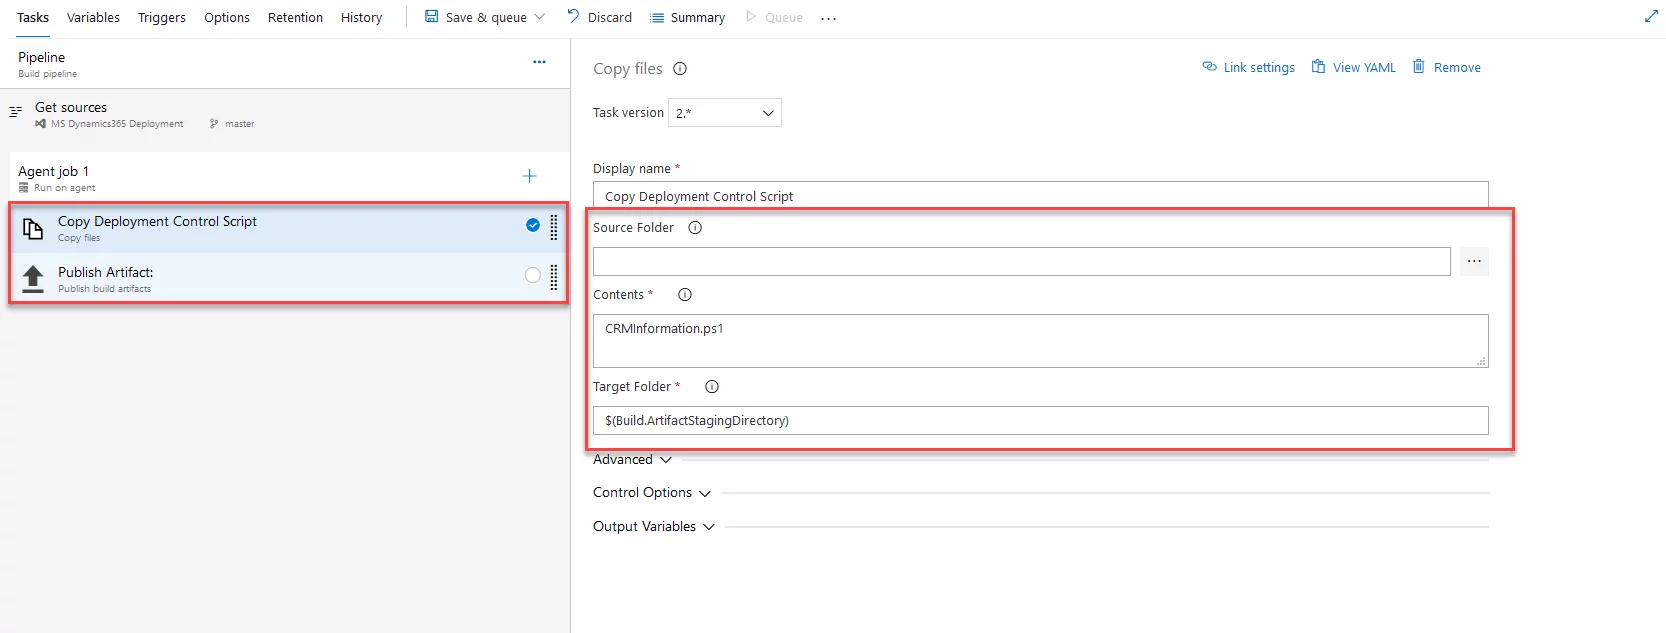
Copy this PS and commit in your repo as a PowerShell Script file.
In your build pipeline, Publish this file as a build artifact.
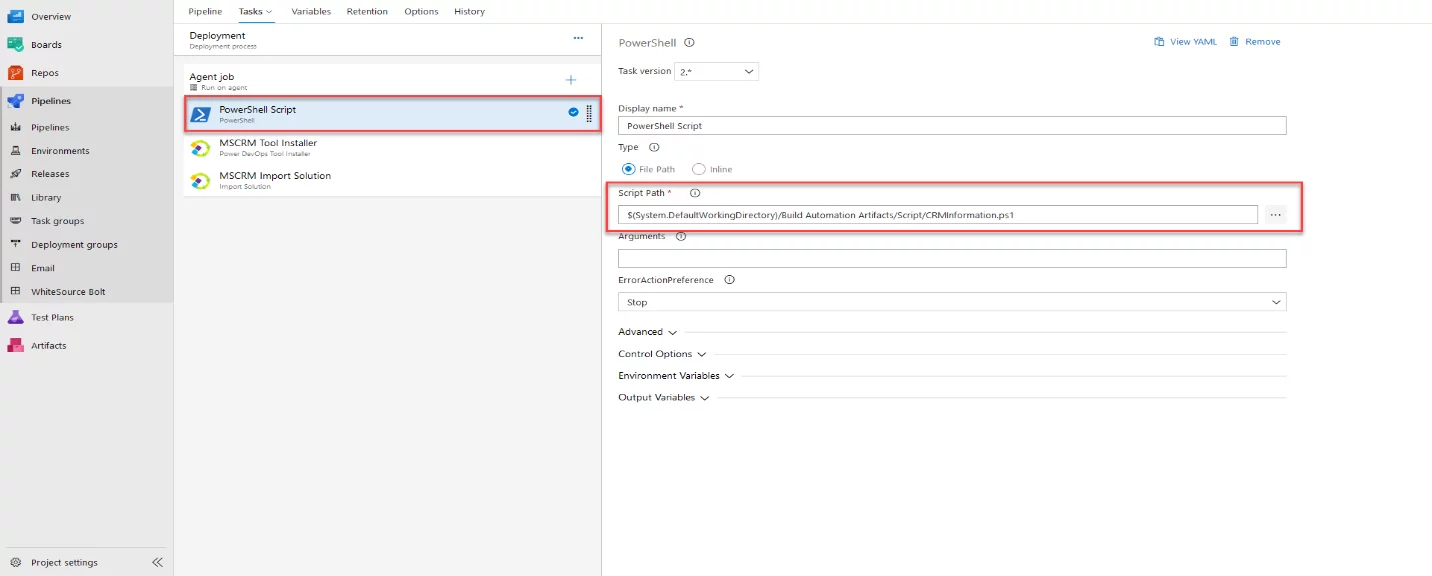
Now in the Release pipeline, run this PowerShell Script on top of each task. It will set the Global Variables on the agent reading the information you provided. Then you can replace the username, solution name, and the organization name with the global variables.
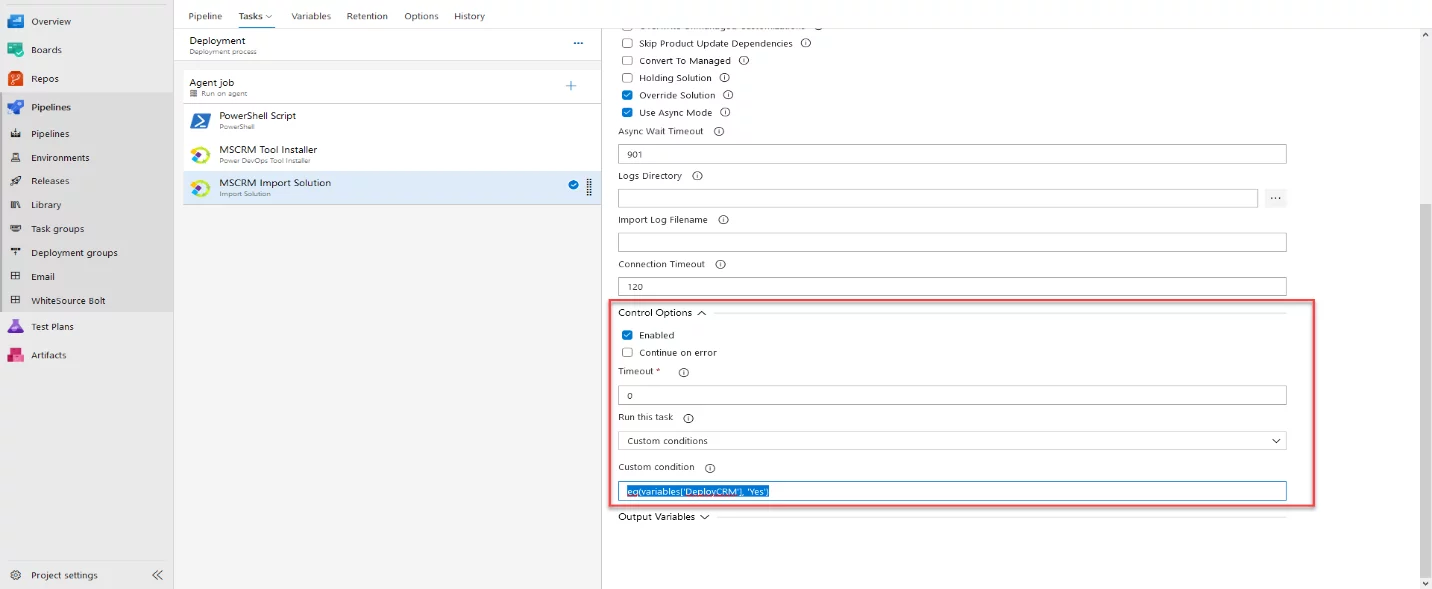
To use the “Deploy CRM” switch, you can find “Control Options” under each task. Use Custom Conditions and Specify the Condition as “eq(variables[‘DeployCRM’], ‘Yes’)”.
Final Thoughts
Microsoft Azure is a best option to use when you want to set up CI/CD of a Microsoft Dynamics Solution because it provides flexible Build and Release Pipelines. MS Azure has a vast marketplace loaded with bundle of tasks to choose within your pipelines, when comes to the Continuous Integration and Continuous Deployment of any application. It also allows you to control your deployment via PowerShell Scripts, you can supply the solution name, source and destination organizations name, credentials along with a switch that will determine if you want to trigger the build or release pipeline on commit.