pool:
name: Azure Pipelines
variables:
SolutionName: ‘AccountCustomizations’
steps:
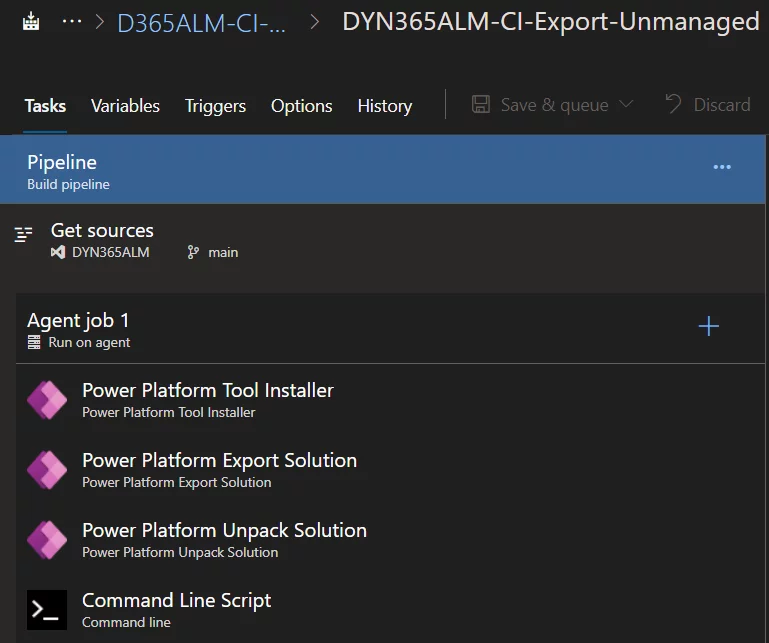
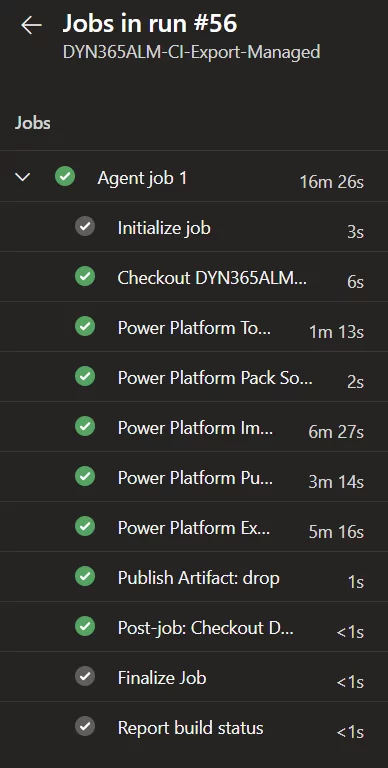
– task: microsoft-IsvExpTools.PowerPlatform-BuildTools.tool-installer.PowerPlatformToolInstaller@0
displayName: ‘Power Platform Tool Installer ‘
inputs:
PowerAppsAdminVersion: 2.0.137
CrmSdkCoreToolsVersion: 9.1.0.90
– task: microsoft-IsvExpTools.PowerPlatform-BuildTools.pack-solution.PowerPlatformPackSolution@0
displayName: ‘Power Platform Pack Solution ‘
inputs:
SolutionSourceFolder: ‘$(Build.SourcesDirectory)\$(SolutionName) ‘
SolutionOutputFile: ‘$(Build.ArtifactStagingDirectory)\$(SolutionName).zip’
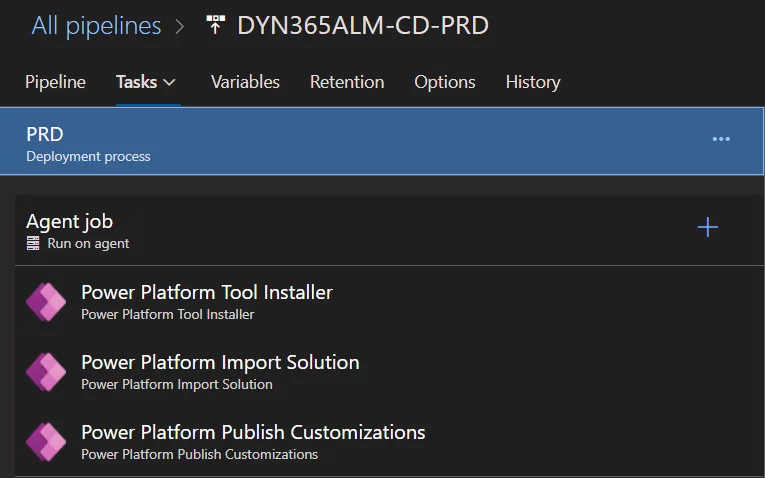
– task: microsoft-IsvExpTools.PowerPlatform-BuildTools.import-solution.PowerPlatformImportSolution@0
displayName: ‘Power Platform Import Solution ‘
inputs:
authenticationType: PowerPlatformSPN
PowerPlatformSPN: CRM907570
SolutionInputFile: ‘$(Build.ArtifactStagingDirectory)\$(SolutionName).zip’
– task: microsoft-IsvExpTools.PowerPlatform-BuildTools.publish-customizations.PowerPlatformPublishCustomizations@0
displayName: ‘Power Platform Publish Customizations ‘
inputs:
authenticationType: PowerPlatformSPN
PowerPlatformSPN: CRM907570
– task: microsoft-IsvExpTools.PowerPlatform-BuildTools.export-solution.PowerPlatformExportSolution@0
displayName: ‘Power Platform Export Solution ‘
inputs:
authenticationType: PowerPlatformSPN
PowerPlatformSPN: CRM907570
SolutionName: ‘$(SolutionName)’
SolutionOutputFile: ‘$(Build.ArtifactStagingDirectory)\$(SolutionName)_managed.zip’
Managed: true
– task: PublishBuildArtifacts@1
displayName: ‘Publish Artifact: drop’