Are you facing the challenge of deploying Power Apps solutions across environments, especially when it comes to migrating a Power Apps form? You’re not alone. Many Power Apps developers grapple with the absence of an out-of-box solution for seamless migration. Currently, there is no out-of-the-box solution that can perform this. This limitation can lead to:
Costly rework hours
Risk of bugs in extensive applications
Time-consuming QA sessions
This limitation causes many reworks, costing a lot of work hours for a developer. Secondly, if an extensive application is being developed again, there is always a chance for some bugs to appear. These bugs then call for another QA session, which requires a lot of effort.
In this blog post, we’ll reveal a powerful method that empowers you to:
Efficiently export Power Apps solutions
Deploy them flawlessly in production environments
Preserve functionality and integrity
Minize rework and bug risks
Save valuable time and resources.
Ready to streamline your Power Apps deployment process, and especially when it comes to migrating a Power Apps form? Dive into this comprehensive guide to master the solution and achieve hassle-free migrations.
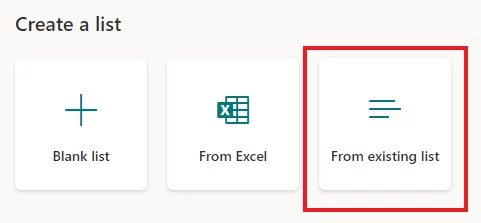
Step 1: Create a List on Production Environment
Important: The name of the list and all the columns should be the same as the development environment.
Pro Tip: One great way to create the production list the same as the development environment would be to create a list via the “From existing list” option where you can select source site and list name, and the resulting list would be the same. Caution: This only works when you are migrating within a tenant.
Need Support in Migrating a Power Apps Form?
Set up a demo with the AlphaBOLD team to understand how Power Platform can extend existing systems or build custom applications today.
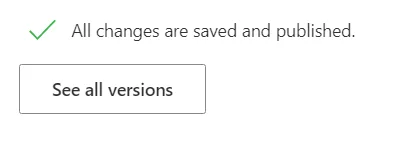
Once the list on the destination site is ready, we can begin with the migration. First, open the source application in Power Apps, and navigate to the options menu. Then click on “See all versions”.
On the next screen, select the “Export Package” button on the top.
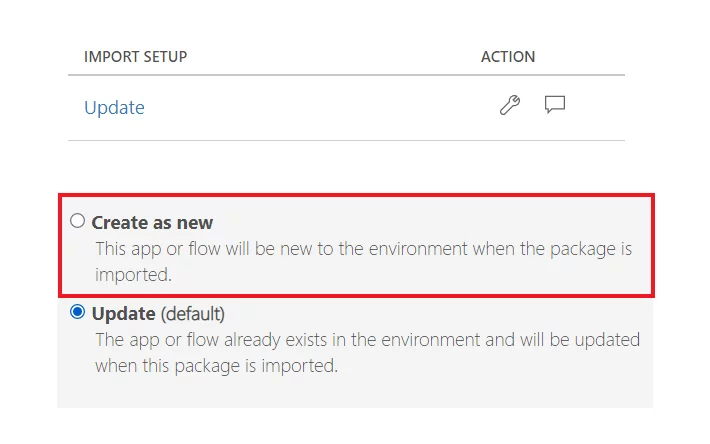
The next page will require some basic information regarding the Package (like package Name etc.). Also, the Import Setup would be set by default to Update, change that to “Create as New.”
Next, click on the settings icon, set that to “Create as New.” Finally, click on the “Export” button at the bottom, and a zip file will be downloaded into your system.
Once the App package is downloaded; extract the file. In the extracted folder, move to Microsoft.Power.Apps -> apps -> 1549133250558238xxxxx. Open the 1549133250558238xxxxx.json file in Notepad.
Under embeddedApp, please provide the following details:
Replace “siteId” with the site Id of the destination site.
Replace “listId” with the list id for the destination list. Hint: While you are in List Settings, it is appended in the URL (between %7B and %7D).
Replace “listUrl” with the URL of the list.
Save the JSON file and replace the original file in ZIP with this newly created JSON file.
Navigate to make.powerapps.com. From the left menu, select Apps, and then on the top select “Import Canvas App”. On the next screen, upload the zip file with the changes we made in the last step. Once the import is complete, navigate to the destination list and click on the customized form. When the Power Apps loads, it will be the same as the source Power Apps Solution. All you need to do is publish it.
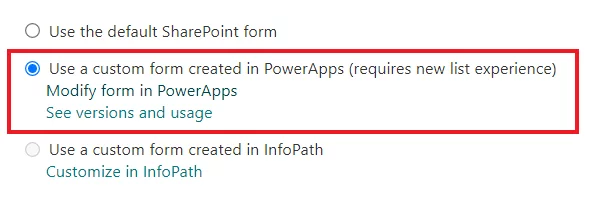
The Power Apps form is now associated with the list and clicking New or any item in the list would open the Power Apps form. (If for some reason it does not show, please check if the Power Apps form is selected in List Settings -> Form Settings)
Lastly, the connections in the list need to be updated to the new list as they will still be pointing to the old links. Update them and Publish the App again.
Step 6: Test the App and you are Done
Now, test the app by creating a new record. Congratulations, you have saved many hours of your workday!
Conclusion
This blog showed how a tedious task such as migrating a Power Apps from your development environment to production environment could be optimized using a few tricks. Not only does this save a lot of work, but it is also significantly less prone to errors.