Introduction
Today, we will outline the necessary steps to integrate Active Directory Federation Services and Azure AD as a Claims Provider Trust for Dynamics 365 on-prem environments. This production-ready solution can integrate multiple Azure Active Directories to expand the external access for Dynamics 365 on-prem environments. This approach can provide more security and granular controls to ensure system security.
Key Benefits
- Enhanced security and logging through Azure Active Directory.
- No need to sync users to Azure Active Directory using Azure AD Connect; therefore, there is no need to create users in the active local directory.
- Leverage Azure B2B features.
- Get the most out of pure, cloud-only Azure AD environments.
Assumptions
- These instructions are based on the following assumptions:
- ADFS is already installed and configured (We can set up SSO with Azure AD without ADFS. However, that is not a production-ready solution as we will lose the desktop and mobile applications because of the application ID).
Claim Based Authentication And Internet-Facing Deployment Is Already Configured And Working As Excepted For Dynamics 365 On-Prem Environment.
Azure AD Configuration
This section will add our on-premises ADFS server as an application in Azure AD.
- Login to https://aad.portal.azure.com using the Global Admin user of your office 365 Tenant.
- Navigate to the “Azure Active Directory” -> “App Registration” and click on new Registration.
Streamline Dynamics On-Premises Authentication with Azure AD
AlphaBOLD can help you streamline authentication for your Dynamics on-premises environment using Azure AD and ADFS. Are you ready to improve your authentication process?
Request a Consultation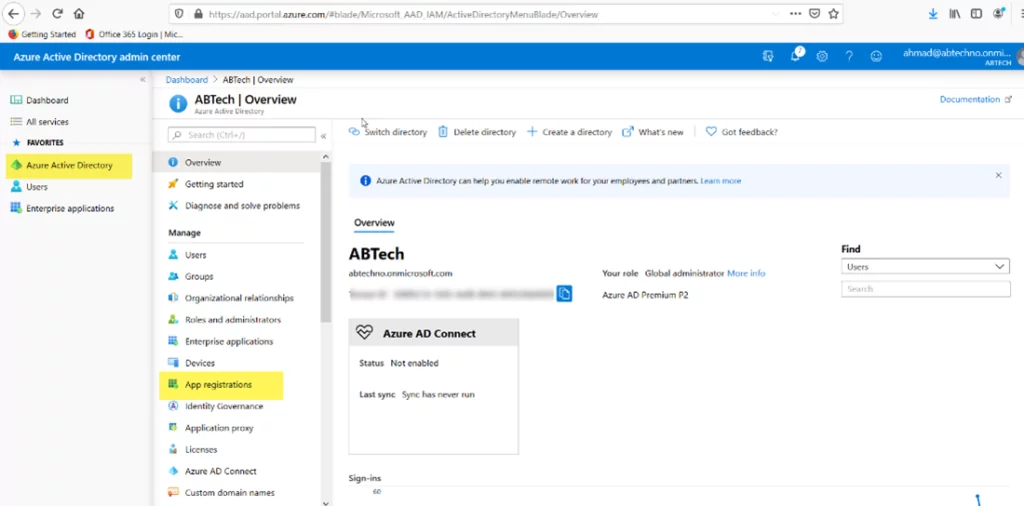
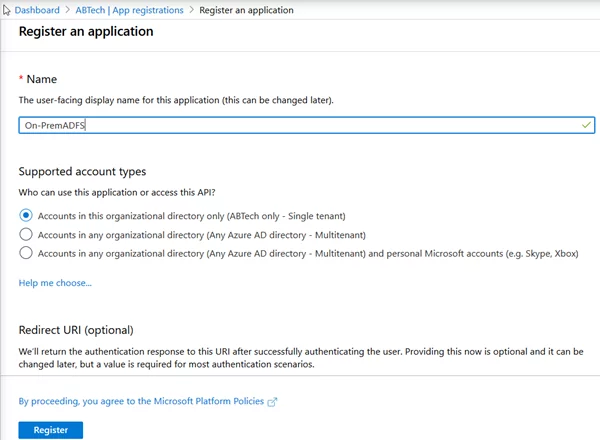
- Enter the Application Name and click Register.
- Open the newly created application and update the Application ID URI and Redirect URIs.
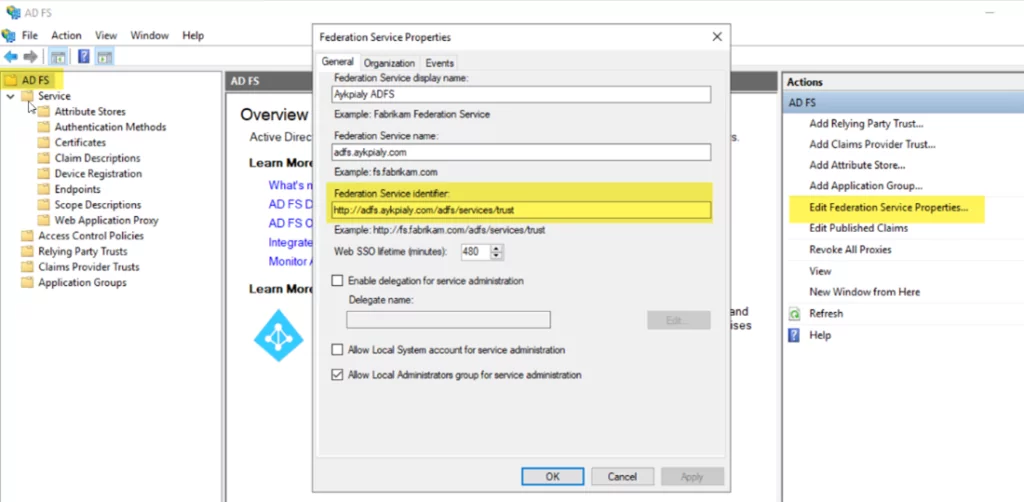
- To get the Application ID URI, open the ADFS Server management console and click on the ADFS. After that, click on Edit Federation Service Properties and use this URL as an Application ID URI in the Azure Active Directory.
- From the Overview panel, click on the Add an Application ID URI
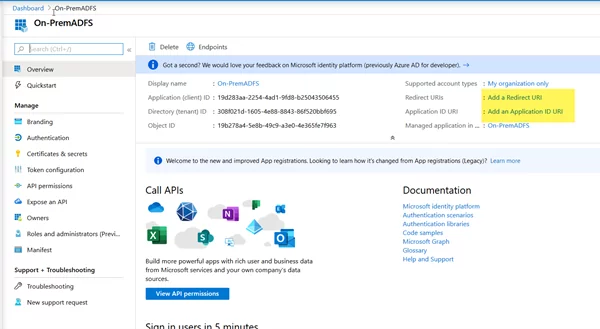
- Click on Set and replace the existing value with the ADFS Federation Identifier URI.
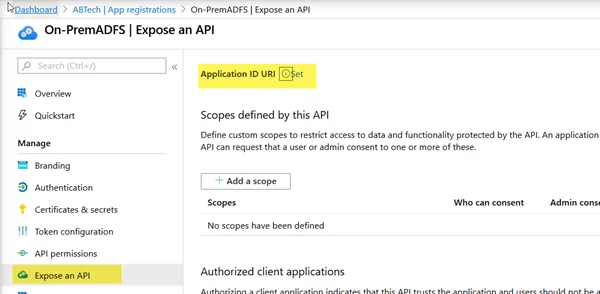
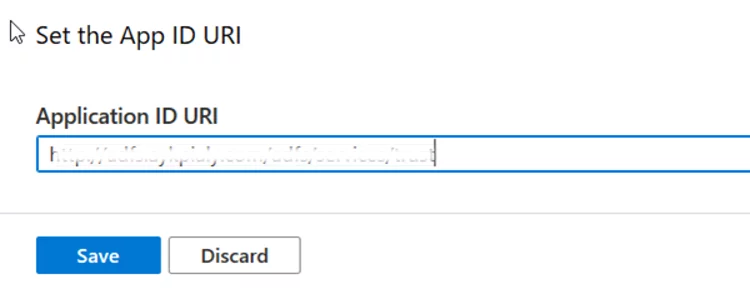
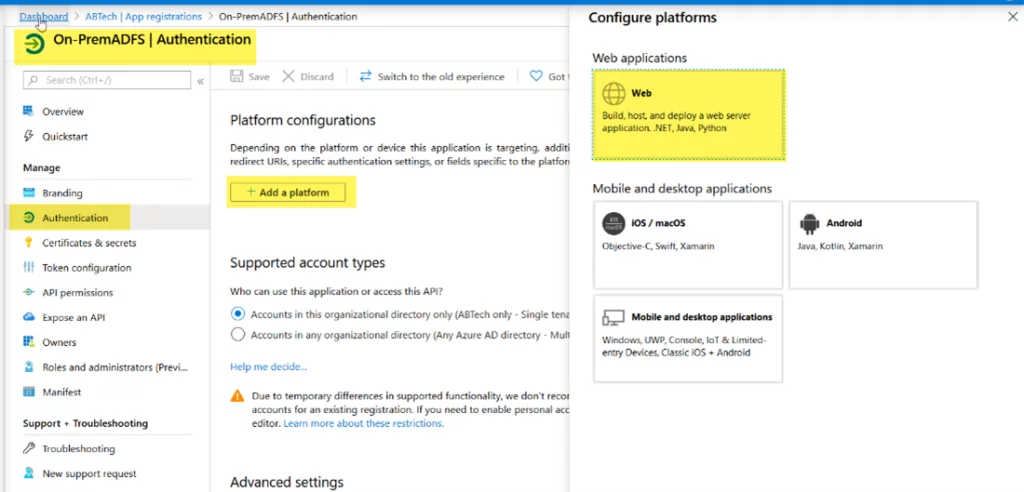
- Update Redirect URIs, and then navigate to Authentication. Now click Add a platform and select Web.
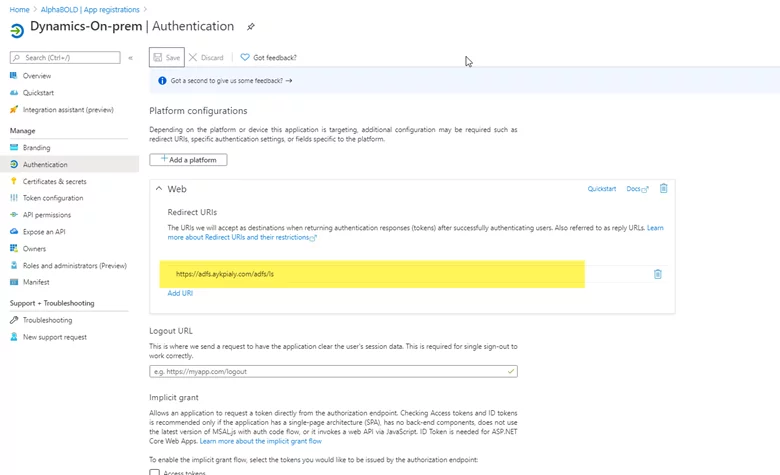
- Enter the ADFS URL, as shown in the following exhibit.
- Now copy the Federation Metadata URL.
- Click on the Overview panel, click the Endpoints, and copy the Federation Metadata document URL. We need this URL to add the Claims Provider Trust in ADFS.
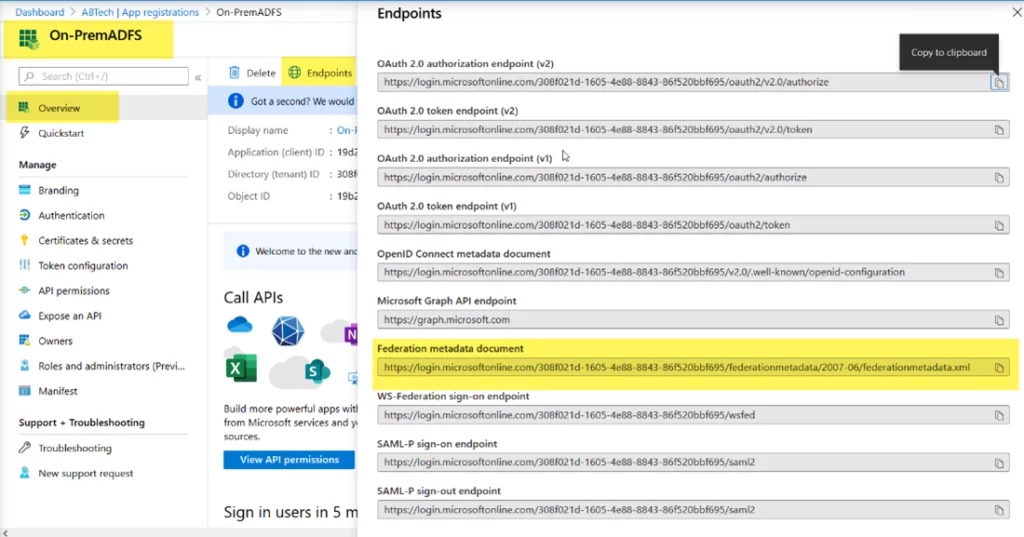
At this point, we have successfully created the ADFS application in Azure Active Directory. Now let’s move to the next part, where we will add Azure AD as Claims Provider Trust in the on-prem ADFS environment.
Further Reading: Automate ML Models Deployment With Azure Services
Setup Claims Provider Trust In ADFS
In this step, we will add Azure AD as an identity provider in ADFS.
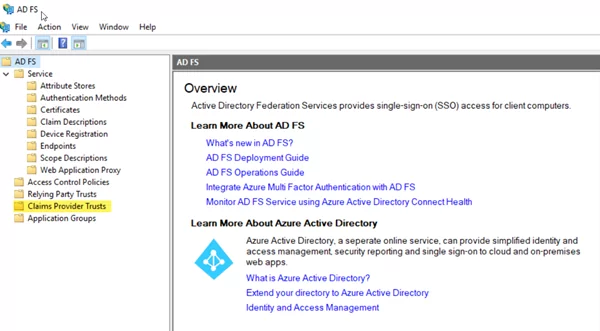
- Open the AD FS Management tool. Click on Claims Provider Trust.
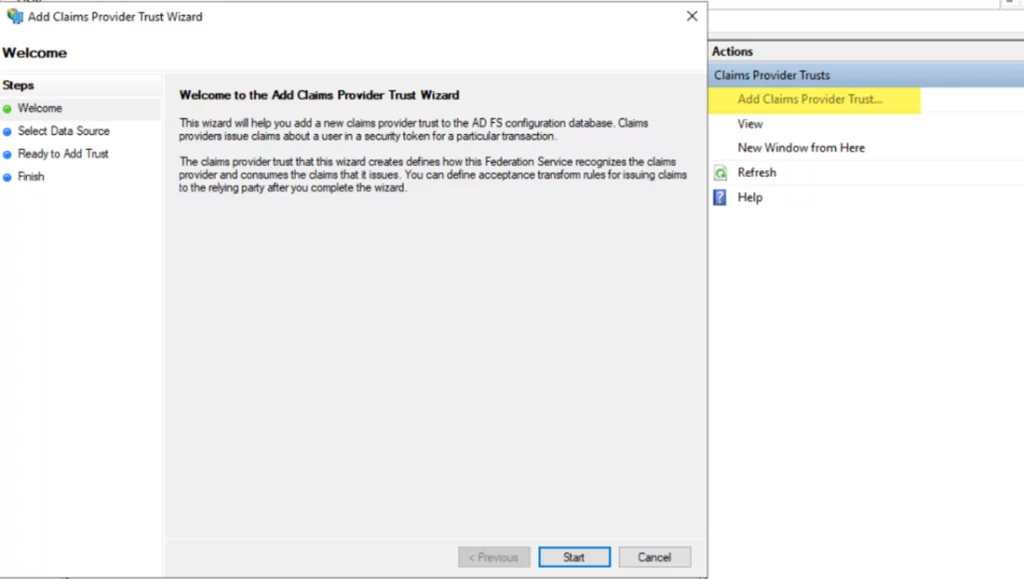
- Click on Add Claims Provider Trust and click Start.
- Enter the Federation Metadata URL copied from Azure Active Directory ADFS application Endpoints.
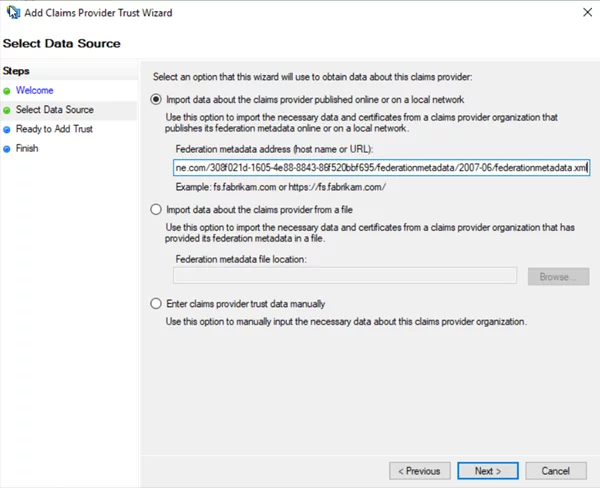
- Enter the Name and then click Next.
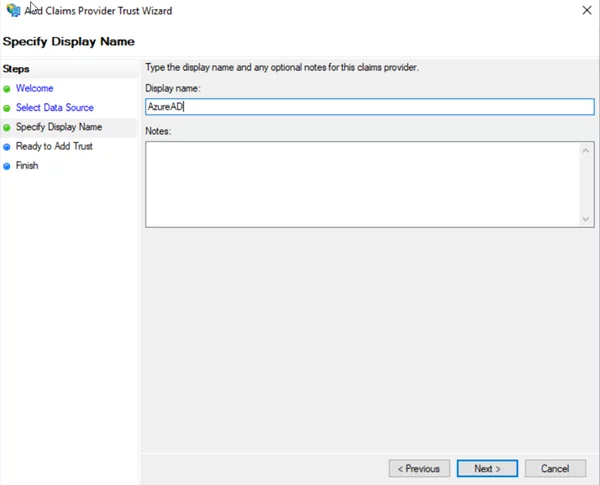
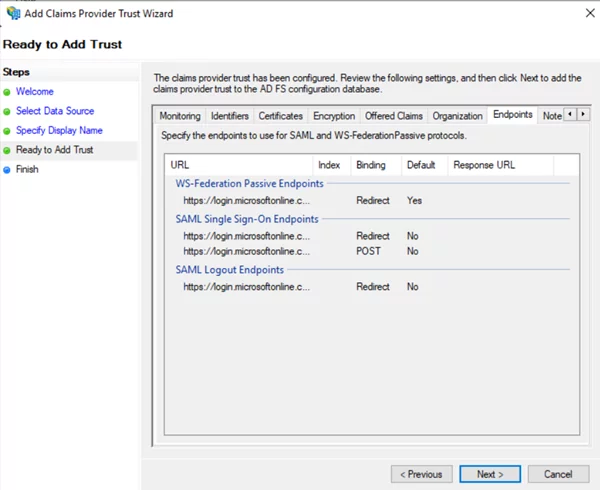
Further Reading: Optimizing Business Strategy And Technical Implementation With DataDevOps On Azure
Click Next and then click Finish.
- Add the Claim Rules and select AzureAD from the Claim Provider Trust list. Click Edit Claim Rules and then click add new Rule.

- Select Transform incoming Rule and click Next
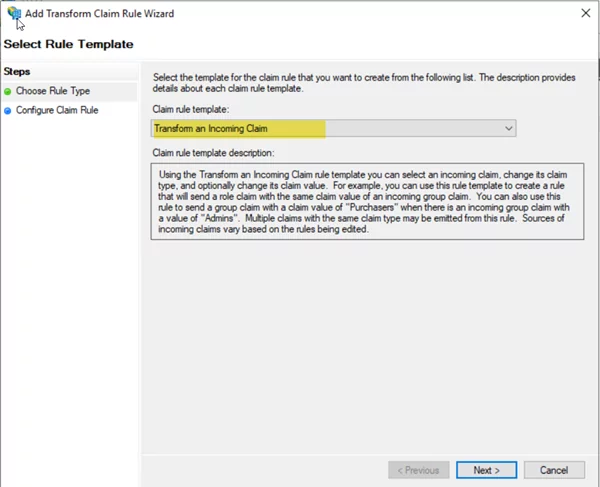
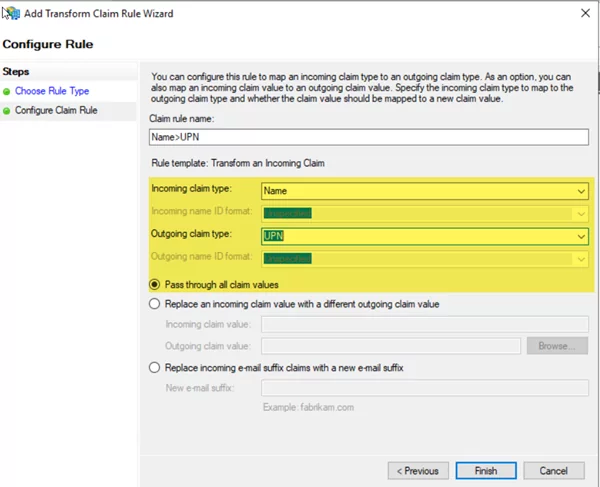
- Enter the name of Rule, select “name” from the incoming claim drop-down, and select UPN from the outgoing claim list. Click on Pass through all claim values.
Configure The Relying Party Trust
For the next part of the configuration, we will assume that the claim-based authentication for the Dynamics environment is already in place and that the UPN pass-through rule has also been created as part of the claim-based authentication for Dynamics. We must enable the Relying Party Trust to accept claims from the AzureAD claims provider. We will be using the Power Shell to make these configuration changes.
- Login to ADFS server and open elevated Power Shell.
- Enter the following command to update the Dynamics Relying Trust Party to accept claims from both the Internal Active Directory and Azure Active Directory.
-
- Import-module ADFS
- Set-AdfsRelyingPartyTrust -TargetName “auth.ayk*****.com” -ClaimsProviderName @(“Active Directory”,”AzureAD”)
Further Reading: Simplify Your Azure Infrastructure With Azure Blueprints
(Replace the Name with your Dynamics Relying Party Trust and the names of your Claims Provider Trusts)
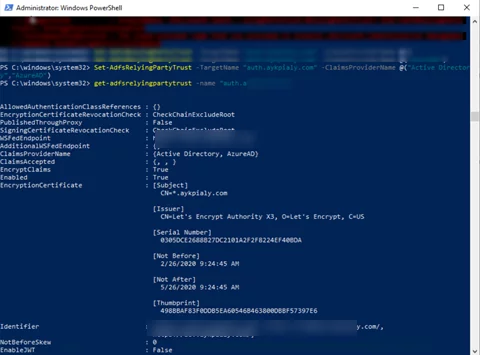
- Reset ADFS services and verify the Dynamics Access using Azure AD user
Secure your Dynamics On-Premises with Azure AD Integration
Looking to enhance security and streamline access for your Dynamics on-premises environment? AlphaBOLD's Azure Services are here to guide you through integrating Azure AD with ADFS.
Request a ConsultationVerify Dynamics Federated Access
At this stage, we have successfully configured federated trust between on-premises ADFS and AzureAD. The prerequisite for this, however, is that we have already created a new user in Dynamics for the AzureAD User and assigned appropriate roles.
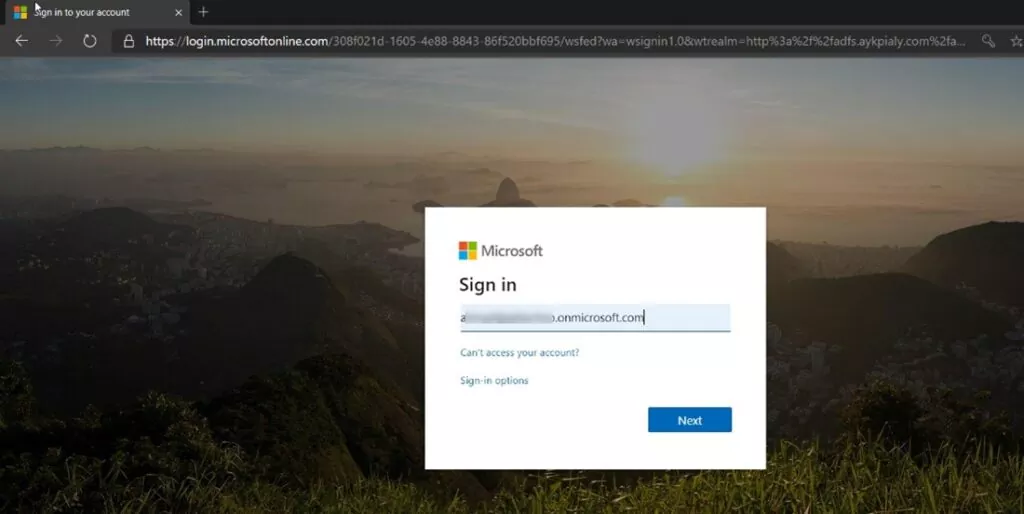
- Launch any internet browser and open the Dynamics external URL. It should redirect to the ADFS login page, and AzureAD IDP should be visible. Click on AzureAD to be redirected to the Microsoft Login page.

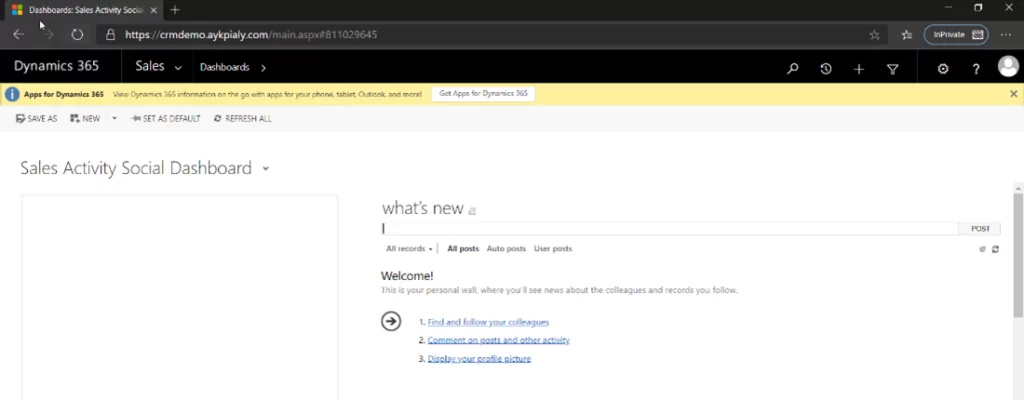
- Enter your Office 365 credentials, after successful authentication, you should be redirected back to the Dynamics home page.
I hope this blog has helped you set up Azure AD with ADFS as Dynamics on-prem IDP quickly. Feel free to leave a comment below if you have any questions. Our BOLDEnthusiasts will be happy to help!
Explore Recent Blog Posts


