Traditionally, when tracking purchases for a company, it takes a human to manually enter data into a database and then manually attach a scanned copy or image of the receipt to the created record. Using a custom flow built-in Power Apps, we can now skip the data entry and extract information from a receipt, generate a Purchase record, and create Purchase Items within Dynamics 365 Field Service simply by uploading an image! In this article, we will walk you through the steps required to configure a Flow within Power Automate to take an attached receipt, use the power of Microsoft powered AI and Machine Learning to help you automatically extract the data from the receipt, and populate it into a record within Dataverse.
Step 1 – Create a new flow in Power Automate that trigger when an attachment is uploaded
The first thing to determine in designing the flow is how to upload the image. Since our process requires that our Purchase record is created before uploading the image, the flow needs to trigger on the modification of a record. In this case we are using a custom entity called “Purchases” to store the related information about the purchase and provide a place to attach the receipt within a Power App.
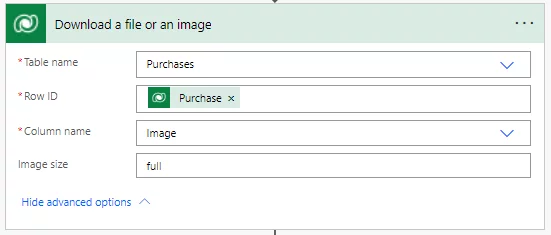
For expediency, in this scenario we have chosen to upload the receipt as the attached “entityimage” related to the record in dataverse. Once the record has been triggered within the flow (indicating that an image has been provided to the record), the next step will be to utilize the “Download a file or an image” step to grab the information from the receipt that will be uploaded into Dynamics 365 Field Service.
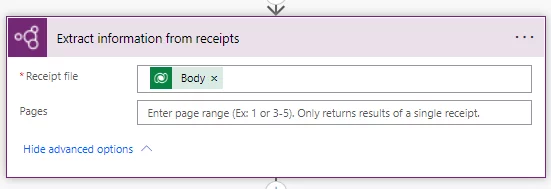
Step 3 – Utilize the “Extract information from receipts” step from AI Builder within power automate
Next, add a step called “Extract Information from receipts.” Set the Receipt file to the body of the “Download a file or an image” step. Please note that this may require you to setup and configure AI Builder within your environment.
Step 4 – Create a loop to generate each receipt item
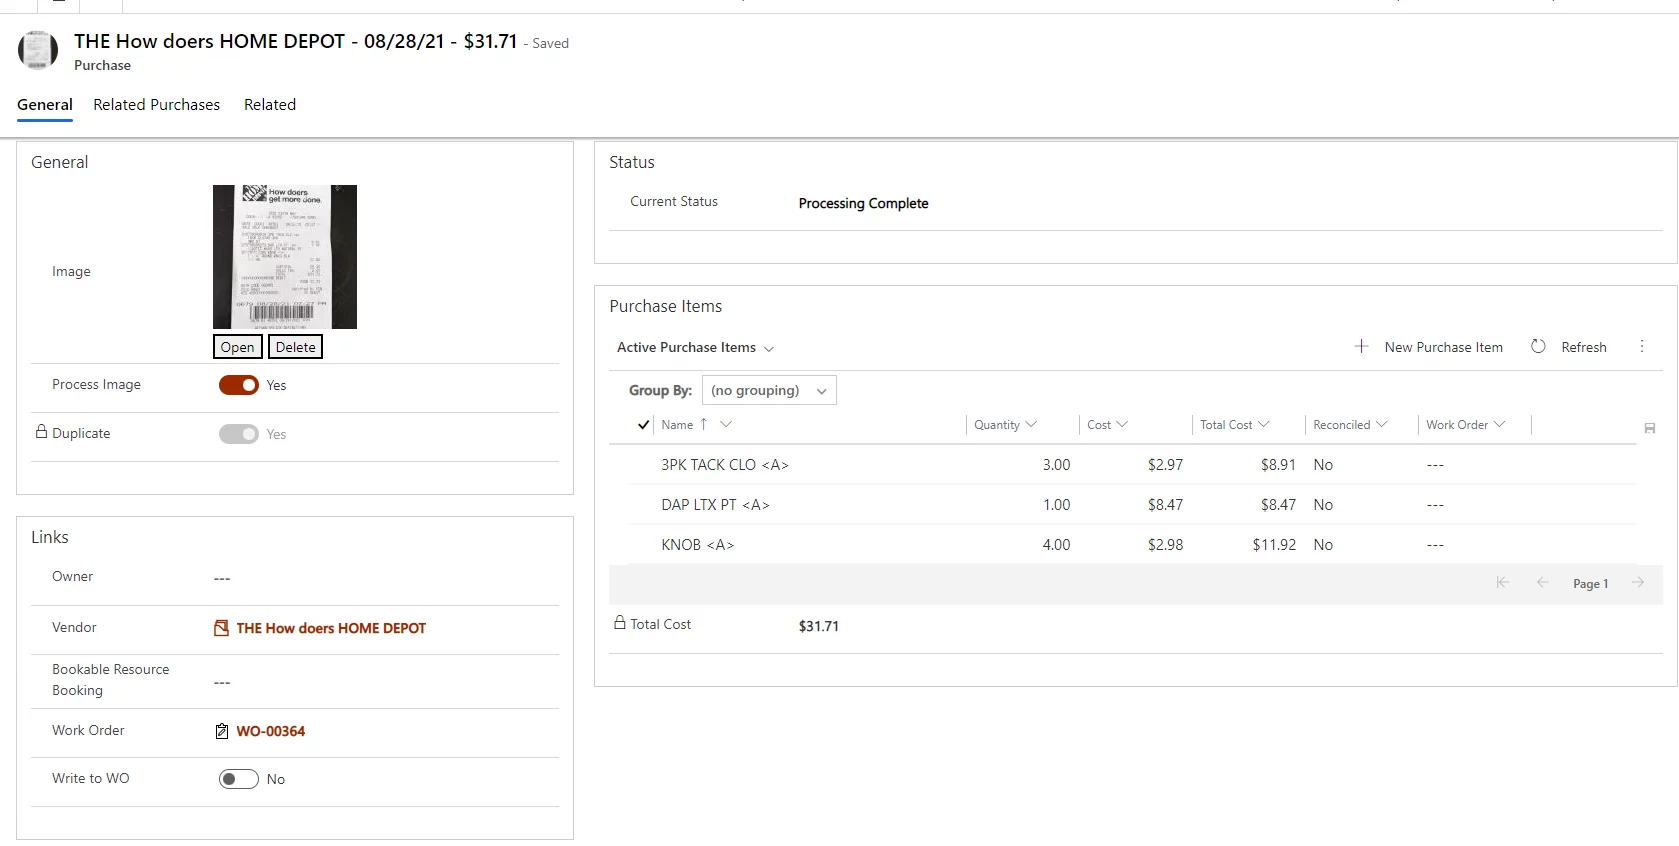
After this step, create a loop that will process the line items of the receipt and create new Purchase Item records. An important thing to note here is that the Purchase Items are not linked to the Products table in Dynamics 365 Field Service. The item name, quantity, cost, price, and totals will need to be set in the flow step during this process.
Step 5 – Populate the extracted extracted summary data into a record
Once the Purchase Items have been created and linked back to the Purchase record, the last step is to update the Purchase record with the details from the receipt. For this example, we set the name of the Purchase record to be the “Merchant Name” – “Transaction Date” – “Total.” Here is a link to a Microsoft document that lists all possible extracted data (Use the receipt processing prebuilt model in Power Automate – AI Builder | Microsoft Docs). It is important to note that, unlike the purchase items, the merchant needs to exist in Dynamics as a Vendor Account before importing the receipt.
Boost Efficiency When You Create Purchase Records in Dynamics 365 Field Service!
Automate purchase record creation with AI-driven tools in Dynamics 365 Field Service for faster, smarter operations.
Creating Purchase records and Purchase Items using an image will streamline a company’s record tracking by minimizing manual data entry. Power apps and flow allow for flexibility in adding additional layers, such as linking the purchase to a Work Order, setting markups or multipliers, and moving the image to SharePoint if desired. An excellent tool for reconciling and tracking spending regarding various projects.