Introduction
Power Apps Portals are important in any organization’s long-range web strategy. Portals provide us with a powerful capability to create external-facing websites that allow external and internal users to interact with data from Dynamics 365. In a recent release, Dynamics 365 Portals are now enriched with Power BI Embedded service that allows customizers to grant access to Power BI service components (dashboards, reports, and tiles) to external users who don’t have a Power BI account or license.
This blog post aims to provide a step-by-step guide to embedding Power BI visualizations in Dynamics 365 Portal’s web pages.
Prerequisite
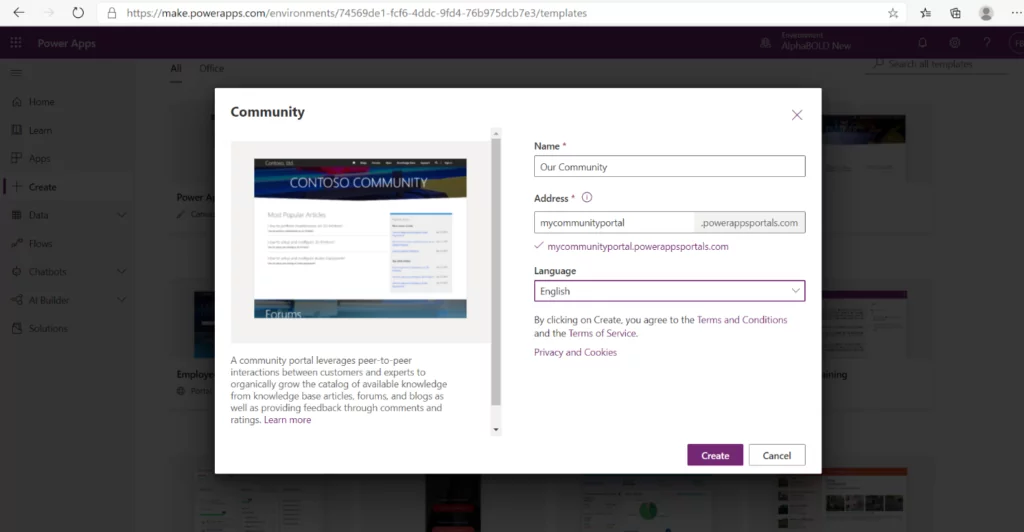
This blog assumes you have an up-and-running Dynamics 365 for Customer Service organization and a Global Admin user with Dynamics 365 and Power BI licenses. You might already have provisioned a Dynamics 365 Portal instance for your organization. If not, go to the Power Apps admin center, select the environment for portal setup, and provision a portal using one of the available templates per your customer requirements, as shown below.
Steps for Power BI Dashboard and Portal Integration
Once your portal provision is complete and accessible, you will follow the below guide to surface a Power BI report/dashboard on a portal’s webpage.
Enable Power BI Visualization:
To embed the dashboard/report on Portal’s webpage, first, you need to enable Power BI visualization from the Power Apps Portals admin center, and for that:
- Open Power Apps and select the environment where you have provisioned the Portal.
- Go to Your Apps section from the Power Apps home page and locate your Portal. Select More Commands (…) and click Settings.

- In the opened Portal settings pane, select Administration.
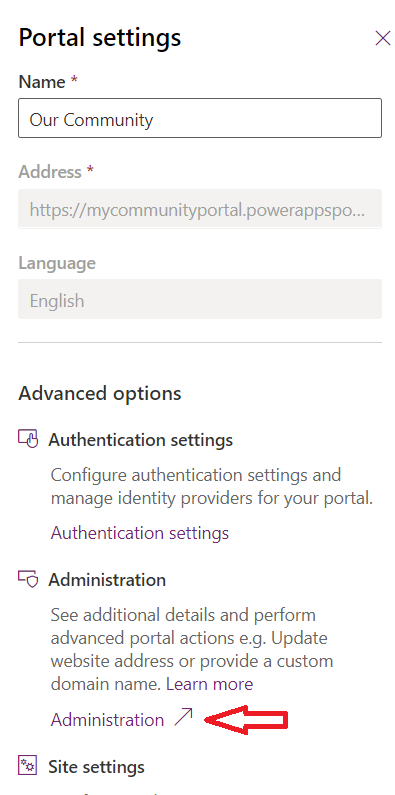
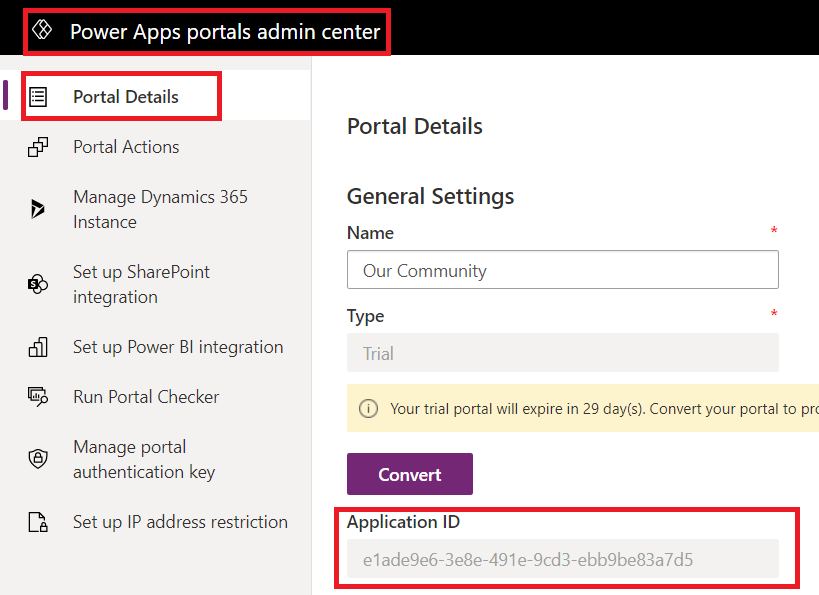
- The Power Apps portals admin center is now opened in a new tab. Please note the Application ID on the Portal Details page. You will need that in later steps.
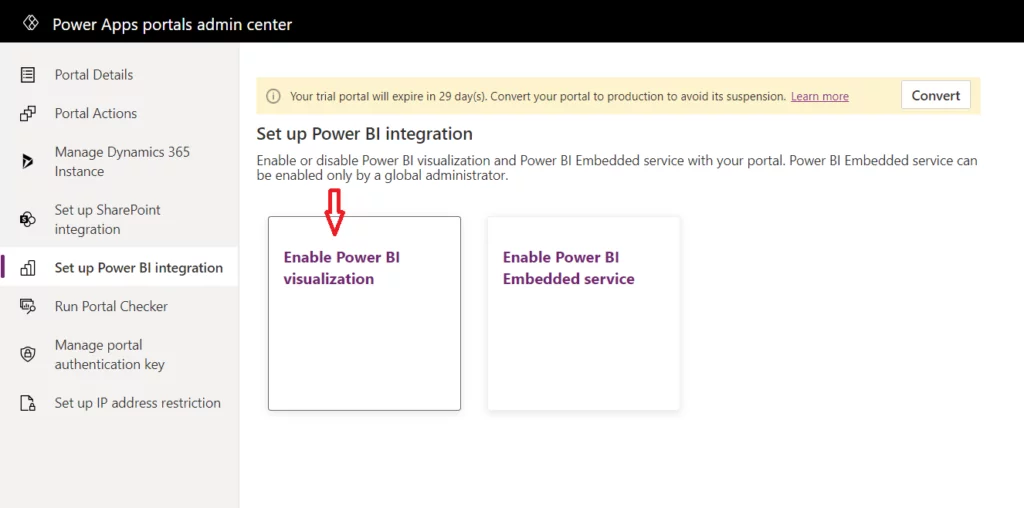
- From the Power Apps portals admin center, go to Set up Power BI Integration and click Enable Power BI visualization.
- Click Enable from the confirmation popup. A message will appear once Power BI visualization is enabled.
Enhance your Decision Making with Power BI!
Explore how Power BI, when embedded in Power Apps portals, can offer real-time insights and analytics with AlphaBOLD. Enhance your strategic planning and data-driven decisions today. Let's explore Power BI's capabilities together.
Request a DemoCreate Azure Ad Security Group and Add to Power BI Account
To display reports or dashboards built-in Power BI workspaces on Portal’s webpage, we need to create a security group in Azure Active Directory, add the Portal application as a member, and add this group to the Power BI account from the admin portal.
- Go to Azure Portal and sign in with the Global Admin user for your tenant.
- From the left navigation, click on Azure Active Directory. Select Groups from the opened page and click New Group from the top header.
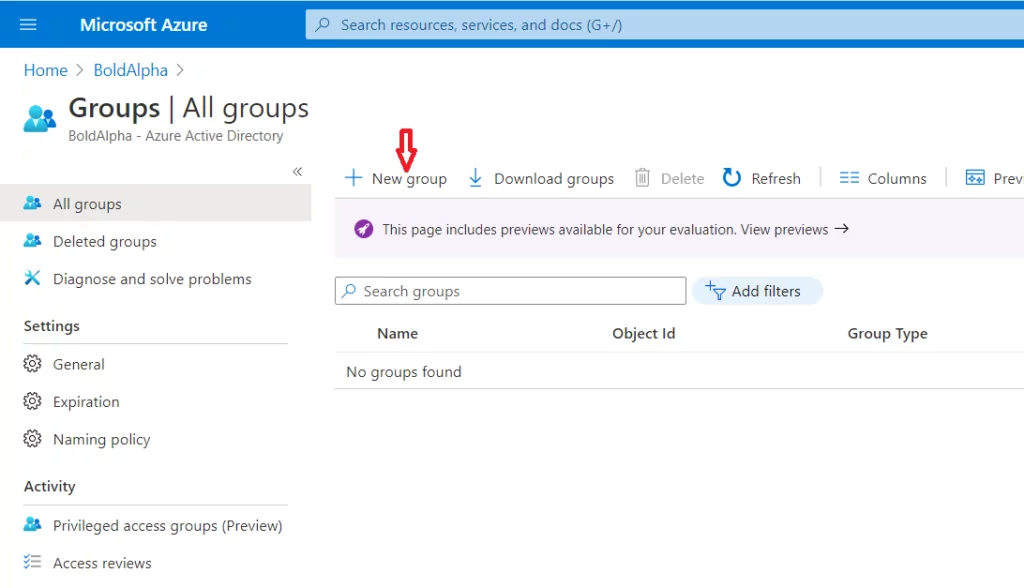
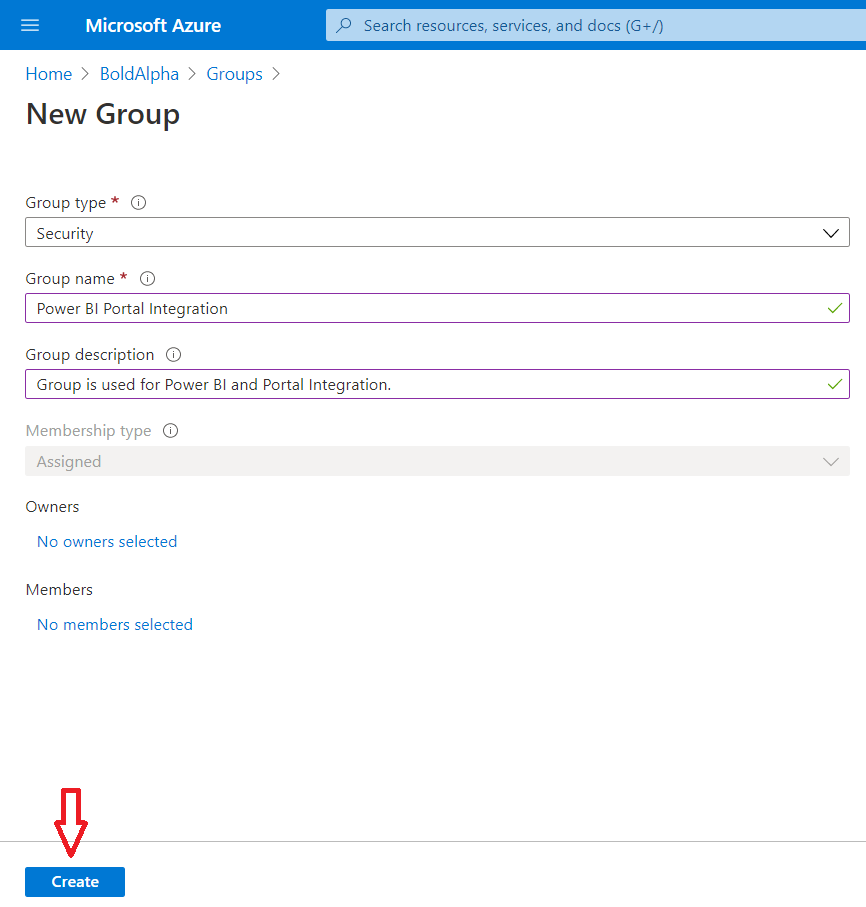
- On the New Group page, select Security in Group type and specify a suitable Group name/description. Click Create.
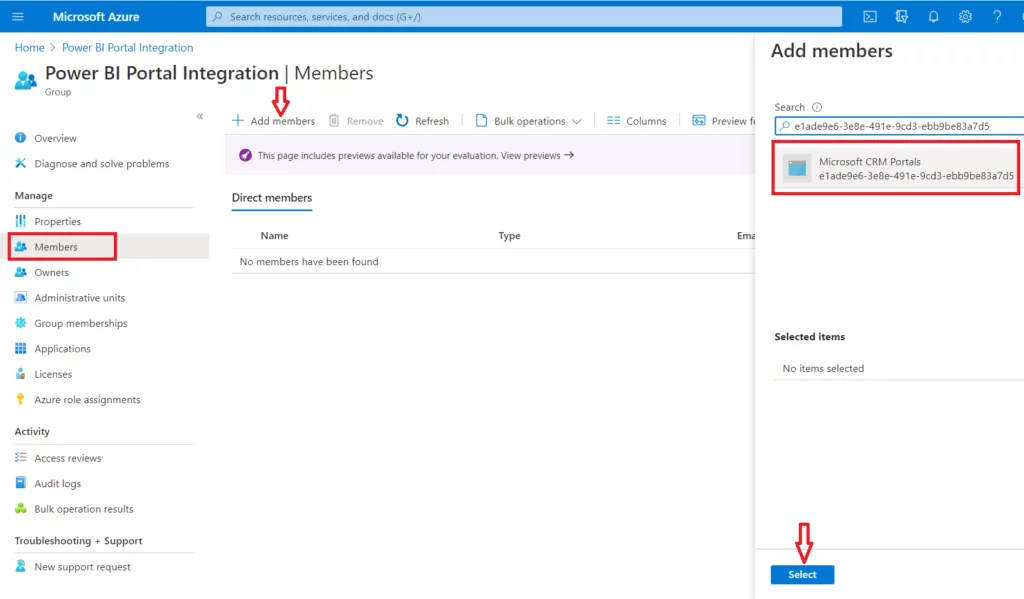
- Open the group you created and click Members under the Manage section. Click on Add members from the top header.
- Specify the Portal’s Application ID you noted earlier in the Add members search box. Select the item appearing in search results and click Select.
- We need to add this security group to the Power BI service. Go to Power BI and sign in with the Global Admin user.
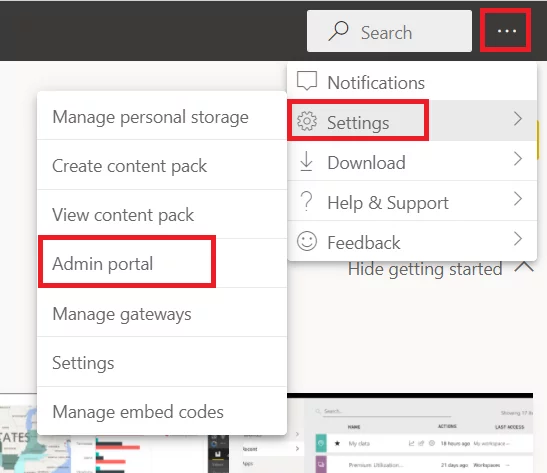
- Click on … -> Settings -> Admin Portal from the top right.
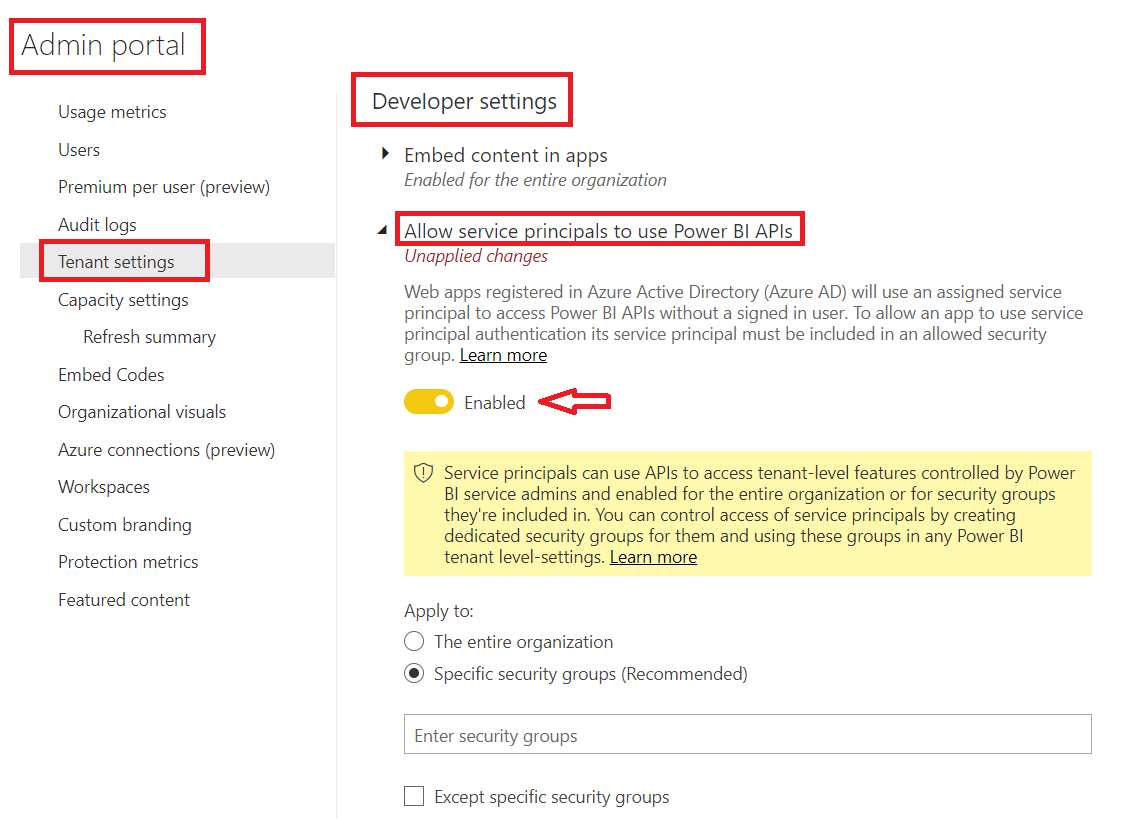
- From the Admin Portal, select Tenant Settings. Locate Developer Settings and expand the Allow service principals to use Power BI APIs section. Enable it from the radio button.
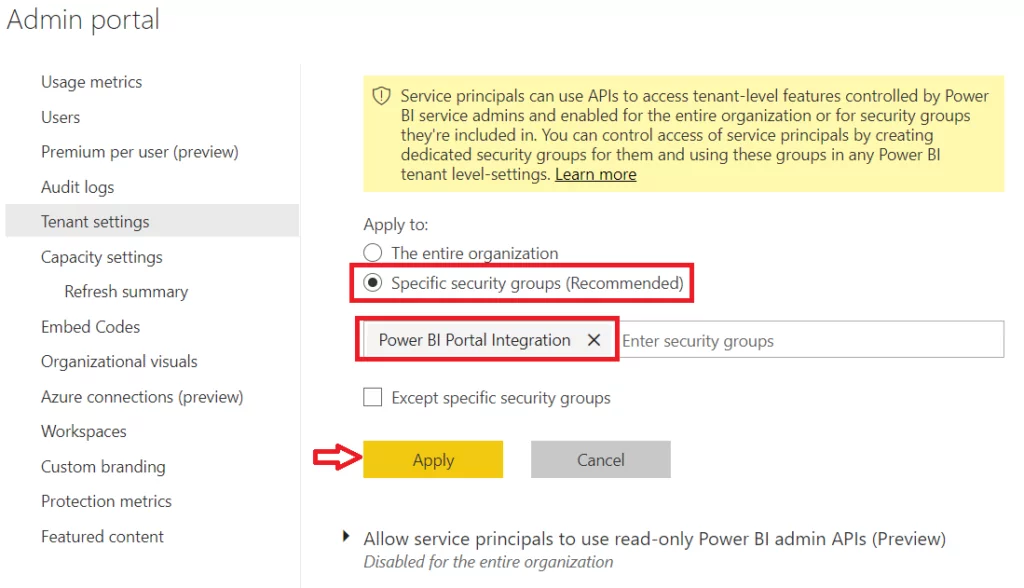
- Select Specific security groups (Recommended) from the Apply to option and search for your security group by name in the search box. Select the group and click Apply.
Learn more about AlphaBOLD’s BI Services
Create Power BI Workspace and Publish the Report
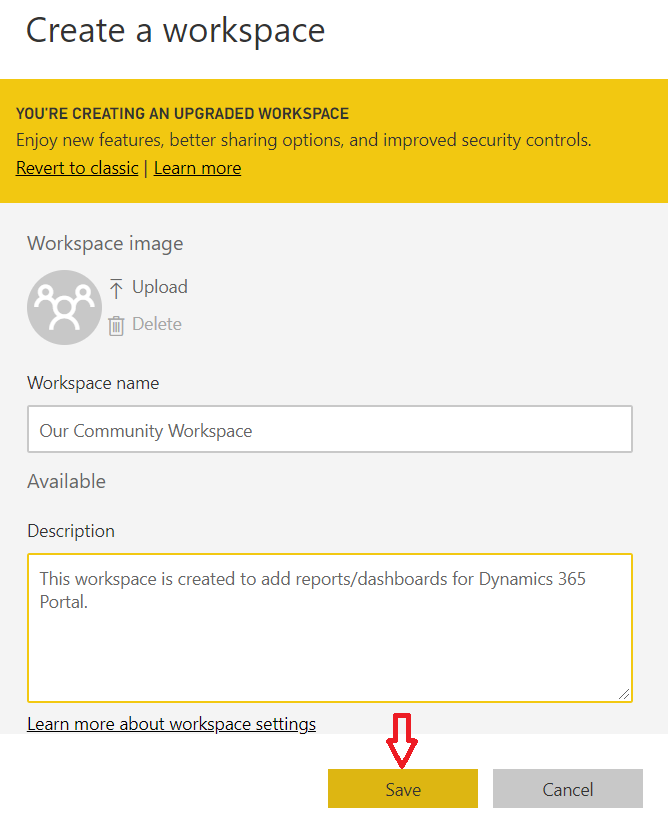
In this step, we will create a workspace in Power BI and publish a new or existing report/dashboard to this workspace.
- Go to the Power BI admin center using Global Admin user and create a new Workspace if it already exists.
- Now open the Power BI desktop application, create a new report/dashboard using your data, or open an existing report/dashboard you want to display on Portal. I have created a sample report like this.
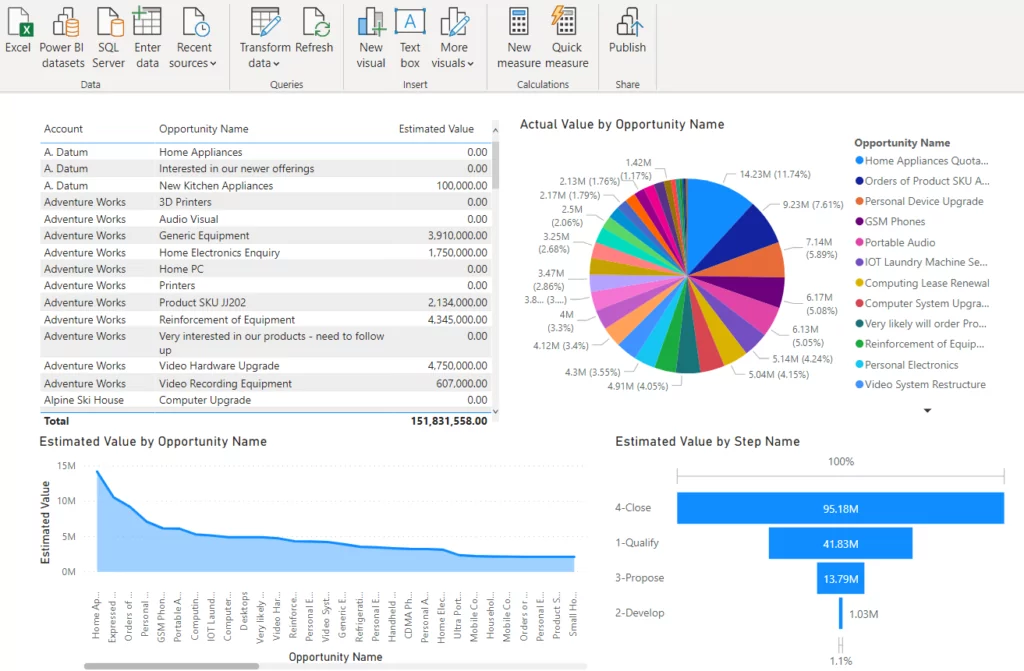
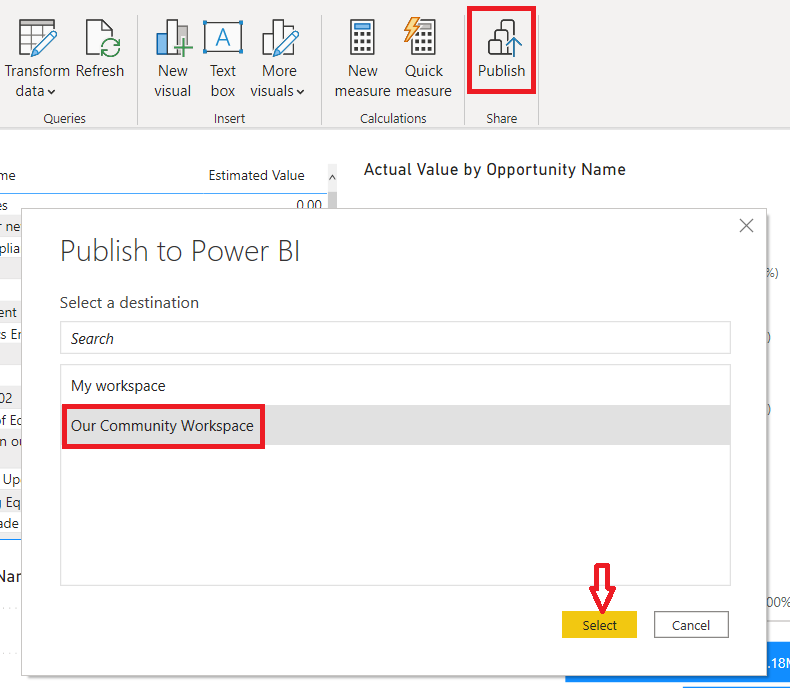
- Click the Publish command from the toolbar Share section. Select the workspace you created in step one or any of your choice and press Select. A success message is shown when the report is published on the workspace.
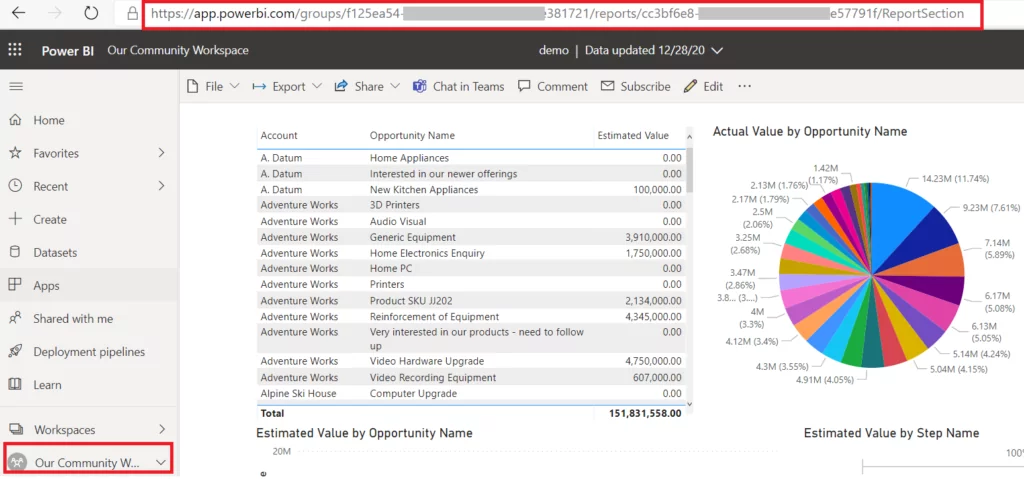
- Now go back to your Workspace on the Power BI admin center and open the report you just published from the list of available contents. When the report is opened, copy the report URL from the address bar.
Enable Power BI Embedded Service from Portal Admin
In this step, we will select the Power BI workspaces to surface reports or dashboards on the Portal’s web pages.
- Go back to the Power Apps portal admin center.
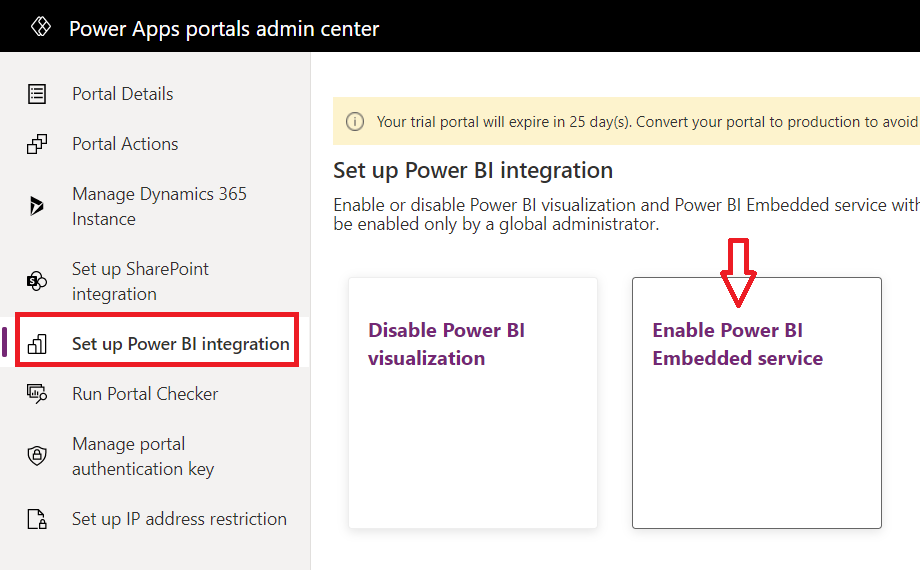
- Select Set up Power BI integration from the left pane and click Enable Power BI Embedded service.
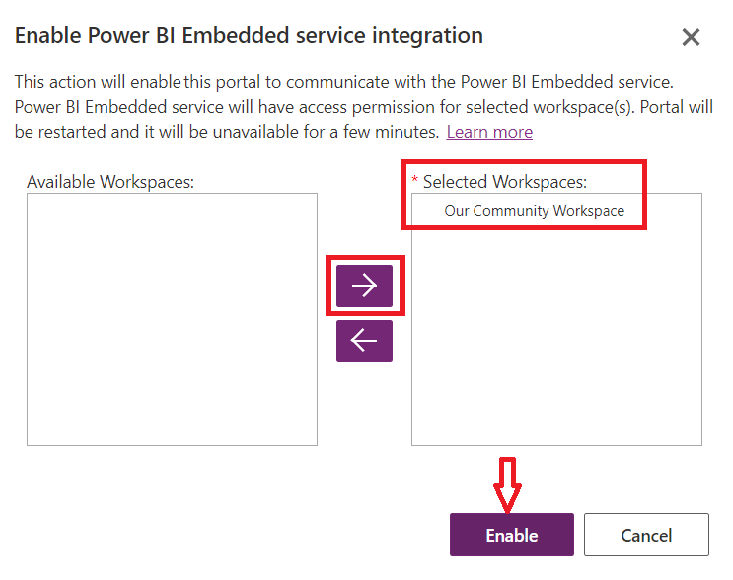
- Select the Power BI Workspaces you want to use from the opened window, move to the Selected Workspaces column using the arrow buttons, and click Enable. A confirmation message is shown once the embedded service is successfully enabled.
Read more: Integrating Power BI: A Guide to Merging with Your Current Infrastructure
Transform your Insights with Power BI!
Transform your approach to business intelligence with Power BI and AlphaBOLD. Learn how embedding Power BI dashboards can provide actionable insights and drive your business forward. Let's transform your data insights together.
Request a DemoEmbed Power BI Dashboard/Report to Portal Webpage
The last step is to embed the Power BI report/dashboard into Portal’s webpage using the Power BI liquid tag.
- Go to Power Apps, and from the Your Apps section on the Power Apps Home page, click Portal Management.

- Portal Management app is opened in a new tab. Select Web Pages under the Content section and add a new Web Page. Choose the template, URL, and parent page of your choice and click Save.
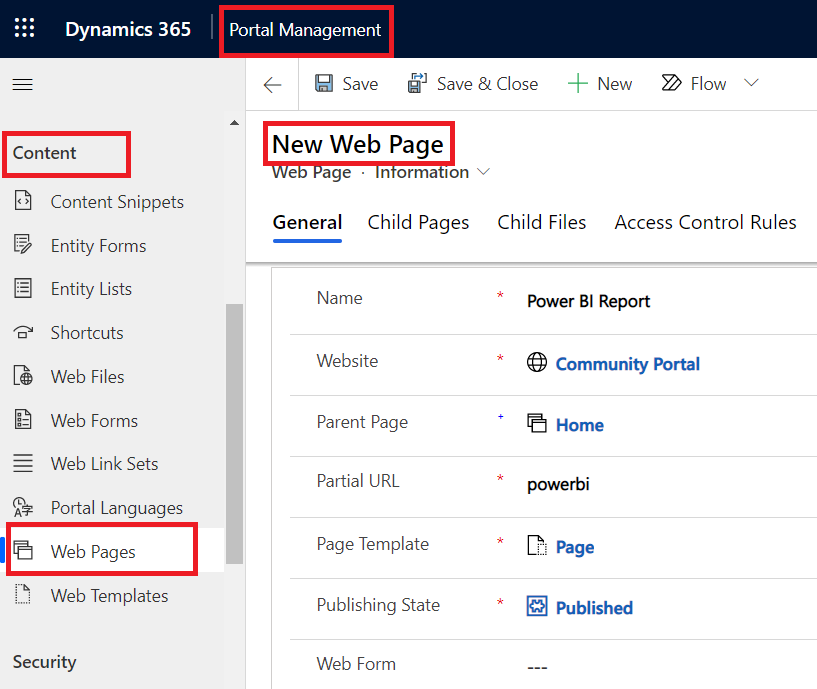
- Open the Content Page from the Localized Content subgrid and go to the Copy (HTML) section. Click on the HTML tab and add the power liquid tag as shown. Please use the authentication type parameter as power bi embedded for reports or dashboards in workspaces. Paste the report URL you noted earlier in the path parameter.
Power BI tag: {% powerbi authentication_type:”powerbiembedded” path:”Your report URL” %}

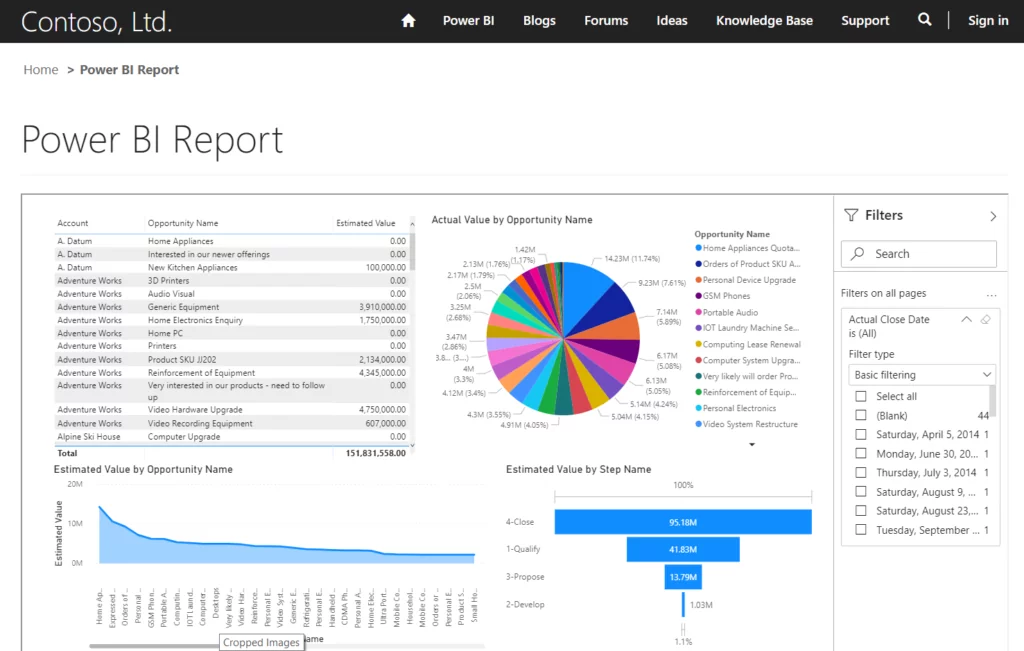
- Add this Web Page to the portal Web Link set if needed and browse to the Portal in the new tab. Go to the Power BI web page to see the Power BI report displayed there without needing any authentication or sign-in.
Read more: Power BI On-the-Go: A Review of the Mobile Experience
Conclusion
Explore Recent Blog Posts


