Introduction
This blog article will discuss how you can trigger power automate flow from the power apps portal without navigating entity forms in the portal. As we you may know, creating and updating data from an entity or web form can trigger flows because now portals can be provisioned on the Common Data Service Database. Today, I will show you how to update CDS data by triggering power automate flow from a portal web page without submitting or navigating away from the page.
I have created an editable grid on the Power Apps portal web page where users can update CDS data. They don’t need to open a web or entity form for each record to update them individually. I took a simple example here. I created a table (Entity) named CLASS in CDS and added a few columns to it.
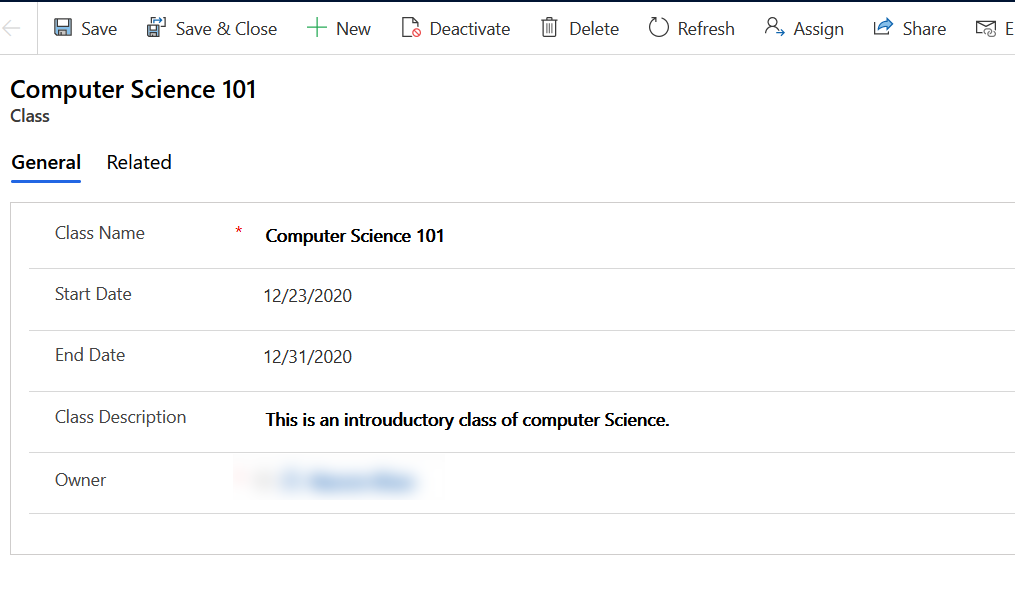
The first step is to retrieve the class records and place them on the Power Apps portal web page where portal users can update them. Keeping it simple, we will be updating class descriptions in series from a portal web page without needing to submit a form. It is simple but hopefully will help you understand the process.
I used Liquid FetchXML tags to retrieve records on the portal web page. You can use FetchXML builder to compose these statements.

Maximize Efficiency with Power Automate and Power Apps Expertise
Maximize your application's efficiency by integrating Power Automate flows with Power Apps Portals. Let AlphaBOLD's expertise in Microsoft Automate and Power Apps services drive your portal's success.
Request a DemoEditable Grid In Power Apps Portal Web Page
I created a custom web template to retrieve and display class records on the list on a web page. I used the accordion style to show the record’s name and hide the description grid on the web page, as it could be lengthy.
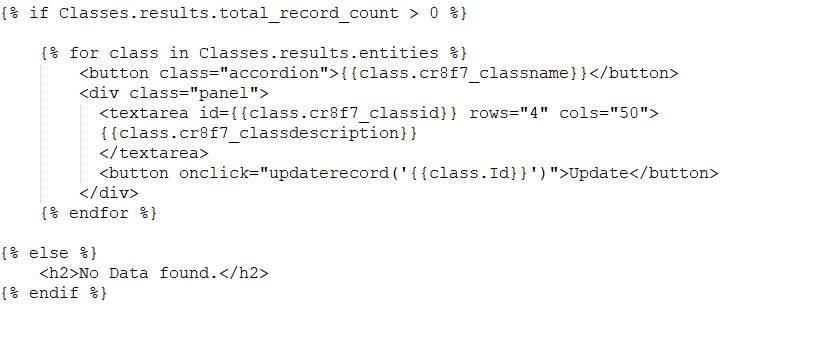
In this chunk of code, I set the class description value to HTML element textarea to be modified on the portal web page. I set the CDS record ID to the textarea tag id, assign each control a unique id, and set the accordion button name to class name. I added a button beside the editable grid to pass the GUID of the record to the JavaScript function.
Further Reading: Embedding Power BI Dashboard/Report In Power Apps Portal
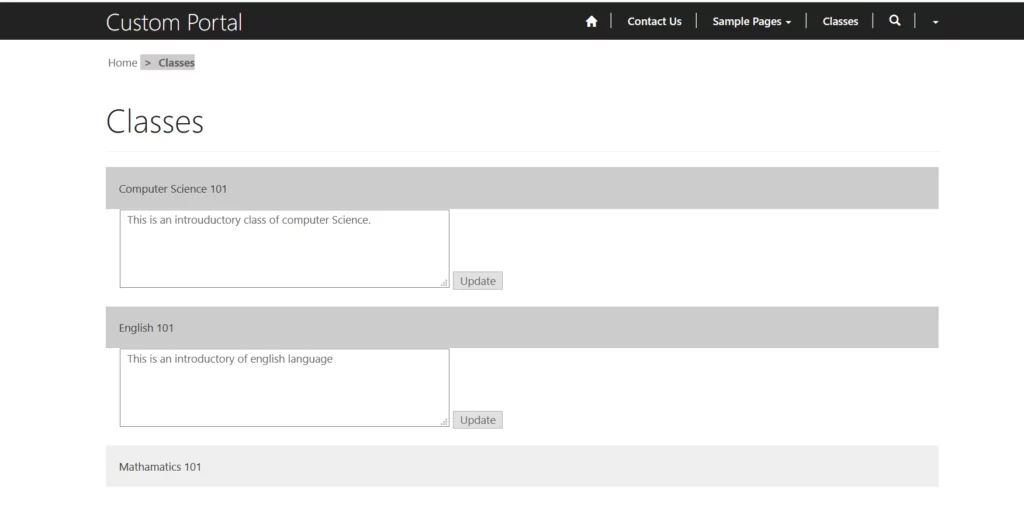
The result looks like the below image on the portal web page.
Create Automated Cloud Flow
The next step is to pass user edits to update the record in Common Data Service. So, we will use Power Automate Flow to update the corresponding record in CDS. We can call FLOW from the power app portal by using the HTTP Request trigger.
Further Reading: Power Automate Desktop: Streamline Your Workflow
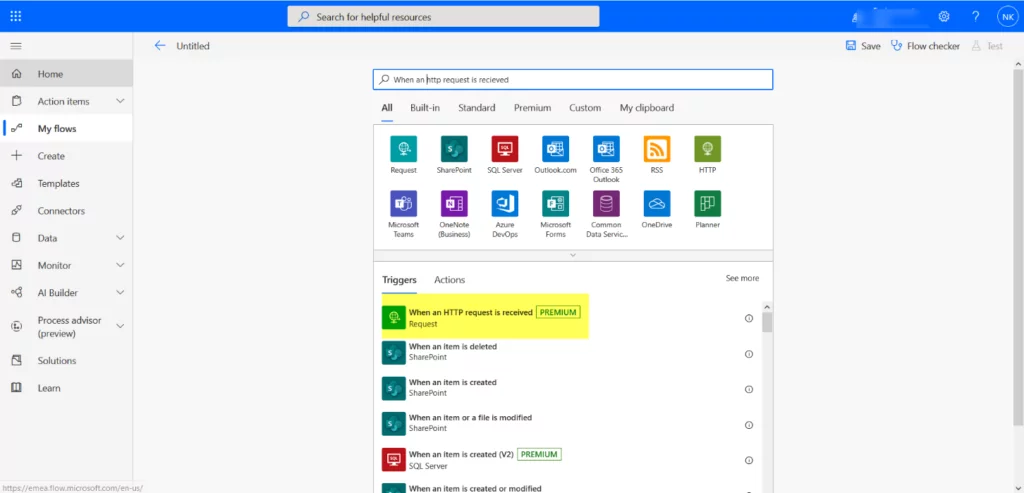
This HTTP request accepts data in a JSON string. So, we will pass the JSON string to configure it. We can define our sample JSON string in the custom web template.
I added a JavaScript function, “updateRecord,” to the custom web template, which will trigger when portal users click on the update button as we have set the GUID of the record to textarea tag ID and passed it to JS function. We will use this GUID in our sample JSON as defined below.

This sample string will produce an actual JSON string. You can use this sample JSON string into the HTTP request body and click the “Generate from Sample” button to get the actual JSON string.
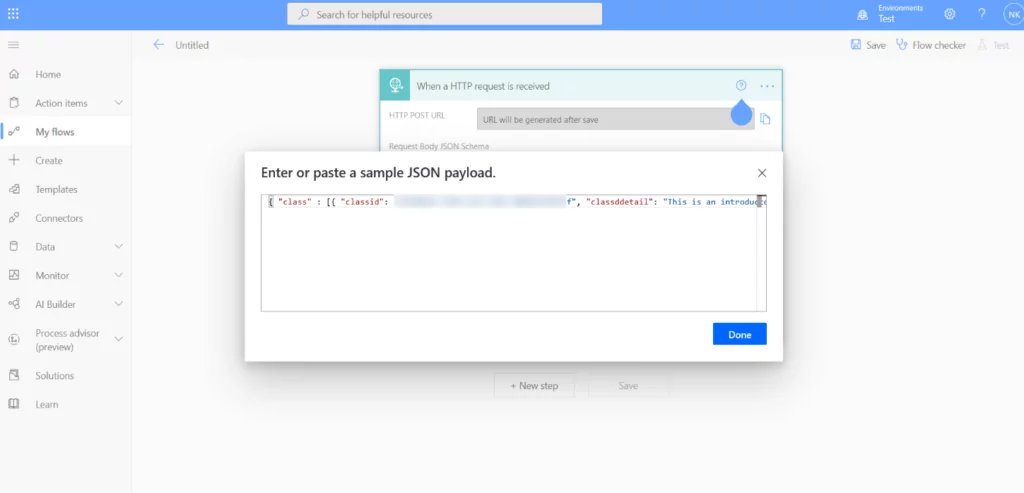
When you click the Done button, it will produce a JSON schema for you. Our next step is to update the CDS record using data collected from the HTTP request trigger. You can use the Common Data Service (CDS) current Update connector to update class records in CDS.
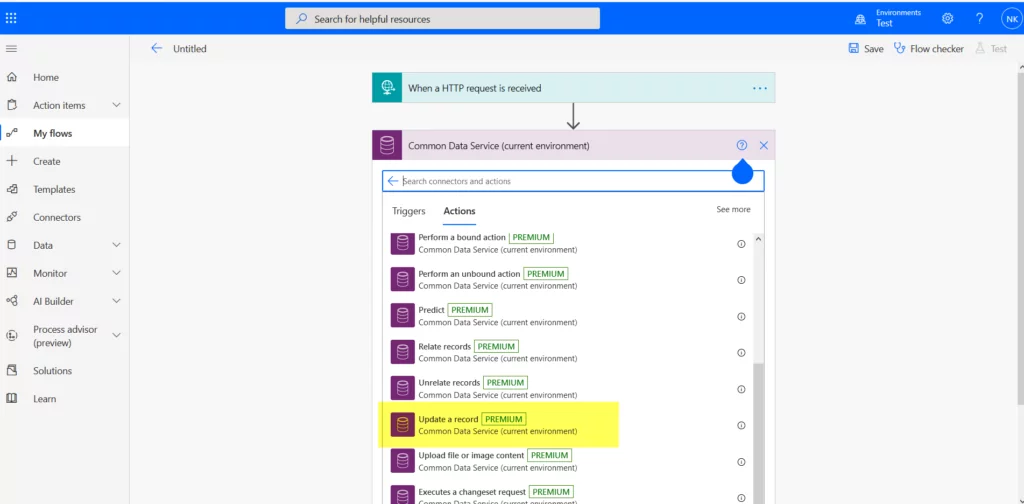
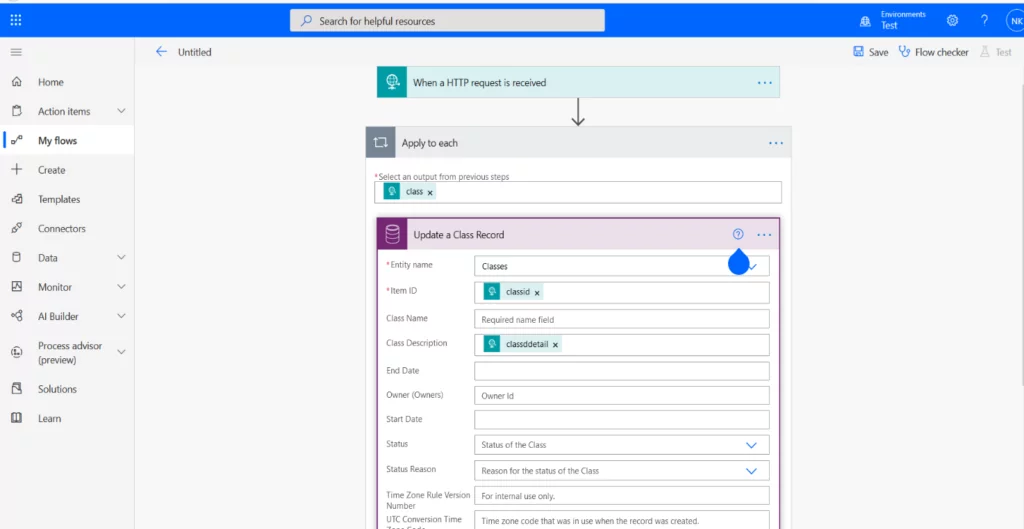
We can get “course Id” and “course description” from the HTTP request trigger and set it to update the connector to update class data in CDS.
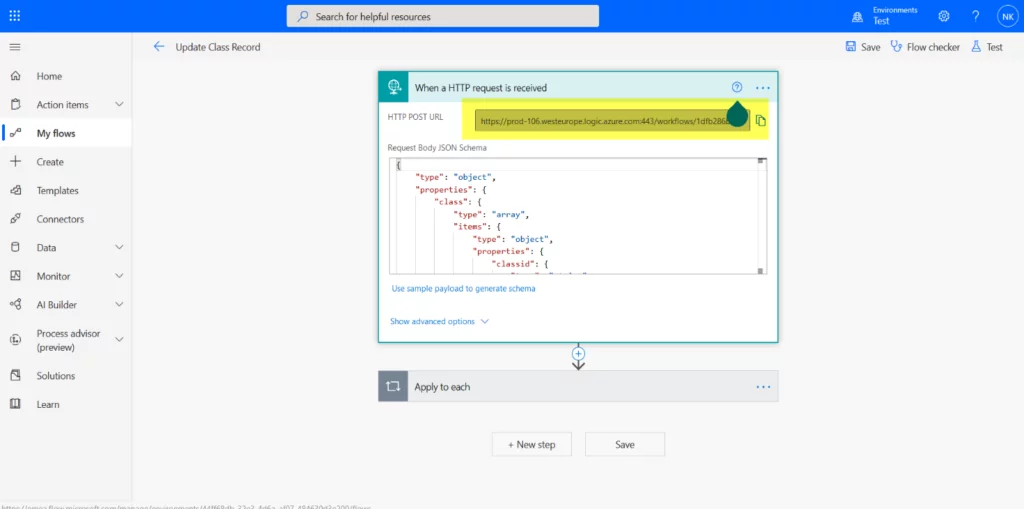
When you save the flow, it will generate an HTTP POST URL that can be used in the JS function to trigger the flow when an update occurs to record on the portal page.
You can test the power automate flow using POSTMAN to ensure that the JSON updates CDS records.
Our last step is to add an HTTP POST URL to the JavaScript function defined in the web template to trigger FLOW when the portal user clicks the update button on the web page.

You can navigate to a portal page displaying a list of records and update the class description grid of any record to test the function.
Further Reading: Embedding Power BI Dashboard/Report In Power Apps Portal
Unlock the Power of Automation in Your Power Apps Portals
Elevate your Power Apps portals with seamless Power Automate integrations. AlphaBOLD's expertise in Microsoft Automate Services will transform your workflows and data processes.
Request a DemoConclusion
This blog covers how the power automate flow can be used in the power apps portal. You can trigger flows to perform tasks beyond creating and updating the data. Power automate flows can trigger a classic workflow in the power apps portal. You can create a custom web template or use existing templates to code JS functions with liquid. If you have any questions, please contact us via the Contact Us page!
Explore Recent Blog Posts


